Configuring SSO When the Identity Provider Is Already Configured for Anypoint Platform
This use case includes instructions for configuring SSO for the portal using an identity provider already configured for Anypoint Platform. This use case also provides instructions for reconciling the username assignment strategy when the usernames for the portal and Anypoint Platform don’t match.
The instructions in this case are using Okta as an example identity provider however, you can use any identity provider to set up SSO.
Before You Begin
Ensure you have the following setup and context:
-
An identity provider for Anypoint Platform is already configured.
-
The user or the identity of the group of the users who have access to the application have been created in the identity provider.
-
Understand the required roles, permissions, and information that API Experience Hub requires to configure custom user attributes and claims for the identity provider.
See Before You Begin.
Step 1: Enable SSO for Your Portal
In this step, you create and configure an application in the identity provider for the API Experience Hub portal, enable the ability to send group information in the application configuration, configure groups, and map the application to the identity provider for Anypoint Platform. Performing these steps require you to move back and forth between applications and the identity provider application to copy or add information.
Create and Set Up an Application
Create a new application for the API Experience Hub portal in the identity provider.
-
In Okta, create an OpenID Connect Web application. For more information, see Create OIDC app integrations.
-
From the General Settings section, complete the following fields:
Field Value App integration name
Enter a name for the app.
Grant type
Select Authorization Code.
Assignments
Select Limit access to selected groups.
Selected group(s)
Enter the name of the group who must have access to the application for API Experience Hub and Anypoint Platform.
-
Verify that your identity provider sends the expected claims listed in the Before You Begin section.
-
Configure the claims that the application sends.
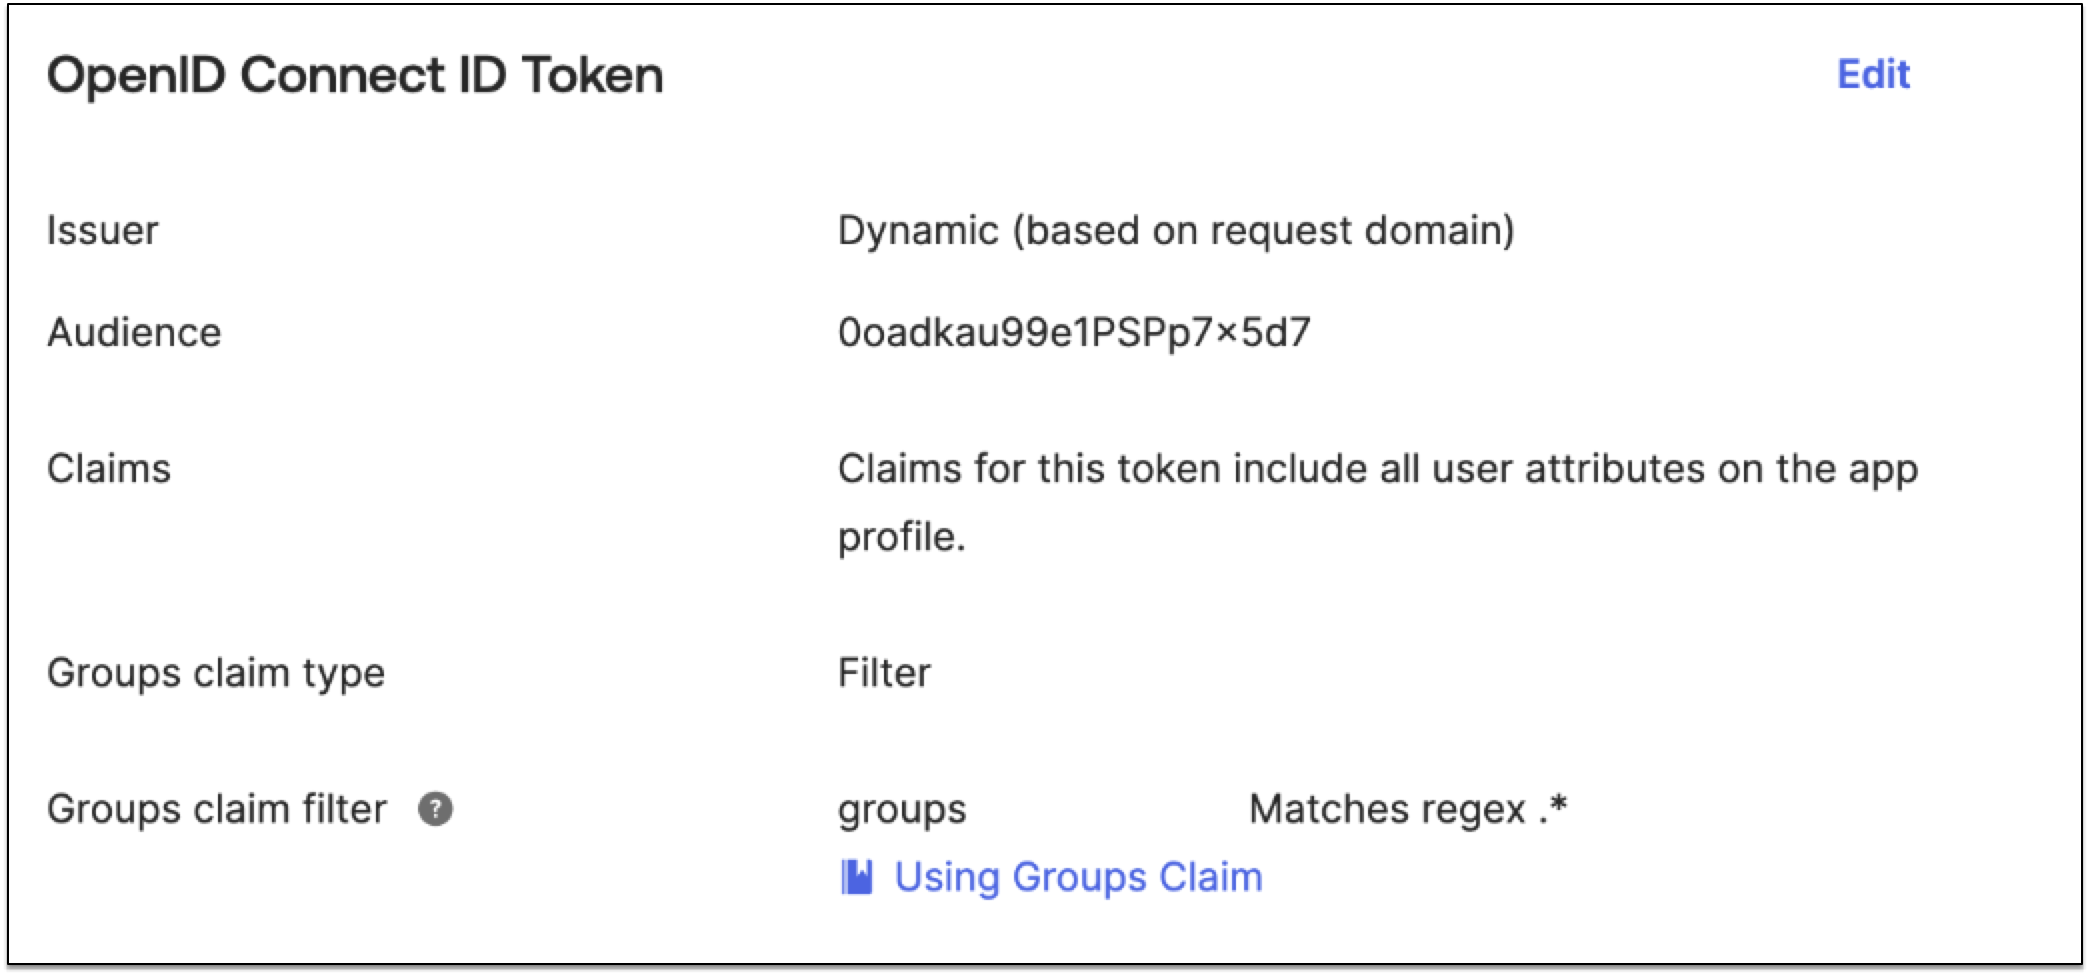
For example, for OpenID Connect, configure the groups claim using the following steps:
-
In the Sign On tab, OpenID Connect ID Token section, click Edit.
-
From Groups claim type, select Filter.
-
From Groups claim filter, enter
groups. -
Select Matches regex for the expression then enter .* for wildcard.
-
Configure an Authentication Provider for Salesforce Using OpenID Connect
You set up the auth provider or SSO settings in Salesforce with the identity provider application information.
-
From the OpenID Connect application, get these configuration values:
-
Client ID
-
Client Secret
-
Authorize Endpoint URL
-
Token Endpoint URL
-
User Info Endpoint URL
-
-
In Salesforce, go to Setup.
-
In the Quick Find box, enter
Auth, and select Auth Providers. -
Click New.
-
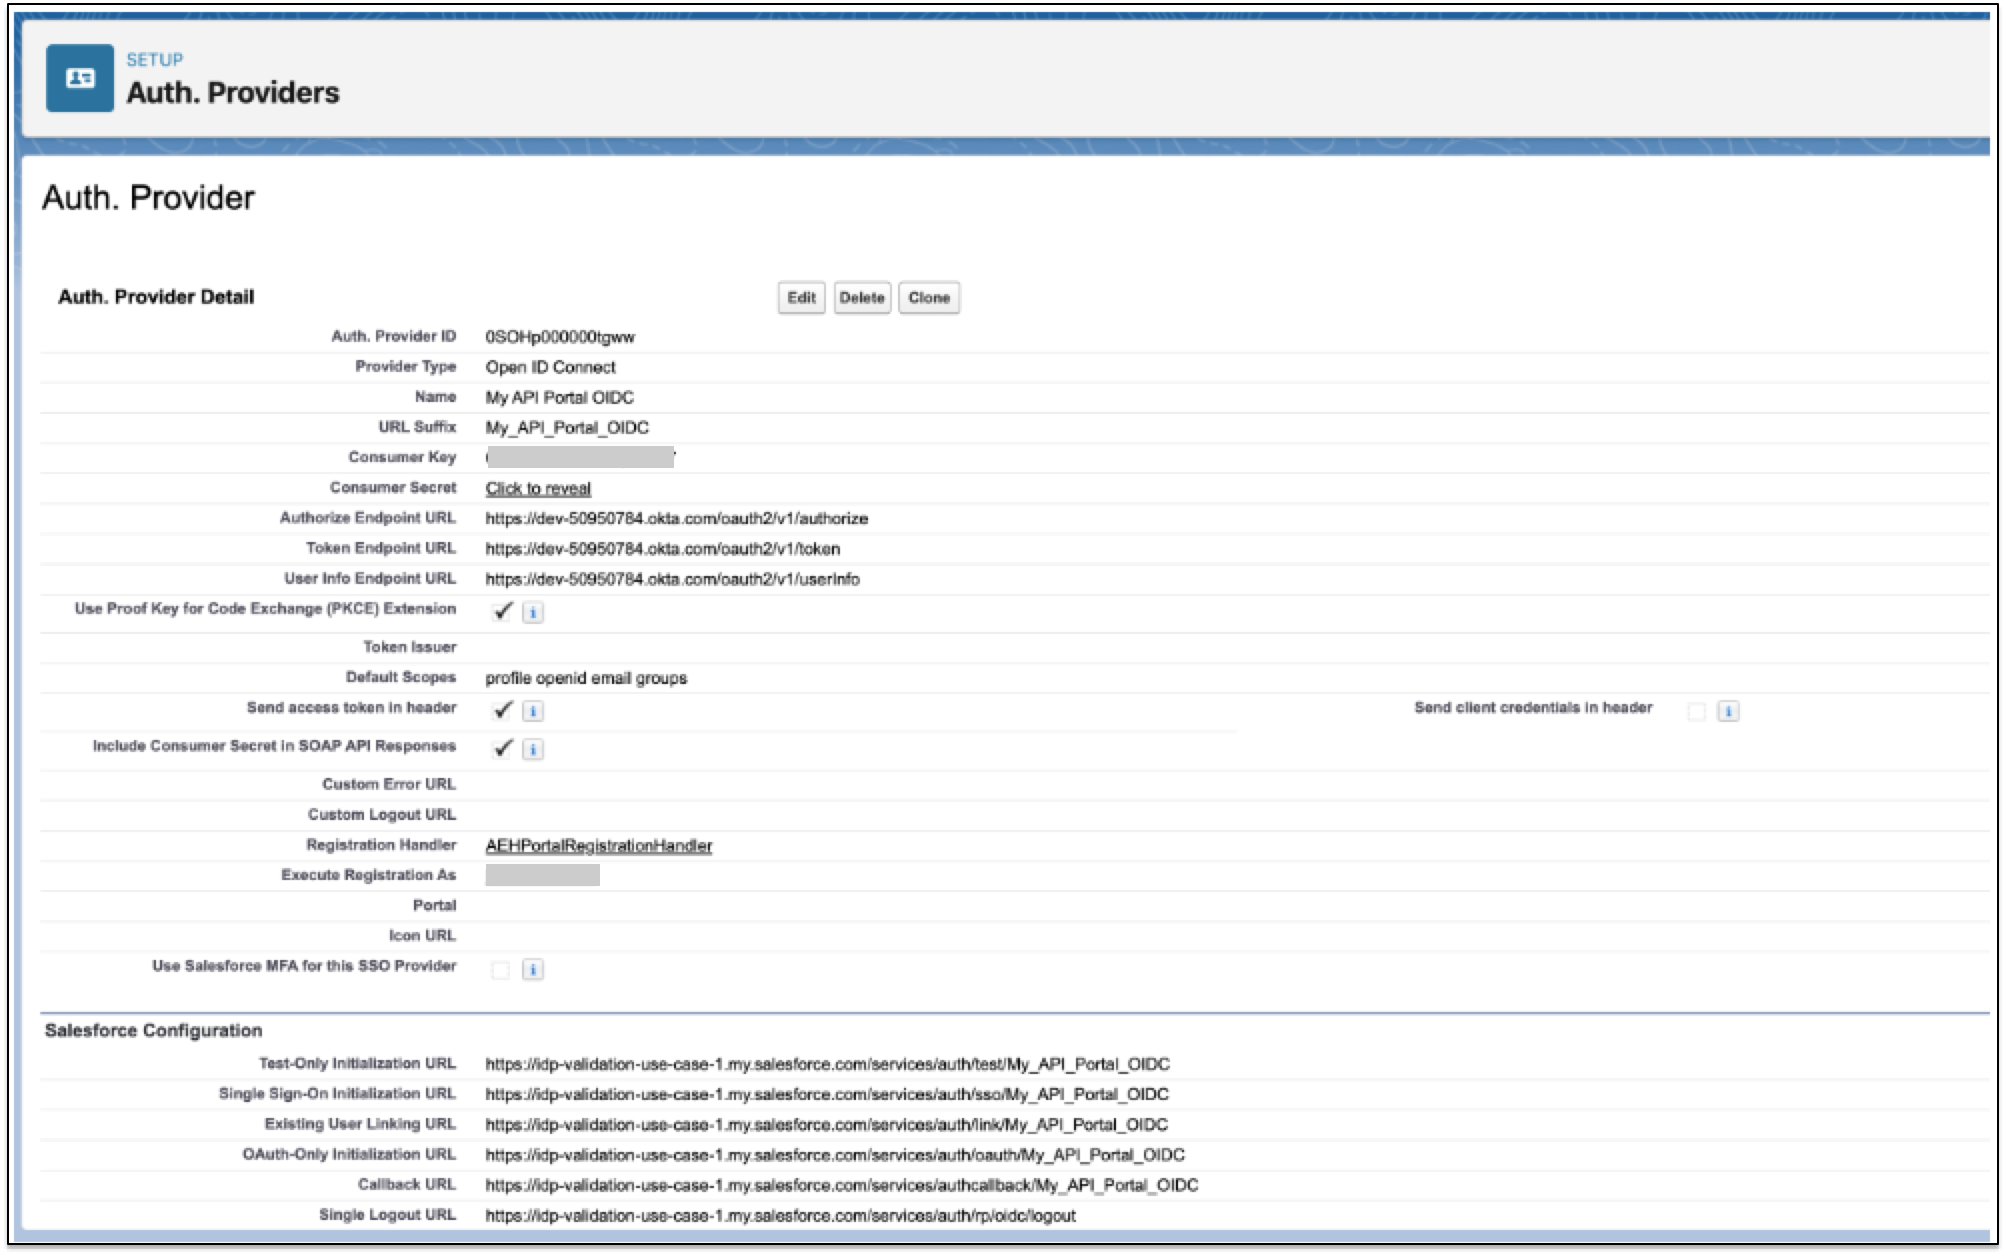
In the Provider Type field, select OpenID Connect.
-
Complete the following fields:
Field Value Provider Type
OpenID Connect
Name
Enter a name for the provider.
Consumer Key
Enter the client ID from the identity provider.
Consumer Secret
Enter the client secret from the identity provider.
Authorize Endpoint URL
Enter
https://{domainofOktaorg}.okta.com/oauth2/v1/authorize*.Token Endpoint URL
User Info Endpoint URL
Enter
https://{domainofOktaorg}.okta.com/oauth2/v1/userinfo`.Default Scopes
profile openid email groups
Registration handler
AEHPortalRegistrationHandler
Execute Registration As
Select an administrator user.
-
Click Save.
Configure the Redirect URIs for the Portal
To configure the redirects, use your 15 digit organization ID and 18 digits org ID and add a URL for each organization ID.
-
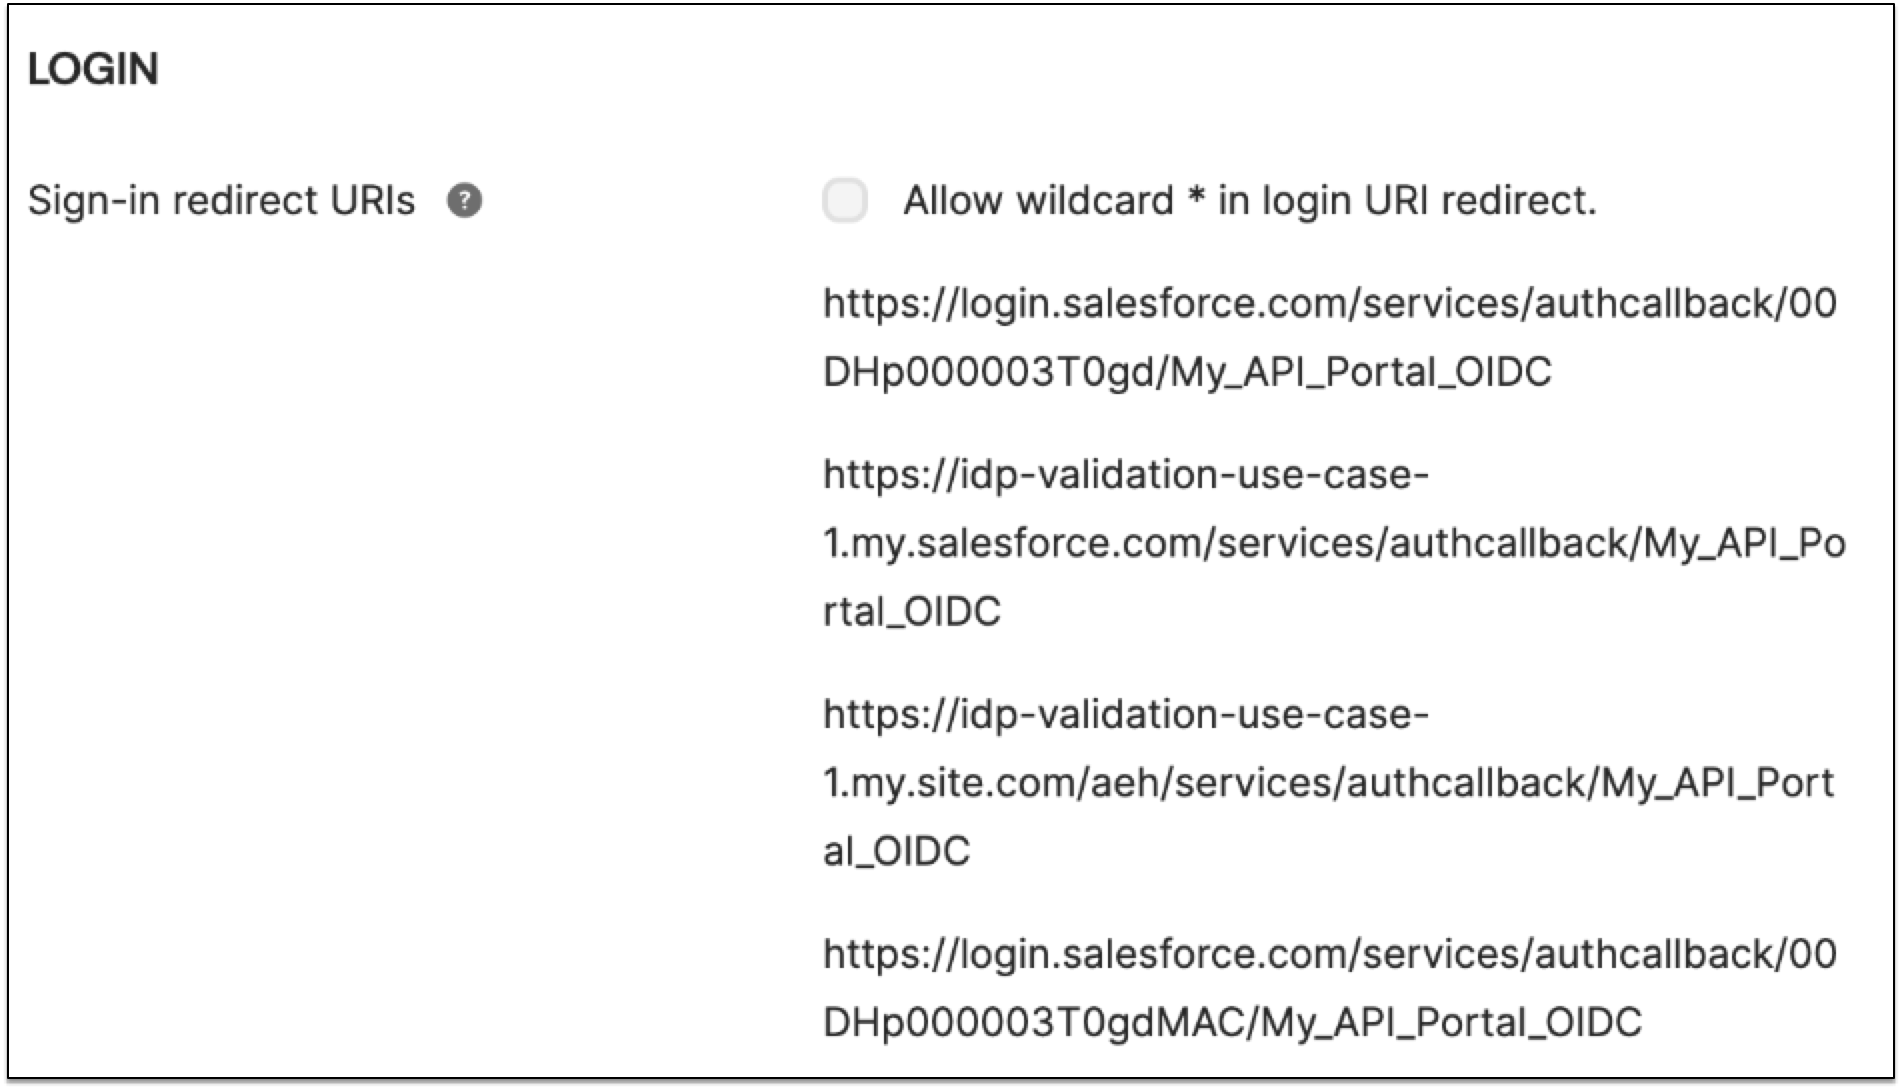
In the Okta application, select the General tab.
-
Add the following URLs for Sign-in redirect URIs:
-
https://${domain}.my.site.com/aeh/services/authcallback/${authProviderURLSuffix}
To get the URLs:
-
For salesforceOrganizationId, go to Setup > Company Information.
-
For authProviderURLSuffix, go to Setup > Auth Providers, click your auth provider, and select URL Suffix.
-
For domain, go to Setup > My Domain > Current My Domain URL.
Map the Application to the Identity Provider for Anypoint Platform
You must map the identity provider ID with the anypoint_idp_id by adding and configuring a new custom attribute called anypoint_idp_id.
In the case that usernames for the portal and Anypoint Platform don’t match, add another custom attribute called anypoint_username to force an update for existing identity provider users to match the identity in the portal to the users in Anypoint Platform.
To map anypoint_idp_id to with the Anypoint Platform identity provider ID:
-
In the Okta application, go to Directory > Profile Editor.
-
Select the portal application that you just configured.
-
Click Add Attributes to create a new attribute called anypoint_idp_id.
-
Complete the following fields:
Field Value Display name
anypoint_idp_id
Value name
anypoint_idp_id
-
Save your changes.
-
Go to Access Management > Identity Providers and click the identity provider.
-
From the browser URL, copy the 32 digit ID.

-
Go to Okta > Directory > Profile Editor and click Mappings
-
Paste the ID into the empty field for the new anypoint_idp_id attribute. The ID must be in quotes.
-
From the yellow arrow drop-down menu, select Apply mapping on user create and update.

-
Click Save Mappings.
-
Apply the mappings to all users in the profile.
If the user already exists and logs in to the portal before the anypoint_idp_id is set, the default identity provider AEH Users - ${salesforceOrganizationId} is used. To prevent the user from being duplicated, the user isn’t added to the new identity provider specified in the anypoint_idp_id field.
If the user already exists in Salesforce and uses SSO to log in to the portal, the API Experience Hub Member User permission set is assigned to that user (if no permission set is already assigned).
To reconcile the usernames assignment for a single identity in the portal and Anypoint Platform:
-
In the Okta application, go to Directory > Profile Editor.
-
Select the portal application that you just configured.
-
Click Add Attributes to create a new attribute called anypoint_username.
-
Complete the following fields:
Field Value Display name
anypoint_username
Value name
anypoint_username
-
Save your changes.
-
Click Mappings.
-
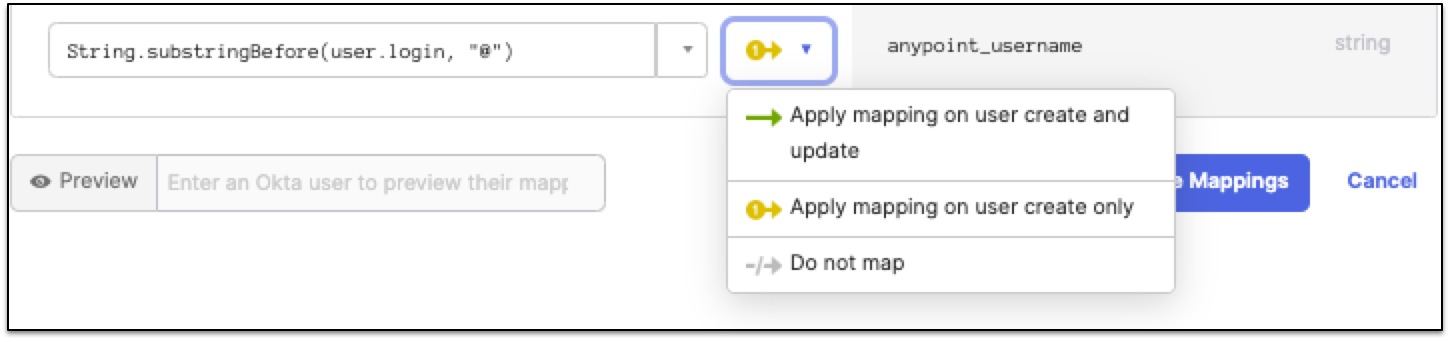
In the empty field of the new anypoint_username attribute, enter
String.substringBefore(user.login, "@"). Since Okta usernames are email-based, this expression removes the email domain. -
From the yellow arrow drop-down menu, select Apply mapping on user create and update.
-
Click Save Mappings.
Step 2: Add Salesforce Identity Providers
Enable the Salesforce identity provider from the API Experience Hub UI. When the identity provider is enabled, users can log in to the portal using this identity provider.
-
Go to API Experience Hub > User management.
-
From the User management page, select the Login settings tab.
-
From the Single sign-on (SSO) section, scroll down to Add Salesforce identity providers section.
-
Move the slider to Enabled for the Salesforce identity provider you configured in Okta.
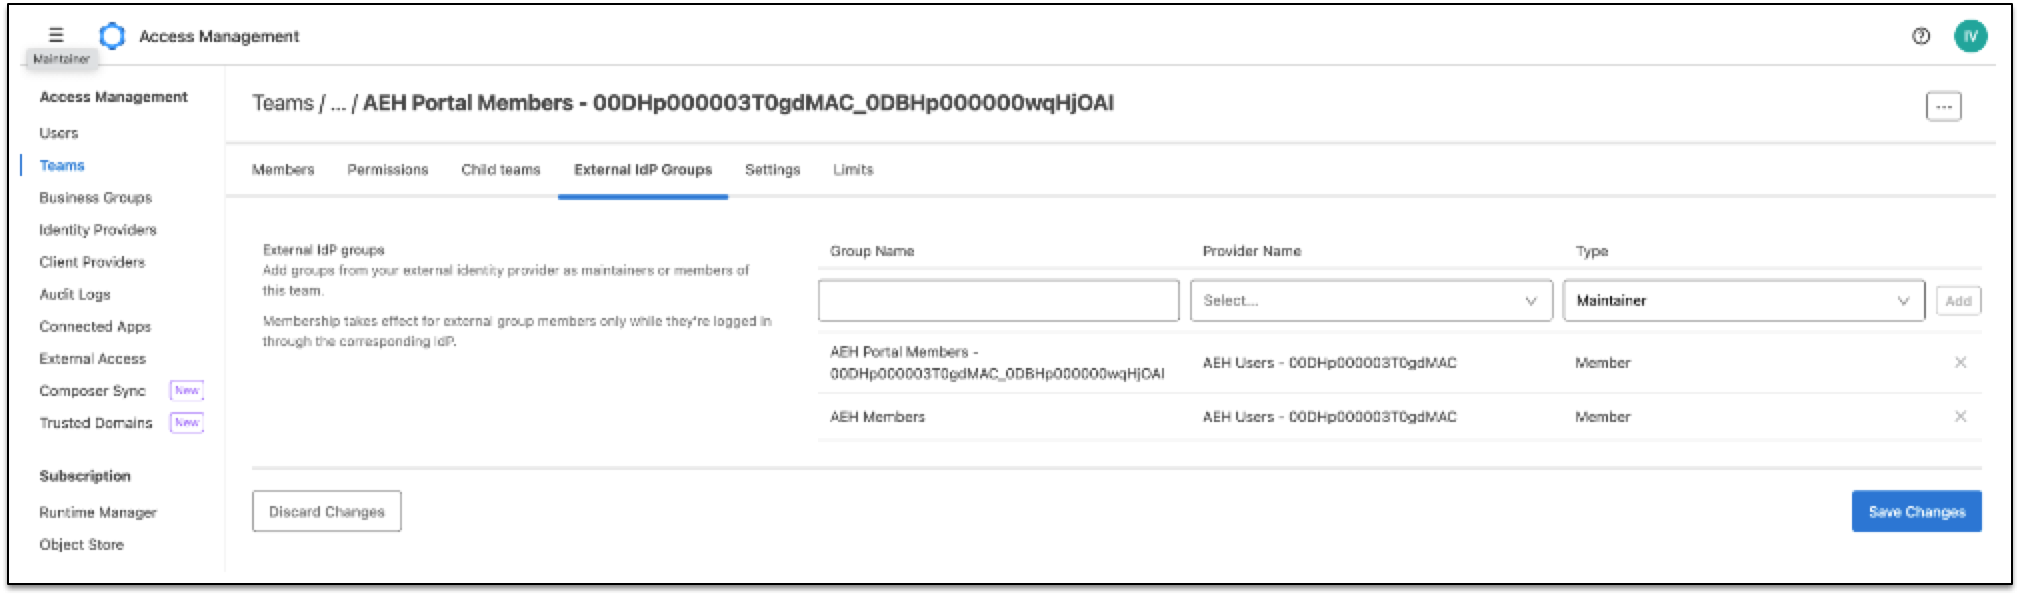
Step 3: Add Group Mappings
When setting up SSO for the portal, your users must have an identity in both Salesforce and Anypoint Platform. SSO users are mapped to teams using their group names. You must map your users to teams using Access Management. API Experience Hub provides an out-of-the-box team called AEH Portal - ${salesforceOrganizationId}_${salesforceCommunityId} that is added automatically as a team in Access Management.
Add group mappings by adding the user to the corresponding profile in API Experience Hub:
-
Go to Access Management > Teams.
-
Select AEH Portal Guests > AEH Portal Members.
-
Select External IdP Groups.
-
From the Group Name field, enter AEH Members.
-
From the Provider Name field, select the name of the corresponding Salesforce identity provider.
-
From the Type field, select Member and click Add.
-
Click Save Changes.
The SSO users associated with the group you designated are assigned to the team.
Step 4: Test the SSO Configuration
Verify that the SSO for the portal is configured properly.
-
In a browser, open an incognito window.
-
Go to your API Experience Hub portal.
-
Select the SSO option that you configured.
-
Log in with a user that belongs to the group you configured in the identity provider for your portal.
-
Check the visibility of APIs for the user in the portal.
-
Go to Access Management > Users.
-
Search using the username to confirm that the user is mapped to the expected identity provider.
-
Go to the team with the configured group mappings.
From the Members tab, Ensure that you can see your user.