
Custom Application Alerts and Notifications
CloudHub enables you to display notifications from your app in the Runtime Manager console. You can configure CloudHub to email these notifications as custom alerts to specific people so that they can fix the underlying problems.
| Custom alerts and notifications are available only for apps deployed to CloudHub workers. They are not available for apps deployed to on-premises servers. See Deployment Options for more information about CloudHub features. |
Prerequisites
-
Deploy your application to CloudHub.
-
For Anypoint Studio 6.x and earlier, enable Maven support for your Mule project.
All projects in Studio 7.x and later support Maven by default.
Custom Application Alerts
Alerts enable you to send emails based on your application’s notifications. You can create standard alerts in Runtime Manager for servers and applications deployed to either CloudHub or on-premises servers. See Alerts.
You can also create custom alerts for applications deployed to CloudHub.
To create custom application alerts:
-
Add Anypoint Connector for CloudHub (CloudHub Connector) to flows in your Mule app in Anypoint Studio and configure the notification.
CloudHub Connector is available for Mule 4 applications.
-
Deploy the app to CloudHub.
-
Configure the custom application alerts in Runtime Manager.
Configure the Notification in CloudHub Connector
In Studio, add and configure CloudHub Connector in your Mule project:
-
In the Mule Palette view, click CloudHub and then drag the Create Notification operation to the application flow for which you want to trigger an alert in the canvas.
-
In the canvas, click Create Notification.
-
In the Create Notification properties window, click the green plus icon (+) to the right of the Connector configuration field.
-
In the Global Element Properties window, configure authentication to Anypoint Platform and click OK:
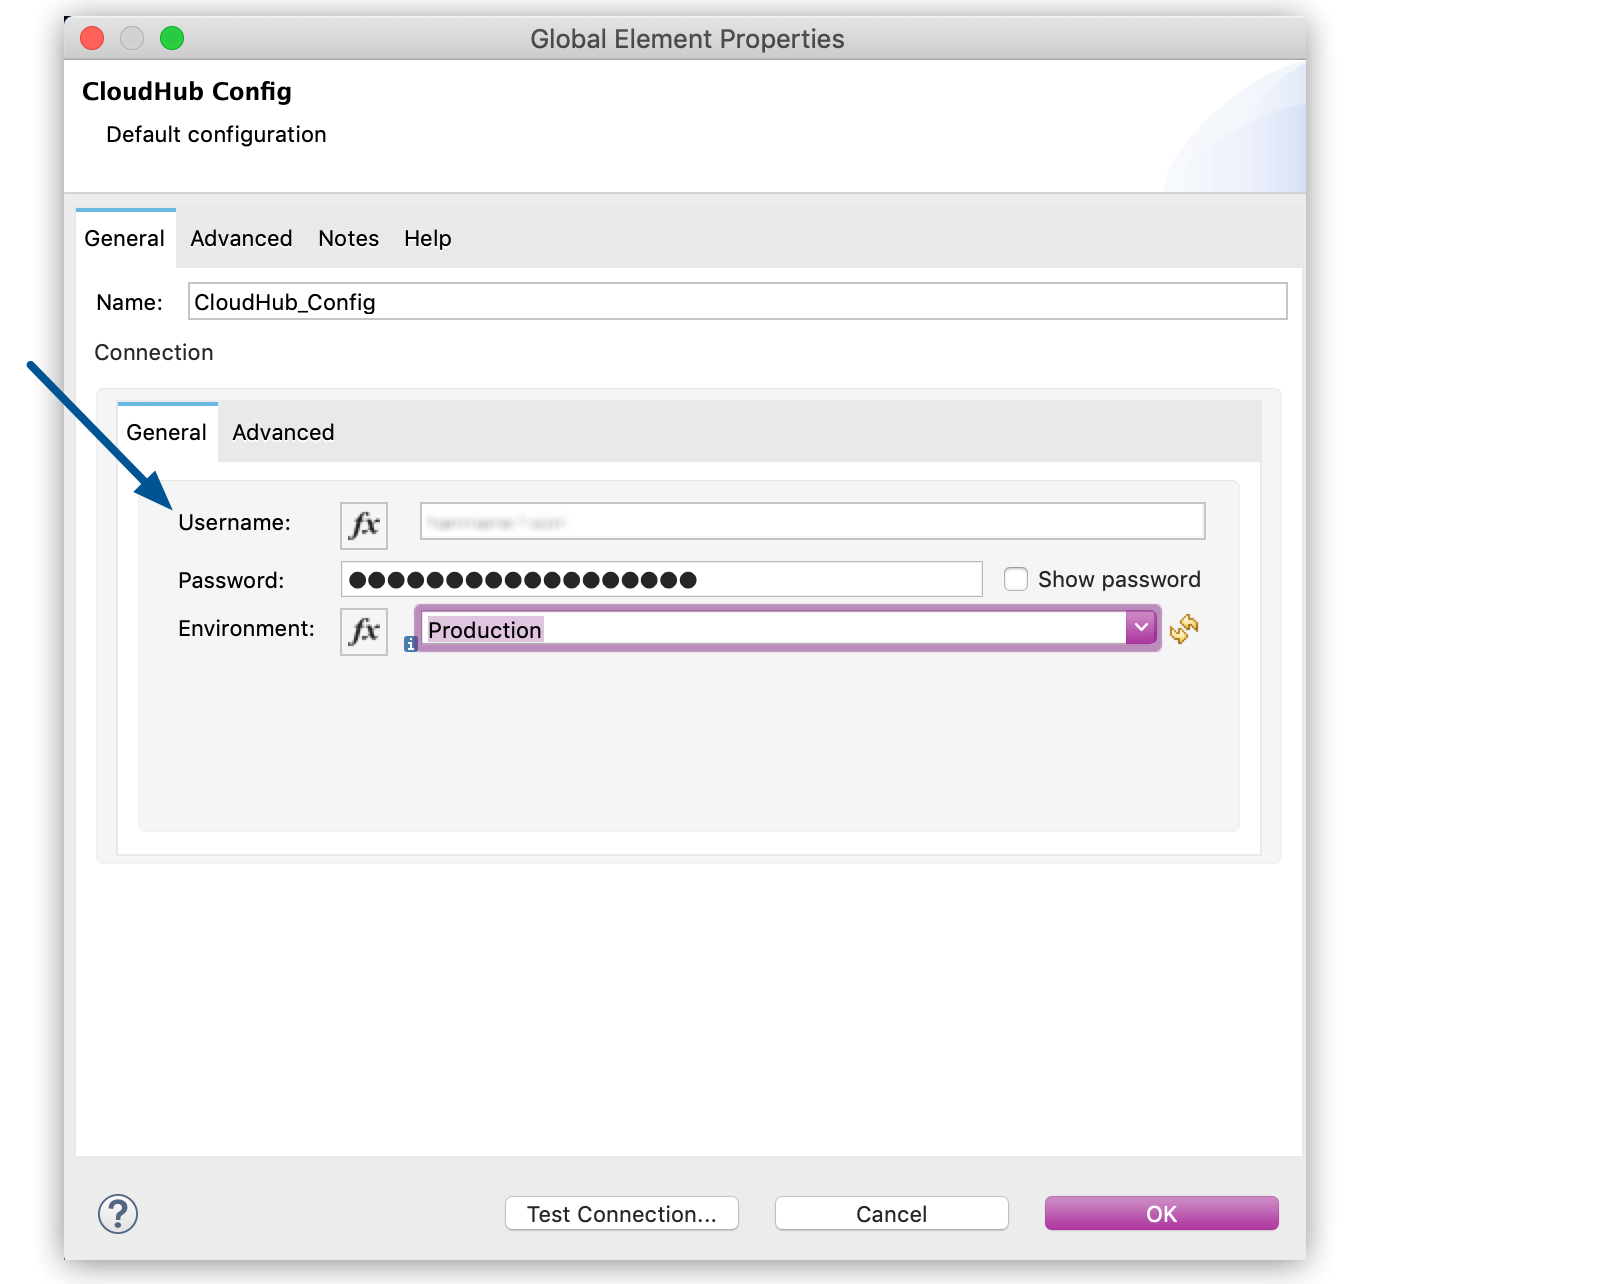 Figure 1. The arrow shows the Username field in the Global Element Properties window.
The connector can use basic authentication or inherited token authentication.
-
In the Create Notification properties window, enter the CloudHub app name in the Domain field and the notification in the Message field:
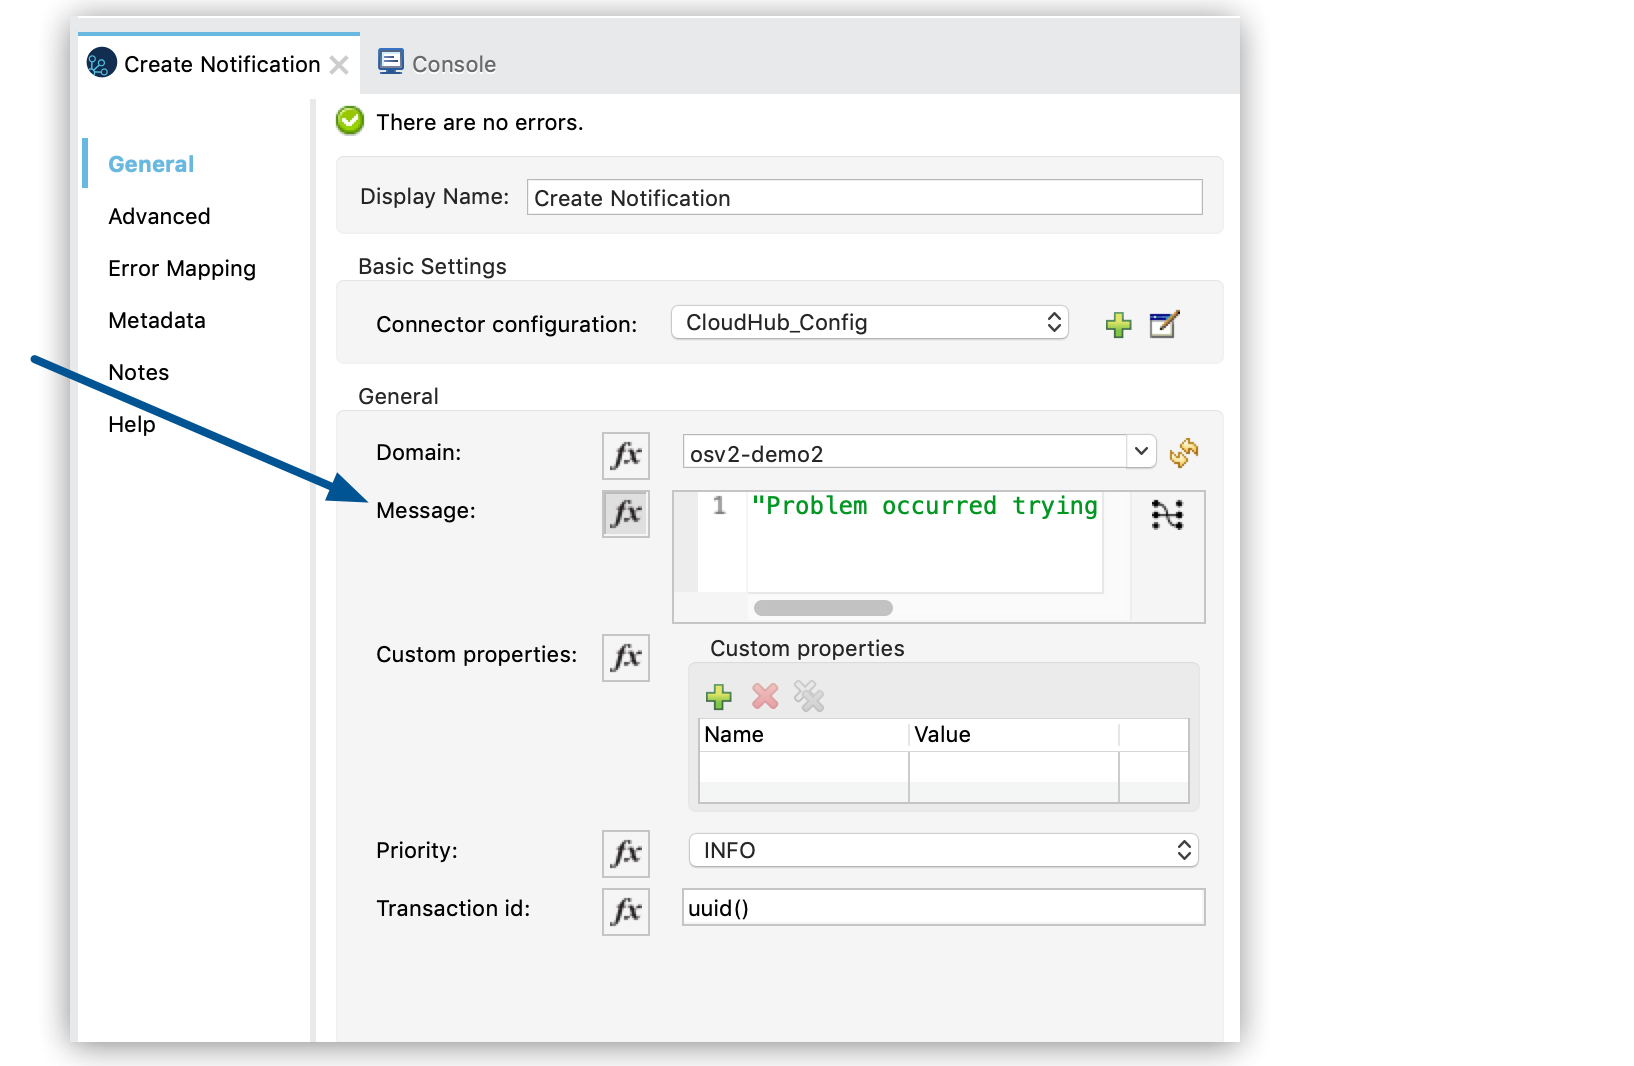 Figure 2. The arrow shows the Message field in the Create Notification properties window.
For more information about creating a notification with CloudHub Connector, see Creating a Notification.
-
Deploy the app to CloudHub.
Create a Custom Alert
In Runtime Manager, bind the custom notification to an alert:
-
Click Alerts in the menu on the left.
-
Click the blue plus icon (+) to create a new alert.
-
In the Create an Alert page, configure your custom alert and click Submit:
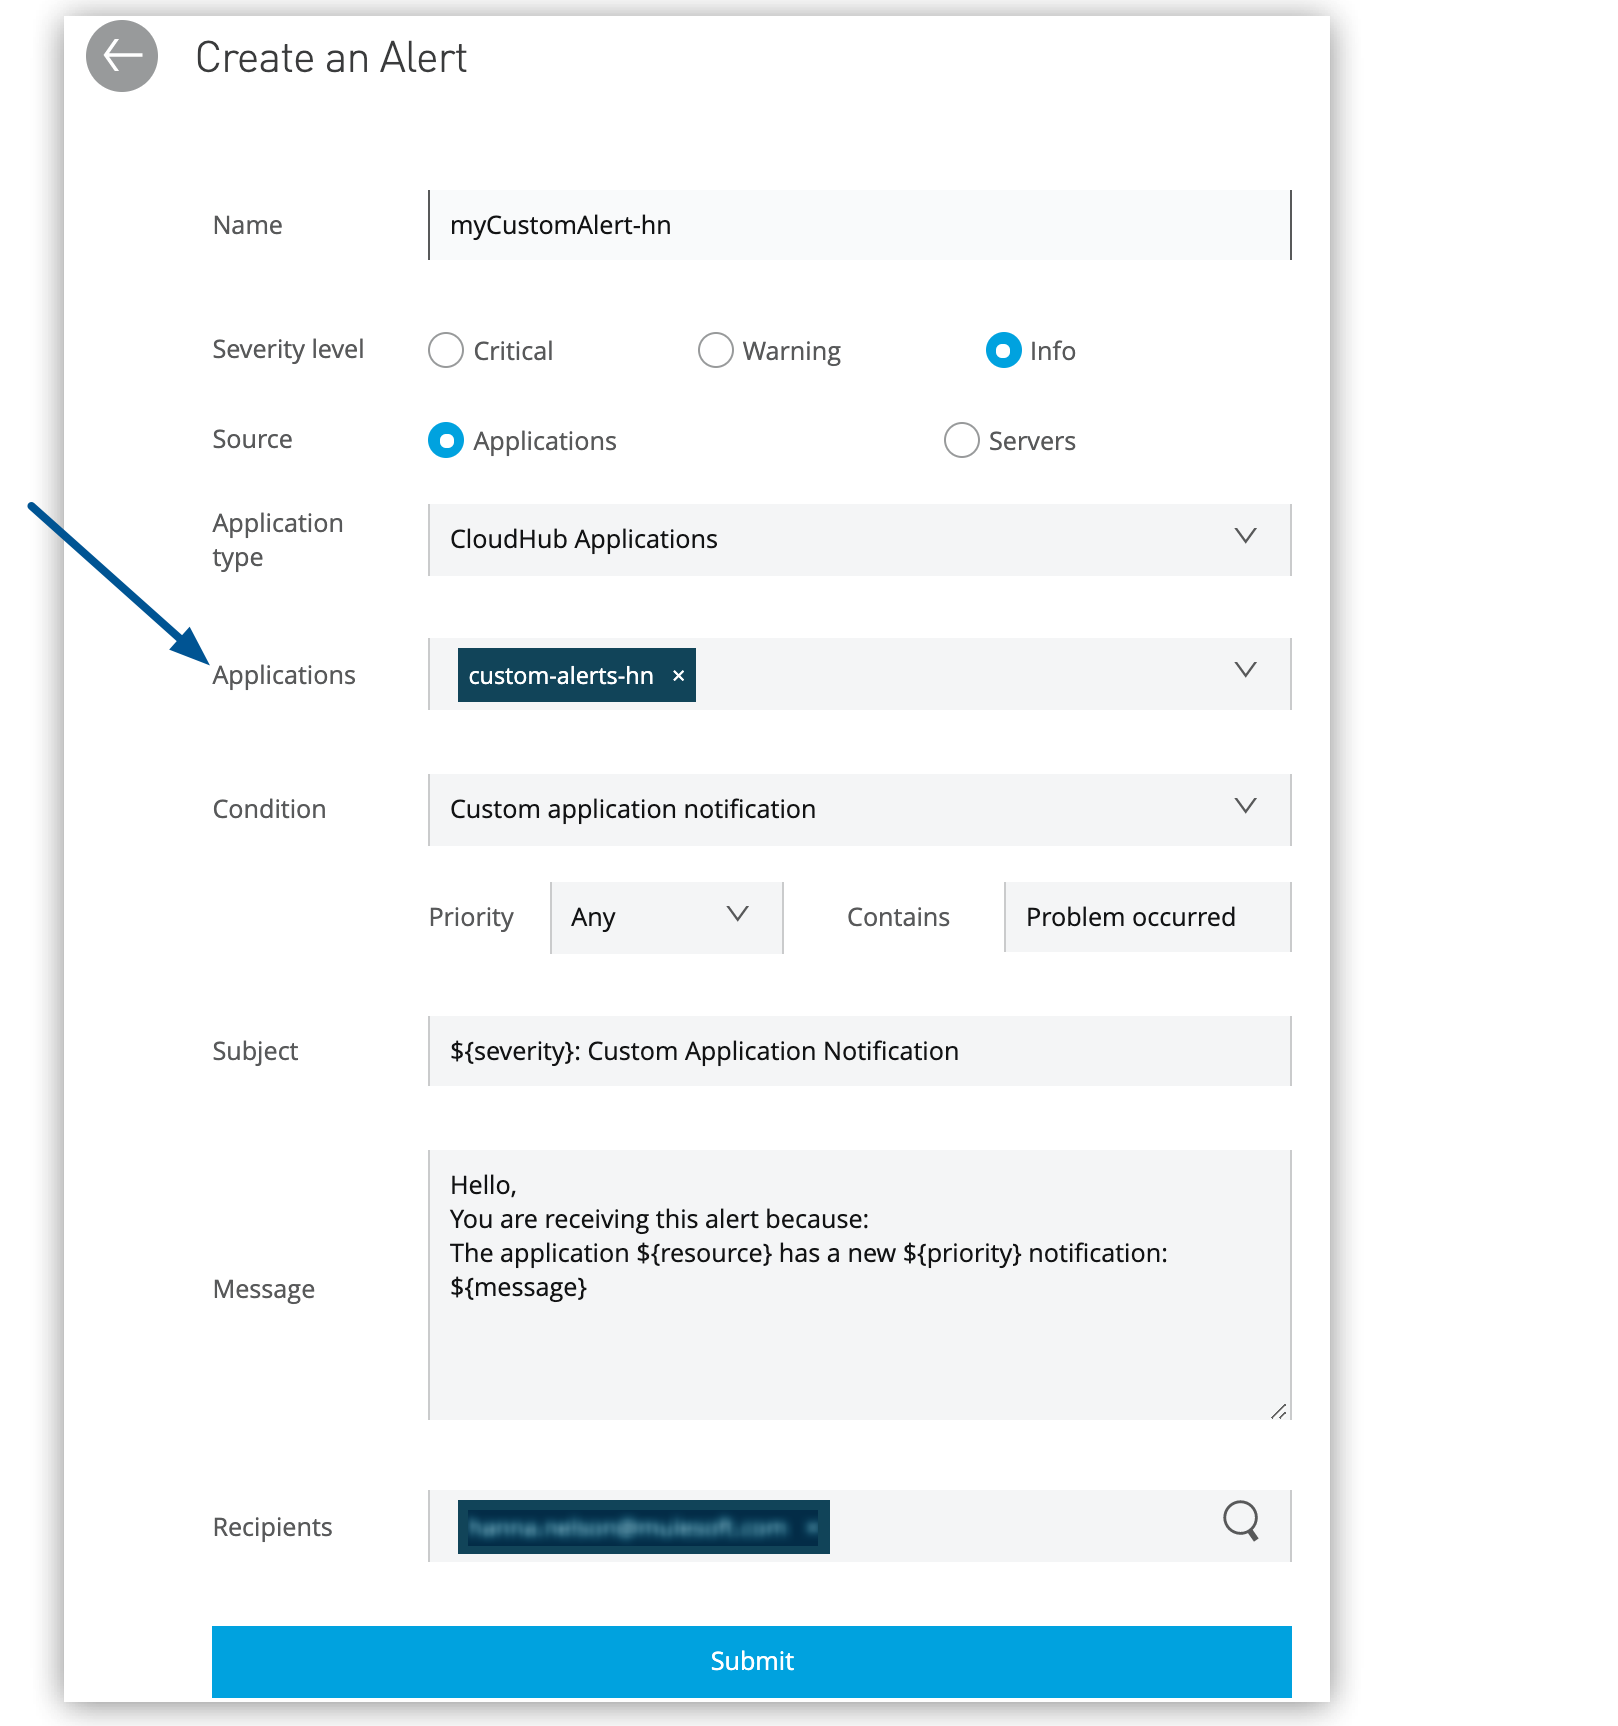 Figure 3. The arrow shows the Applications field in the Create an Alert window.
- Name
-
Enter a meaningful name for the custom alert.
- Severity level
-
Select the severity level to apply to the alert:
-
Critical
-
Warning
-
Info
-
- Source
-
Select Applications for the alert source.
- Application type
-
Select CloudHub Applications.
- Applications
-
Select the application that contains the flow that you configured to trigger a custom alert.
- Condition
-
Select Custom application notification.
-
Select the priority from the Priority menu, or leave the priority as Any to send notifications regardless of priority.
-
In Contains, enter the string to use to trigger a notification.
This string must match a string in the Message field that you configured in CloudHub Connector.
-
- Subject
-
Enter the subject line to include in the notification email.
- Message
-
Enter the custom message to include in the notification.
- Recipients
-
Enter the email addresses for notification recipients.
You can use variables in the alert Subject and Message fields. For information about using variables in alerts, see Alert Variables.
When you trigger the alert, the specified recipients receive an email with the custom message you added to the app.
Notifications
Notifications give you visibility into business-related events inside your application. For example, you can create notifications that appear when:
-
Your application is unable to connect to a remote service.
-
An error that requires human intervention occurs, such as a problem with data mapping.
-
You want to create a summary of what happened in your application, such as the number of orders processed.
| CloudHub stores up to a maximum of 1000 notifications per application. If the number of notifications exceeds the maximum, CloudHub deletes the oldest notification. Each notification can contain up to 10,000 characters. |
Trigger a Notification
To trigger a notification for an app deployed to CloudHub:
-
Open the application URL and path, for example:
http://myApp.us-w1.cloudhub.io/storeThe page displays an error message and sends a new notification to the Runtime Manager console.
-
In the Runtime Manager Applications page, click the red bell icon in the upper-right to display the notification.
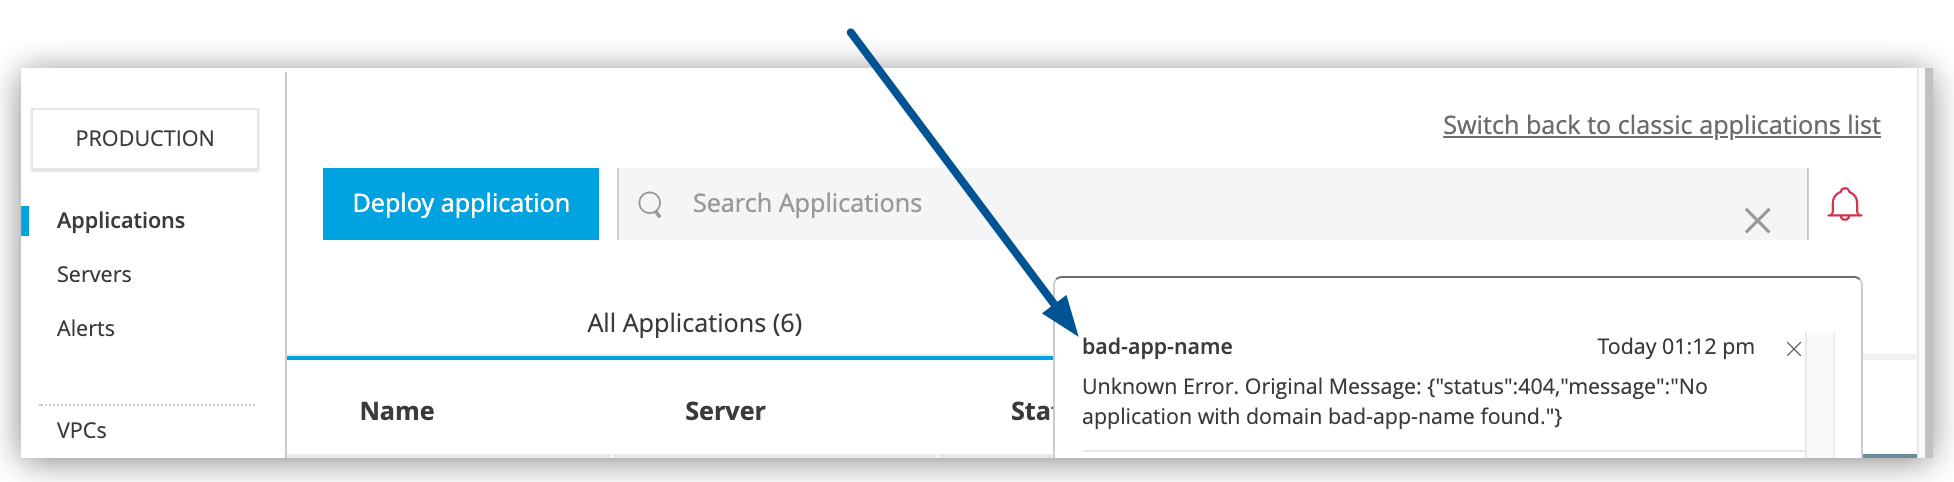 Figure 4. The arrow shows the error in the notifications dropdown.
If the notification is sent after an exception, it includes
exception.message and exception.stacktrace as custom properties of the notification,
accessible from the Runtime Manager console.
Send an Error Notification
You can use the CloudHub Connector inside an <error-handler> component to send notifications when errors happen.
For example, use the <on-error-propagate> component to send the error message and stop processing the flow:
<flow name="myTestFlow" >
...
    <error-handler >
        <on-error-propagate enableNotifications="true" logException="true" doc:name="On Error Propagate" type="ANY">
            <cloudhub:create-notification doc:name="Create Notification" config-ref="CloudHub_Config" domain="bad-app-name" priority="WARN">
                <cloudhub:message ><![CDATA[#[error.description]]]></cloudhub:message>
            </cloudhub:create-notification>
        </on-error-propagate>
    </error-handler>
...
</flow>
For information about the On-Error components, see Using On-Error Components to Handle Messaging Errors.