
Insert, Update, and Delete Data from a Database Examples
Anypoint Connector for Database (Database Connector) supports the Insert, Update, and Delete operations that enable you to manage data from a database.
In the following example, you insert, update ,and delete data from a database schema named Products that has a table named electronic. The table contains columns named id, name, description, price, and discount.
The following SQL statement creates the table:
CREATE TABLE electronic(
    id INT AUTO_INCREMENT PRIMARY KEY,
    name VARCHAR(100),
    description VARCHAR(255),
    price SMALLINT,
    discount TINYINT
)
Configure the Insert Operation in Studio
Given that the table electronic is already created and there is a Database Connector connection configuration named dbConfig, you can configure the Insert operation that inserts a new record in the table:
-
In your Studio flow, select the Insert operation.
-
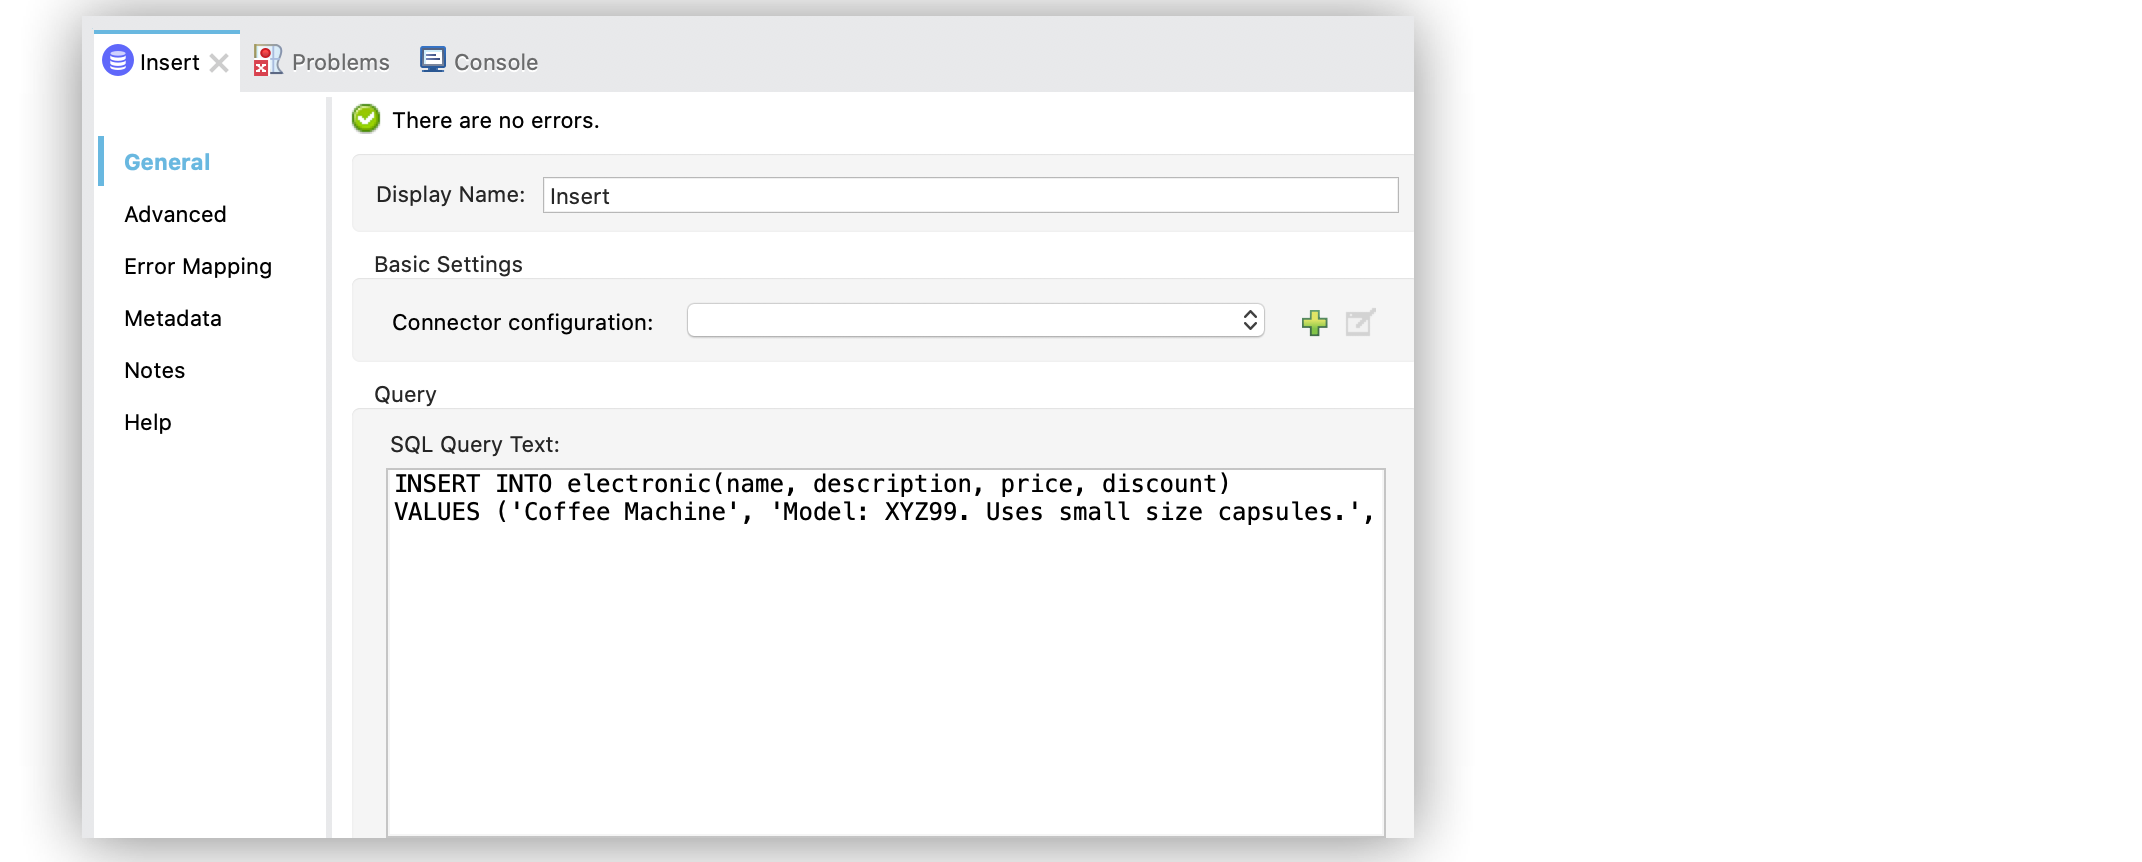
In the connector configuration screen, set the SQL Query Text field to the query to execute, for example:
    INSERT INTO electronic(name, description, price, discount)
    VALUES ('Coffee Machine', 'Model: XYZ99. Uses small size capsules.', 120, 5)
The id parameter is not passed in the query because it is an auto-increment key that is generated automatically by the database.
In the Configuration XML editor, the <db:insert> configuration looks like this:
<db:insert config-ref="dbConfig">
  <db:sql>
    INSERT INTO electronic(name, description, price, discount)
    VALUES ('Coffee Machine', 'Model: XYZ99. Uses small size capsules.', 120, 5)
  </db:sql>
</db:insert>
Configure the Input Parameters Field in the Insert Operation
To benefit from the advantages of input parameters, structure the equivalent SQL query as follows:
-
In your Studio flow, select the Insert operation.
-
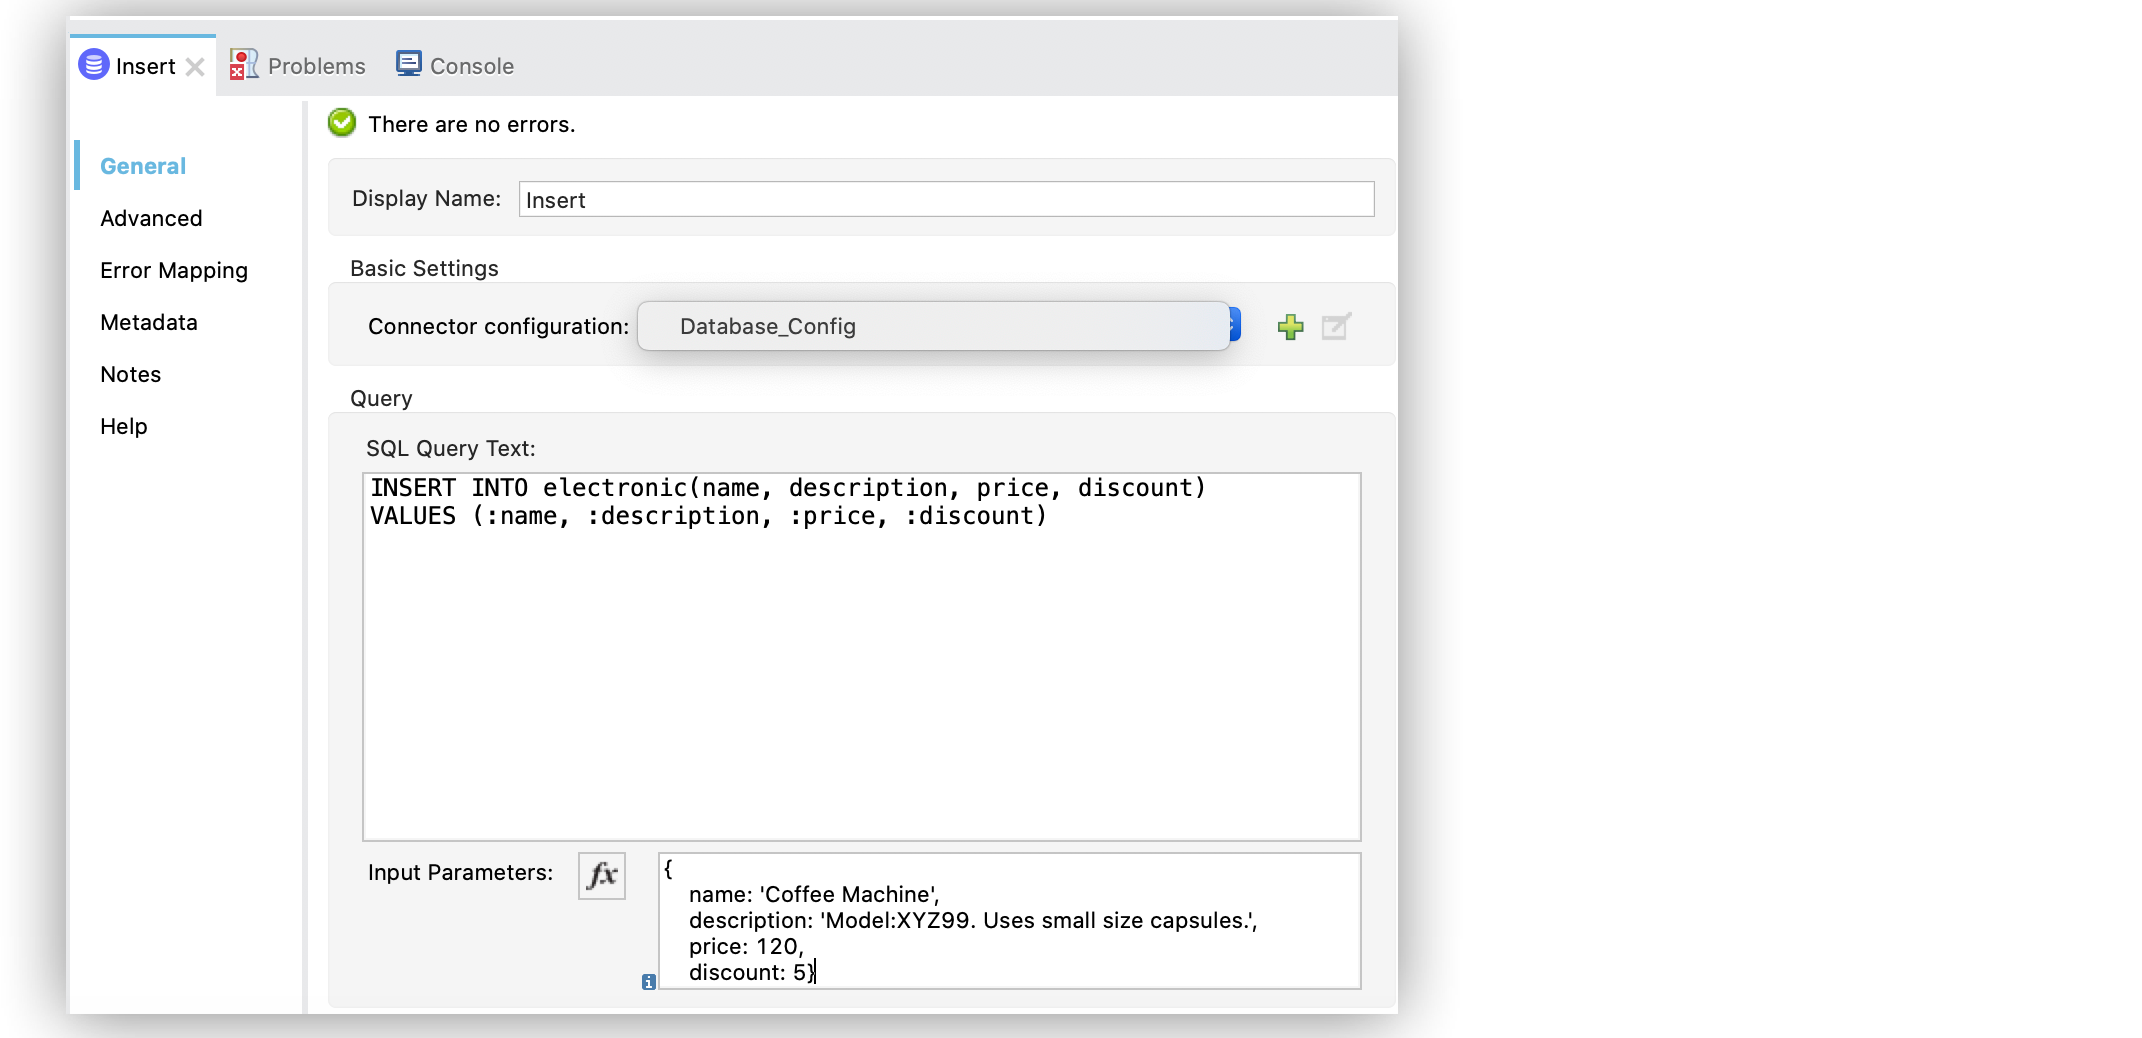
In the connector configuration screen, set the SQL Query Text field to the query to execute, for example:
INSERT INTO electronic(name, description, price, discount)
VALUES (:name, :description, :price, :discount)-
In the Input Parameters field, set the following parameters:
{
    name: 'Coffee Machine',
    description: 'Model:XYZ99. Uses small size capsules.',
    price: 120,
    discount: 5
}
In the Configuration XML editor, the <db:input-parameters> configuration looks like this:
<db:insert config-ref="dbConfig">
    <db:sql>
        INSERT INTO electronic(name, description, price, discount)
        VALUES (:name, :description, :price, :discount)
    </db:sql>
    <db:input-parameters>#[{
        name: 'Coffee Machine',
        description: 'Model:XYZ99. Uses small size capsules.',
        price: 120,
        discount: 5}]
    </db:input-parameters>
</db:insert>
Configure the Auto Generate Keys Fields in the Insert Operation
The Insert operation outputs a Statement Result object that contains two fields: an affectedRows
integer that indicates how many rows were affected by the query, and a generatedKeys map
that contains the autogenerated keys.
In the following example, the output shows that the generatedKeys map is empty, although a row is successfully added to the table. The map is empty because this information is disabled by default to avoid overhead.
{
  "affectedRows": 1,
  "generatedKeys": {

  }
}
To activate the information and generate keys, follow the next steps:
-
In your Studio flow, select the Insert operation.
-
In the Advanced tab, set the Auto generate keys field to True.
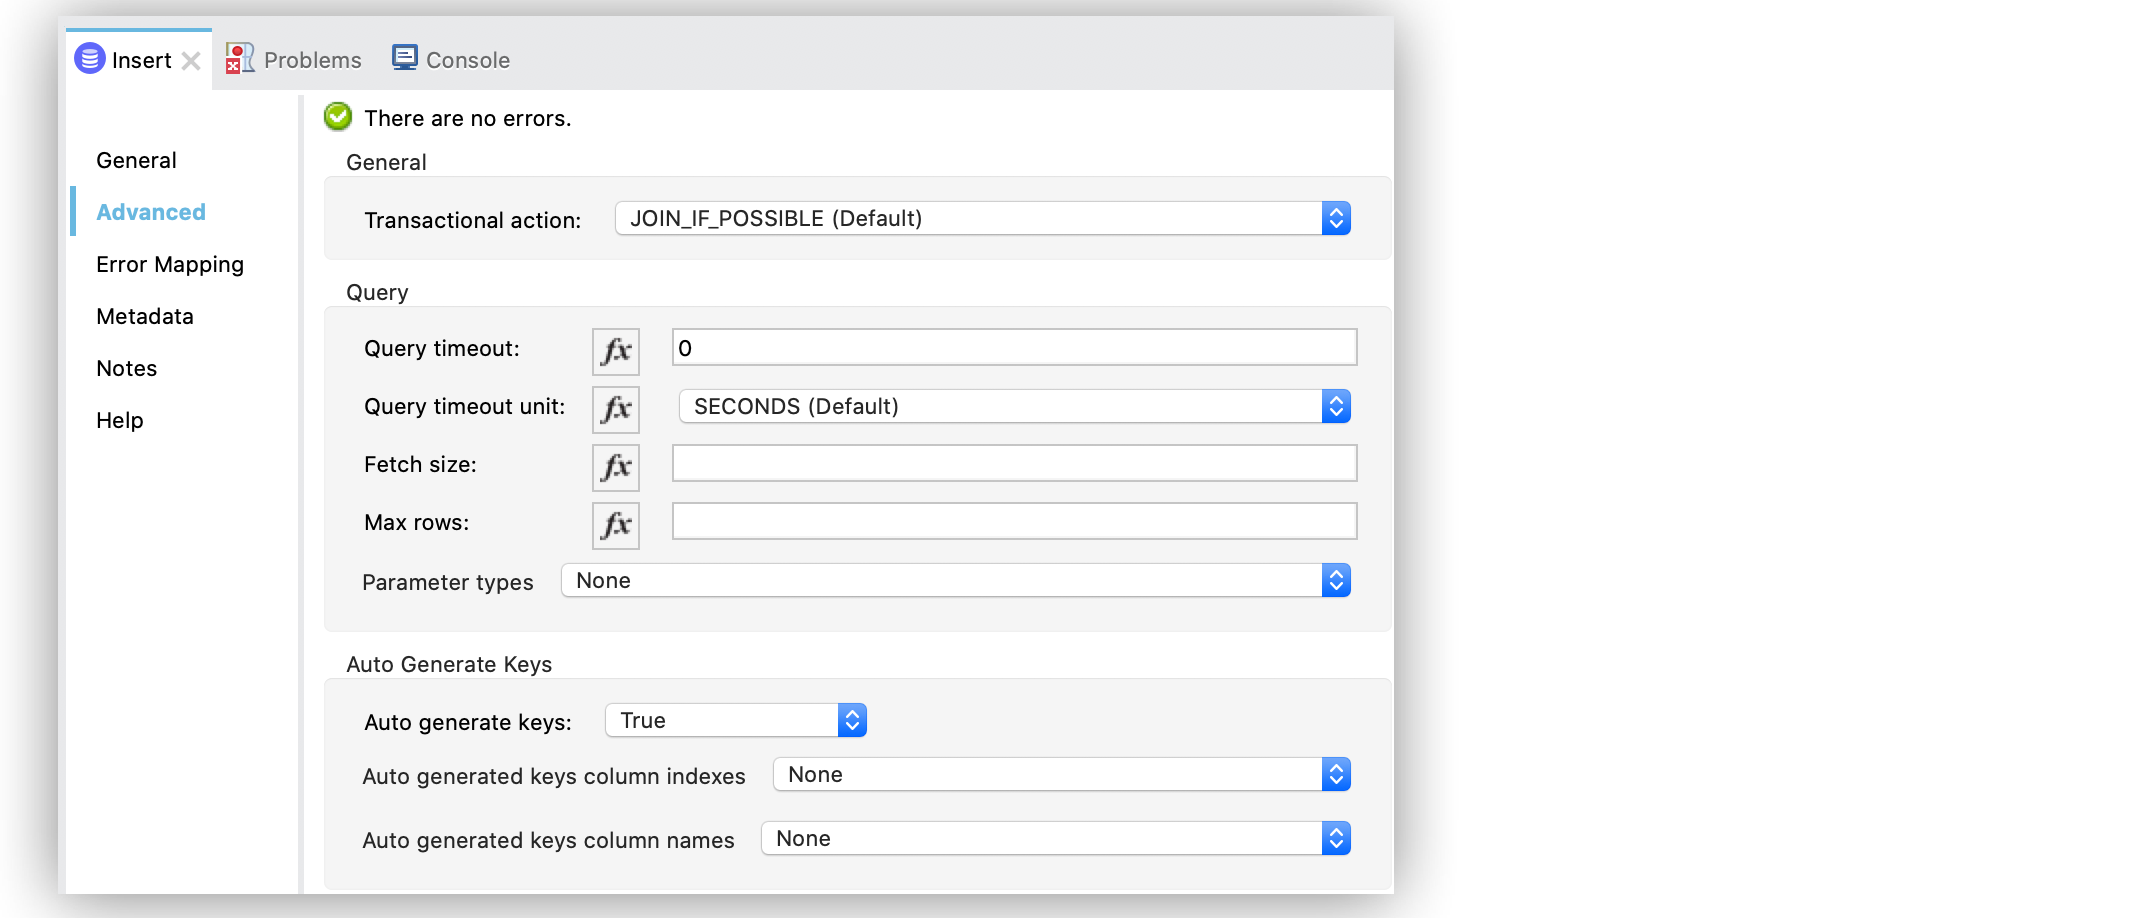
In the Configuration XML editor, the <autoGenerateKeys> configuration looks like this:
<db:insert config-ref="dbConfig" autoGenerateKeys="true">
...
</db:insert>
If the statement generates multiple keys per affected row, you can specify which columns should be returned by setting a list that contains the desired column names, for example:
-
In your Studio flow, select the Insert operation.
-
In the Advanced tab, set the Auto generate column names field to
Expression or Bean referenceto set the field to a DataWeave list with a single string element. -
Set the expression field to
['id']to ensure that only theidcolumn is returned.
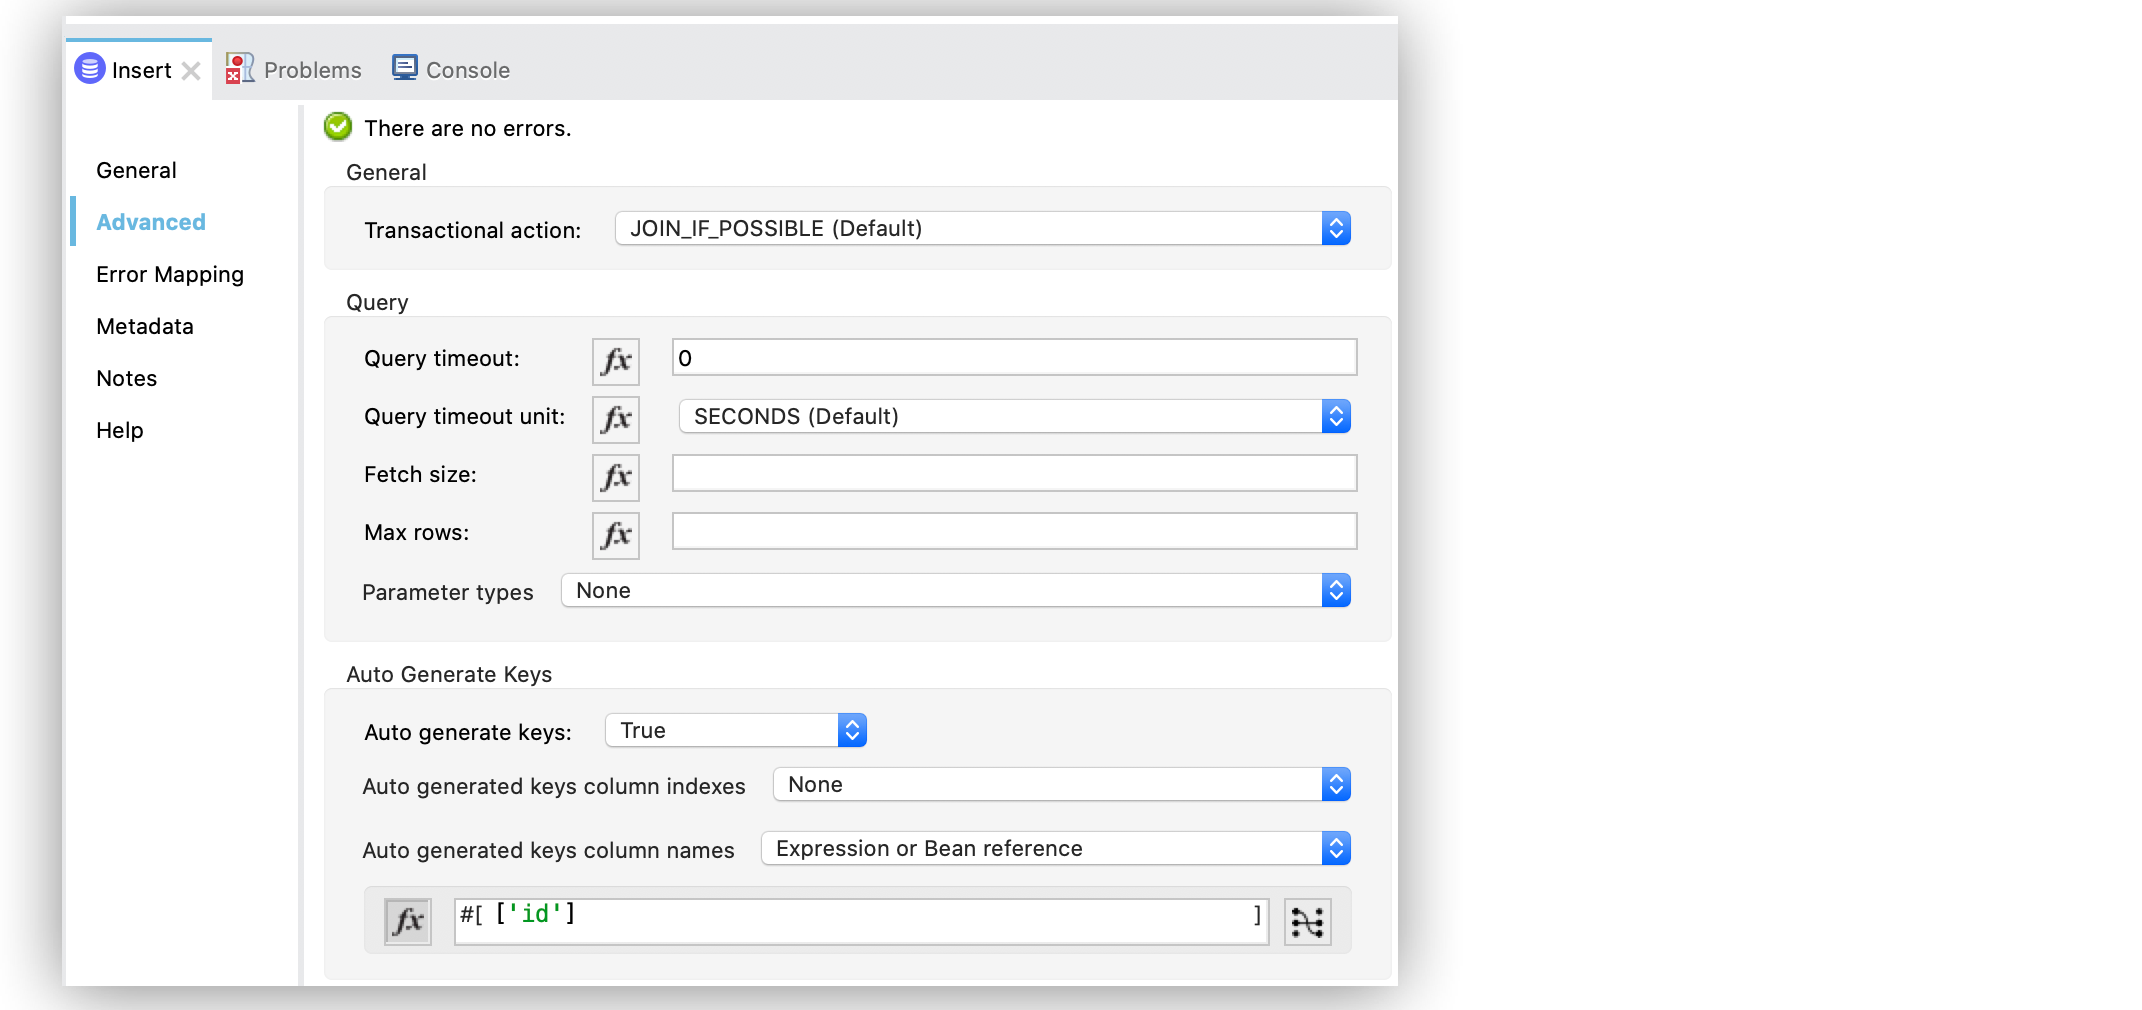
In the Configuration XML editor, the <autoGeneratedKeysColumnNames> configuration looks like this:
<db:insert config-ref="dbConfig" autoGenerateKeys="true" autoGeneratedKeysColumnNames="#[['id']]">
    ...
</db:insert>
Configure the Update Operation in Studio
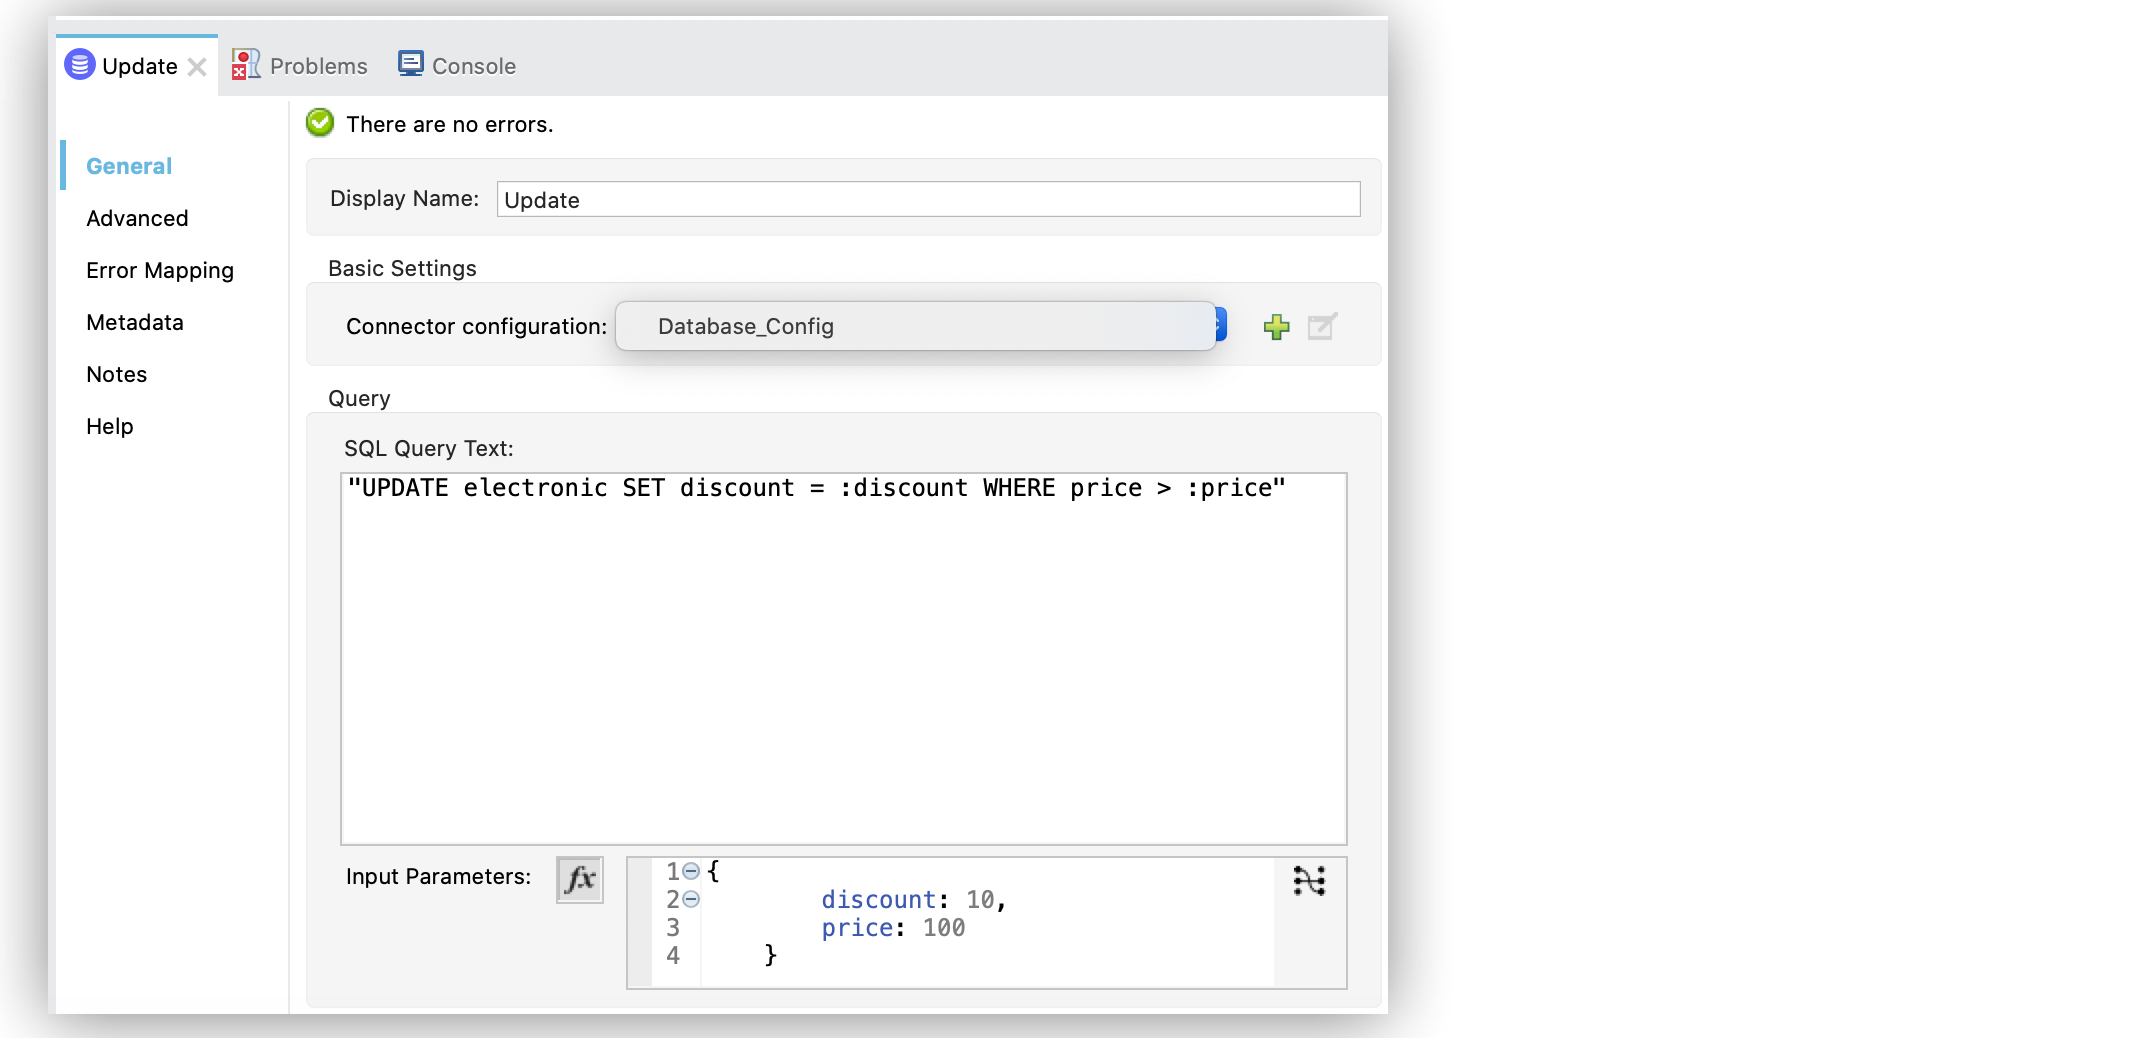
Given the electronic table previously defined, to update data from the table (for example, setting the discount to 10 percent for all items that have a price value above 100), configure the Update operation:
-
In your Studio flow, select the Update operation.
-
In the connector configuration screen, set the SQL Query Text field to the query to execute, for example,
"UPDATE electronic SET discount = :discount WHERE price > :price". -
Set the Input parameters field to the following parameters:
{
      discount: 10,
      price: 100
}
In the Configuration XML editor, the <db:update> configuration looks like this:
<db:update doc:name="Update">
			<db:sql ><![CDATA["UPDATE electronic SET discount = :discount WHERE price > :price"]]></db:sql>
			<db:input-parameters ><![CDATA[#[{
        discount: 10,
        price: 100
    }]]]></db:input-parameters>
		</db:update>
The <![CDATA[…]]> wrapper enables you to use special characters, such as > or ", in the query.
Otherwise, you must use XML-escaped versions of those characters, such as > and ".
Configure the Delete Operation in Studio
Given the electronic table previously defined, to remove the record with id: 1, configure the Delete operation:
-
In your Studio flow, select the Update operation.
-
In the connector configuration screen, set the SQL Query Text field to the query to execute, for example,
DELETE FROM electronic WHERE id = :id. -
Set the Input parameters field to
{id: 1}.
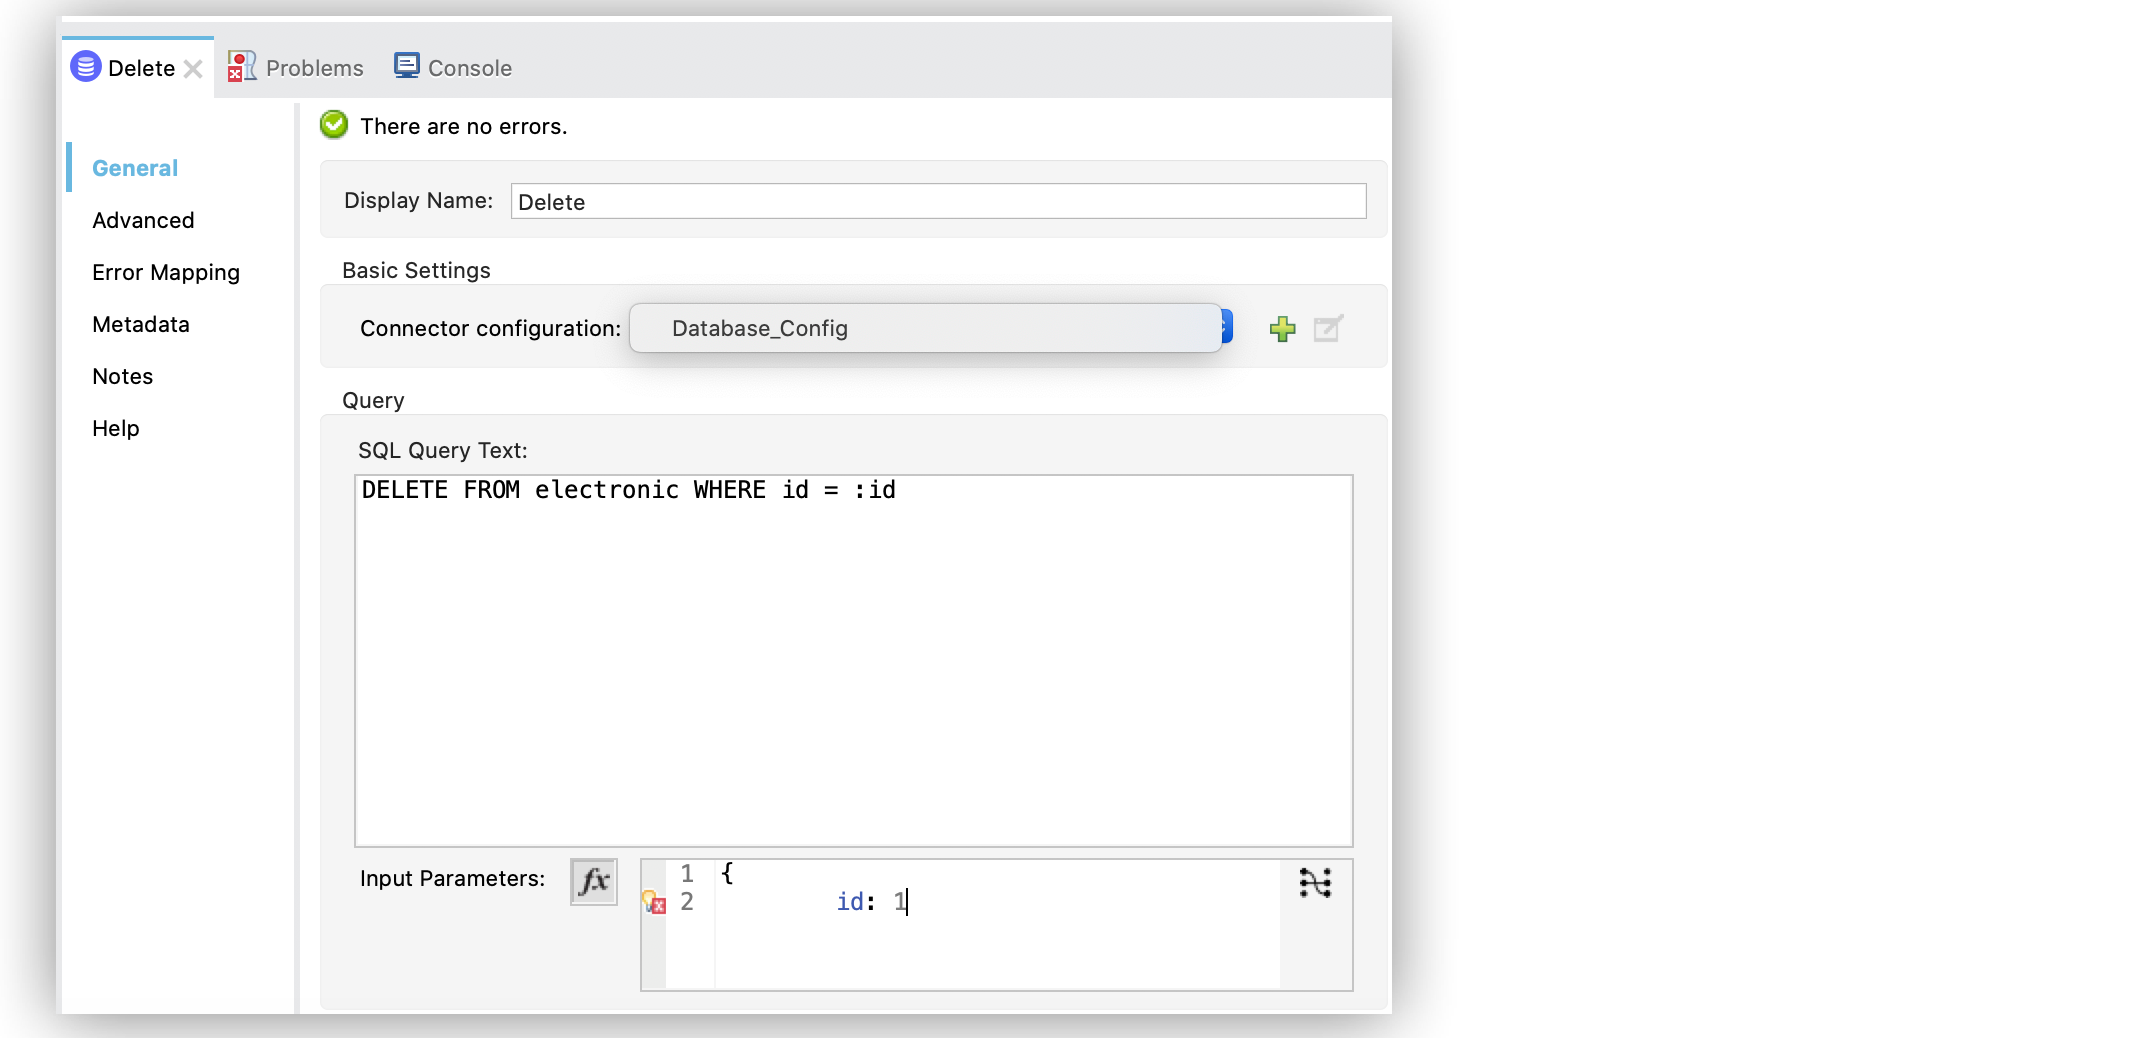
In the Configuration XML editor, the <db:delete> configuration looks like this:
<db:delete config-ref="dbConfig">
    <db:sql>DELETE FROM electronic WHERE id = :id</db:sql>
    <db:input-parameters>#[{
        id: 1
    }]</db:input-parameters>
</db:delete>
Insert Record Mule App Example
The following example shows how to configure the Insert operation to create a person’s record in a database.
-
In Studio, drag the HTTP Listener source to the Studio canvas.
-
Set Path to
/person. -
Drag the Insert operation next to the Listener source.
-
Click the plus sign (+) next to the Connector configuration field to access the global element configuration fields.
-
In the SQL Query Text box, declare the following SQL text:
insert into person (id, name, photo, dob)
values (:ID,:NAME,:PHOTO,:DOB);
-
In the Input Parameters field, specify a list of maps of the person record to create, which contains the parameter names as keys and the value the parameter, and in which every list item represents a row to insert:
{'ID' : message.payload.parts['id'].content , 'NAME': message.payload.parts['name'].content, 'PHOTO' : message.payload.parts['photo'].content, 'DOB' : message.payload.parts['dob'].content} -
Drag a Set Payload component next to the Insert operation.
-
Set Value to
Person Created. -
Save and run your Mule application.
In the Configuration XML editor, the configuration looks like this:
<?xml version="1.0" encoding="UTF-8"?>

<mule xmlns:db="http://www.mulesoft.org/schema/mule/db" xmlns:http="http://www.mulesoft.org/schema/mule/http"
	xmlns="http://www.mulesoft.org/schema/mule/core"
	xmlns:doc="http://www.mulesoft.org/schema/mule/documentation" xmlns:xsi="http://www.w3.org/2001/XMLSchema-instance" xsi:schemaLocation="http://www.mulesoft.org/schema/mule/core http://www.mulesoft.org/schema/mule/core/current/mule.xsd
http://www.mulesoft.org/schema/mule/http http://www.mulesoft.org/schema/mule/http/current/mule-http.xsd
http://www.mulesoft.org/schema/mule/db http://www.mulesoft.org/schema/mule/db/current/mule-db.xsd">
	<http:listener-config name="HTTP_Listener_config" doc:name="HTTP Listener config" >
		<http:listener-connection host="0.0.0.0" port="8081" />
	</http:listener-config>
	<db:config name="Database_Config" doc:name="Database Config" >
		<db:my-sql-connection host="localhost" port="3306" user="root" password="root" database="dev" />
	</db:config>
	<flow name="db-connector-testFlow">
		<http:listener doc:name="Listener" config-ref="HTTP_Listener_config" path="/person" allowedMethods="POST"/>
		<db:insert doc:name="Insert" config-ref="Database_Config">
			<db:sql ><![CDATA[insert into person (id, name, photo, dob)
values (:ID,:NAME,:PHOTO,:DOB);]]></db:sql>
			<db:input-parameters ><![CDATA[#[{'ID' : message.payload.parts['id'].content ,
'NAME': message.payload.parts['name'].content,
'PHOTO' : message.payload.parts['photo'].content,
'DOB' : message.payload.parts['dob'].content}]]]></db:input-parameters>
		</db:insert>
		<set-payload value="Person Created" doc:name="Set Payload" />
	</flow>
</mule>