#%RAML 1.0
title: Test Renaming

types:
  product_name:  (1)
    type: object
    properties:
      name: string

/test:
  get:
    responses:
      200:
        description: product_name  (2)
        body:
          application/json:
            type: product_name  (3)
Helpful Features in the Text Editor
The text editor makes it easy to perform the following:
-
Rename declarable objects
-
Find the names of declarable objects by highlighting them
-
Find locations where a definition is referenced
-
Select code ranges
-
Navigate to a symbol
-
Extract an element to a declaration
Rename Declarable Objects
Using only one action, you can rename declarable objects everywhere they are used in a project.
You can right-click the name of an object where it is declared, select Rename Symbol, and provide a new name. The object is thereby renamed wherever it is used in all of the files of the current project that are associated with the root file of the project, but the object is not renamed where only mentioned.
For example, in the following example API specification product_name is declared as a type on line 5 at callout 1, mentioned at callout 2, and used on line 17 at callout 3. If you right-click product_name at callout 1 and use the Rename Symbol option to change its name, product_name is changed only at callout 3.
Highlight the Names of Declarable Objects
You can highlight the names of declarable objects where they are used in a file.
To see all of the locations in a file where an object is used, click the cursor in the name of the object where that object is declared.
For example, the type person is declared on line 5 at the first callout in the following example API specification. That type is subsequently used on line 16 at the second callout. If you click person on line 5, the text editor highlights person on line 16.
#%RAML 1.0
title: Test Highlighting

types:
  person:  (1)
    type: object
    properties:
      name: string

/test:
  get:
    responses:
      200:
        body:
          application/json:
            type: person  (2)
This highlighting works for all declarable objects, such as types, security schemes, resource types, and traits.
Highlighting appears only where the object is used, not every location where its name appears. For example, in the following example API specification, person is declared as a type on line 5 at callout 1, mentioned on line 14 at callout 2, and used on line 17 at callout 3. When you click in person at callout 1, person is highlighted only at callout 3.
#%RAML 1.0
title: Test Highlighting

types:
  person:  (1)
    type: object
    properties:
      name: string

/test:
  get:
    responses:
      200:
        description: person  (2)
        body:
          application/json:
            type: person  (3)
Find Locations Where a Definition is Referenced
You can navigate to locations where a given definition is referenced by right-clicking the definition and selecting Go to References.
For example, the type person is declared on line 5 at the first callout in the following example API specification. That type is subsequently used on line 14 at the second callout, and on line 22 at the third callout.
#%RAML 1.0
title: Test References

uses:
  lib: library.raml

types:
  person:  (1)
    description: this is person's description
    properties:
      firstname: string
  manager:
    type: lib.manager
  Alertable: manager | person  (2)

/person:
  get:
    responses:
      200:
        body:
          application/json:
            type: person[]  (3)
If you right-click person on line 5 and select Go to References, a list of the person locations (callouts two and three) appears. Double clicking a listed location navigates you to the relevant line.
Go to References also supports the following:
-
RAML resource types and traits
-
RAML type expressions
-
Library aliases
-
References linked in JSON path navigation
-
References to nodes that apply macros, such as
annotationTypes,securitySchemes,resourceTypes, andtraits
Select Code Ranges
“Selection Ranges” enable you to select and to expand the selection of code blocks.
To select a range, click an element and press Control + Shift + [Left Arrow | Right Arrow]. The Right Arrow key increases the range. The Left Arrow key decreases the range.
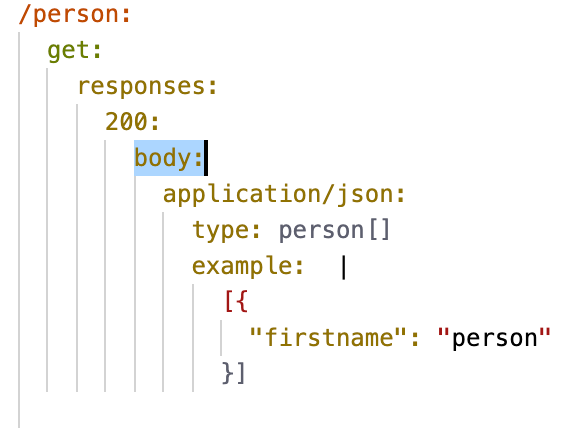
For example, clicking body: in the following code, and pressing Control + Shift + Right Arrow creates a selection range that includes only body::
Pressing Control + Shift + Right Arrow again results in the following selection range:
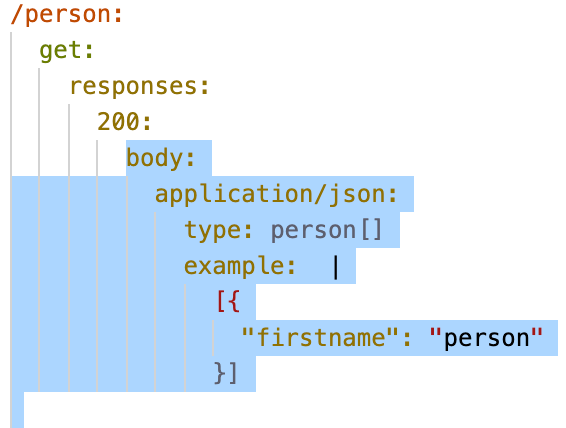
Pressing Control + Shift + Left Arrow collapses the selection range, leaving only body: selected again.
Navigate to a Symbol
You can right-click anywhere in the document and select Go to Symbol, which presents the list of defined symbols:
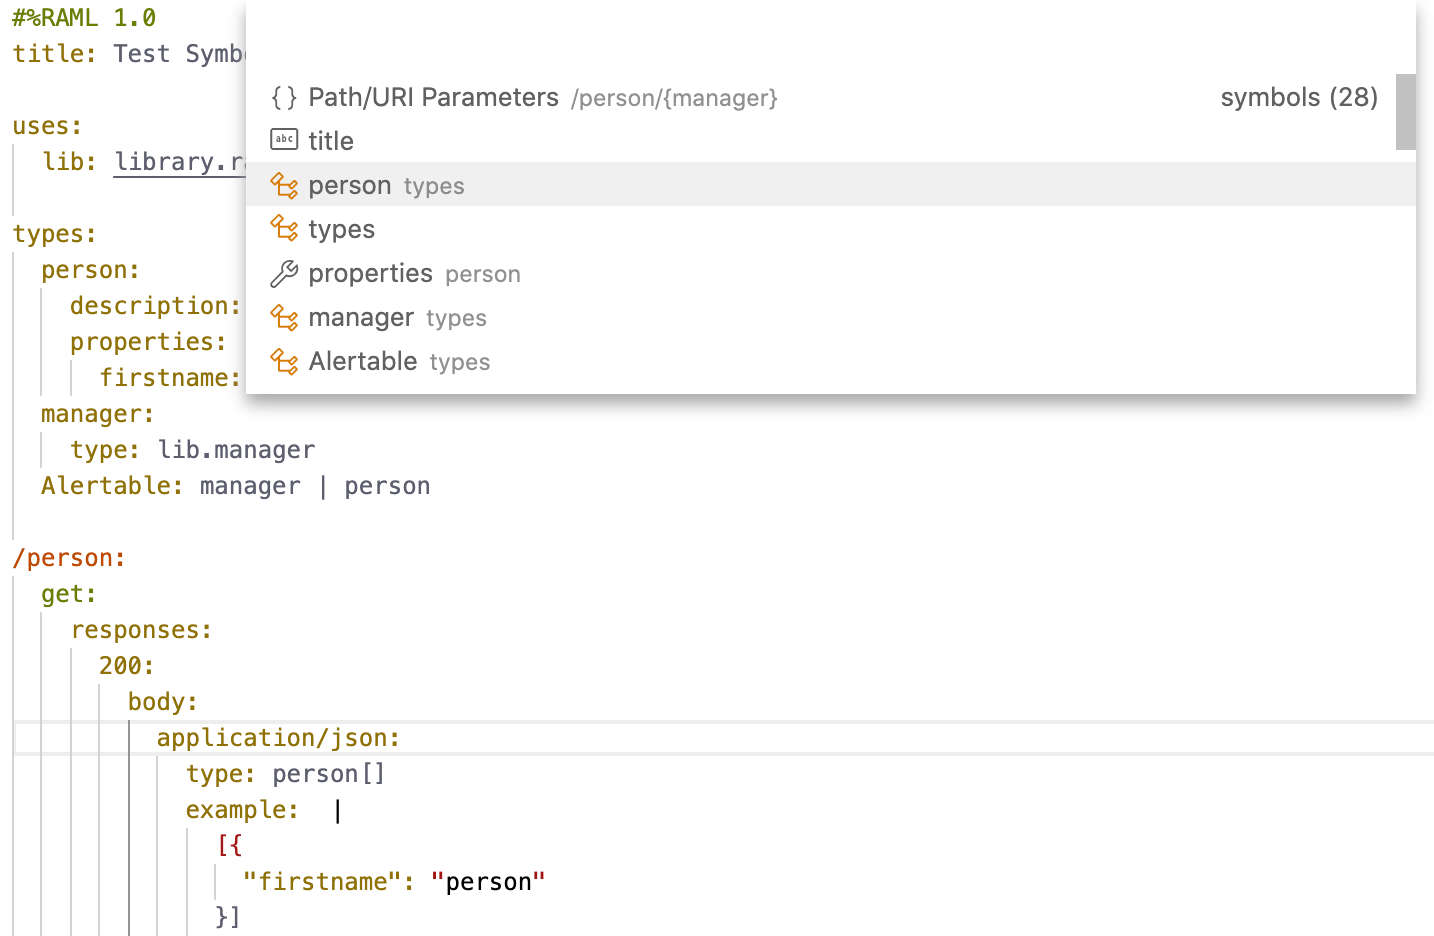
Selecting a symbol navigates you to its location in the document.
Extract an Element to a Declaration
You can take advantage of refactoring helpers to ease the continuous improvement of the design. One such helper is the ability to extract an inline declarable element to a top-level declaration, with the result being reusability.
When you select a range that matches an inline declarable element, an icon appears to the left of the element:
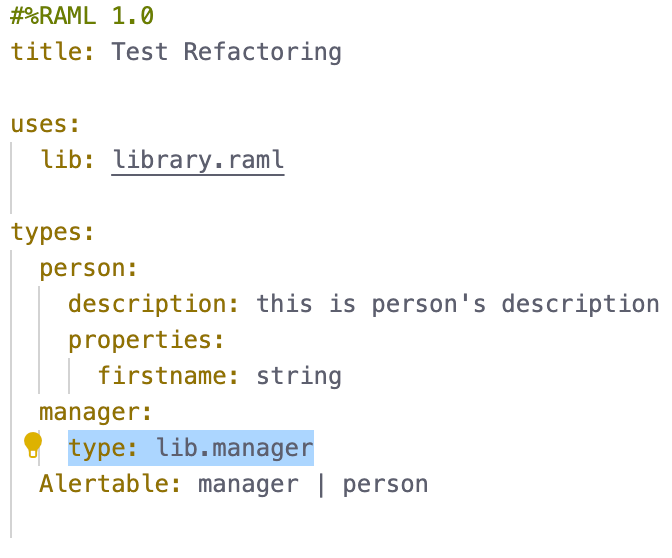
Click the icon and select Extract to Declaration, which results in the following two changes to the document:
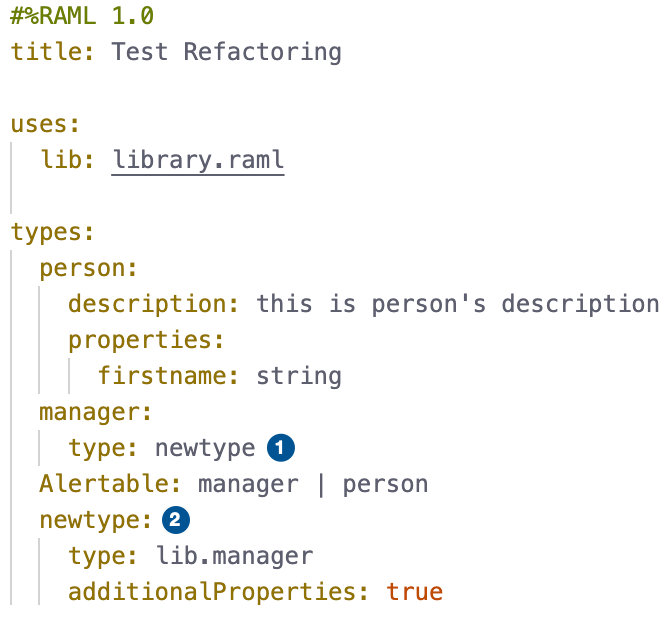
The first callout shows that type: lib.manager is replaced with type: newtype. A newtype declaration now exists outside of the manager scope (as shown at the second callout), thereby making newtype reusable.
The extracted declaration name is based on the original name. If the name is already being used by another declaration of the same kind, an automatically incremented number is added at the end of the name. You can rename the declaration.
Along with types declarations, you can also extract resourceTypes declarations and traits declarations.


