Manage Client Applications
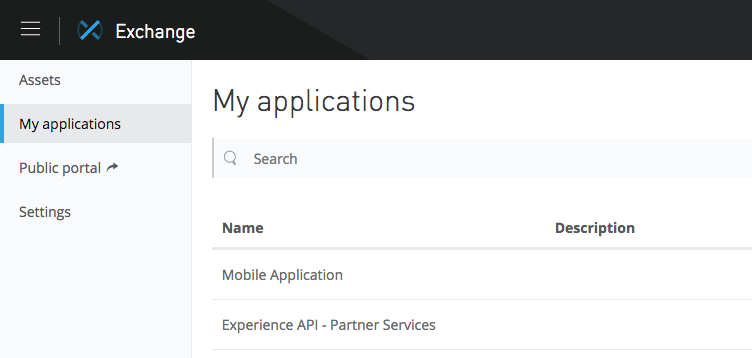
Manage your client applications by using the My Applications page. This page lists applications that hold a contract with an API or an API group. To view this page, select My applications from the navigation bar.

Applications are registered using API Manager in Anypoint Platform.
To register a client application to an existing API or API Group, the client application must first request access. When the request is approved by the API or API Group owner, a contract is created between the client application and the API or API Group, and the client application is registered.
If you don’t have an application to link to the API or API Group, you can create the application in the Request Access menu. You can then click Request Access to connect your application and the API or API Group. Some APIs and API Groups require selecting a service-level agreement (SLA), and some APIs and API Groups require accepting terms and conditions.
APIs and API Groups that are protected by a client ID enforcement policy require client applications to provide a client ID and optional client secret. The client ID and client secret credentials are automatically created when the client application is registered.
An API owner can use API Manager to view all API contracts ever created for an API or API Group instance. Client app owners can assign other users and teams to view and manage a client application using the My Applications page in Exchange.
An API consumer can use the Exchange My Applications page to view the contracts created between an API instance or API Group instance and that consumer’s client applications.
View Client Applications Details
Each client application has a client ID, client secret, description, URL, redirect URIs, grant types, and usage dashboard.
To see the details of a client application, select My application from the sidebar and select an application from the list.
To find an application, search the list of applications by entering a name or description in Search and press Enter.
Edit Client Application Details
You can change the client application details. These include name, description, URL, and OAuth 2.0 redirect URIs.
To make changes, click Edit. After making your updates, click Update to save your changes.
Delete a Client Application
When you don’t need the contract for an application, you can delete it. After the application is deleted, there’s no longer a contract with the application and you can’t access it. To regain access, request access to the API again.
-
From the sidebar, select My applications and click the name of the application.
-
Click
 and select Delete application.
 -
Confirm that you want to delete the application by clicking Delete application.
Reset Client Secret
You can reset the client secret for an application on a set schedule to ensure security, even if users leave the company. Resetting the secret also ensures it isn’t unintentionally shared with unauthorized users.
Applications using the current client secret can’t access any of the APIs with which they were registered.
-
From the sidebar, select My applications and click the name of the application.
-
Click
 and select Reset client secret.
 -
Confirm that you want to delete the application by clicking Reset client secret.
The client secret is reset. In the application details section, click Show to see the new client secret.
Add and Change an SLA Tier
SLA tiers are defined in API Manager. If an application doesn’t have an SLA tier listed, you can request to add an SLA tier. You can also change the SLA tier for an application. The available SLA tiers are set by an admin in API Manager. The owner of the API instance must approve the request to add or change the tier level.
To add or change an SLA tier:
-
From the sidebar in Exchange, select My applications and click the name of the application.
-
From the instances panel, move the cursor over an instance and click View SLA Tier.
-
Click Manage SLA Tiers, select an SLA tier, and click Submit.
View Usage Information
See usage information for the instances of a client application using the application dashboard. The dashboard shows graphs for:
-
Total requests
-
Average latency (ms)
-
Requests by status code
-
Requests by HTTP status code
-
Error percentage
You can set a date range to display for all the charts in your dashboard. If not specified, the range is the previous eight days.
-
From the sidebar in Exchange, select My applications and click the name of the application.
-
Select one of more instance.
-
Click the calendar dropdown, select a date range, and click Confirm.


