Flex Gateway新着情報
Governance新着情報
Monitoring API Manager|
このバージョンの Mule は、拡張サポートが終了する 2023 年 5 月 2 日にその すべてのサポートが終了しました。 このバージョンの Mule を使用する CloudHub には新しいアプリケーションをデプロイできなくなります。許可されるのはアプリケーションへのインプレース更新のみになります。 標準サポートが適用されている最新バージョンの Mule 4 にアップグレードすることをお勧めします。これにより、最新の修正とセキュリティ機能強化を備えたアプリケーションが実行されます。 |
Mule SDK および Mule API を使用して、アプリケーションで設定プロパティ値を検出できるようにするカスタム設定プロパティプロバイダーを作成できます。
API のメインインターフェースは次のとおりです。
ConfigurationPropertiesProviderFactory
このインターフェースは、設定プロパティプロバイダーのカスタム実装を検出するために使用されます。Mule Runtime Engine (Mule) は、getSupportedComponentIdentifier() メソッドによって提供される名前空間と名前に一致する設定要素を検出すると、createProvider(..) メソッドで定義した設定を使用して ConfigurationPropertiesProvider を作成するようにファクトリーに要求します。Mule は、SPI を使用して ConfigurationPropertiesProviderFactory のインスタンスを検出します。
ConfigurationPropertiesProvider
Mule が設定プロパティを検出すると、このインターフェースを呼び出してプロパティの値を解決します。
セキュリティモジュールは、API を使用して ConfigurationPropertiesProviderFactory を実装します。
import static org.mule.runtime.api.component.ComponentIdentifier.builder;

public class SecureConfigurationPropertiesProviderFactory implements ConfigurationPropertiesProviderFactory {

  public static final String EXTENSION_NAMESPACE = "secure-properties";
  public static final String SECURE_CONFIGURATION_PROPERTIES_ELEMENT = "config";
  public static final ComponentIdentifier SECURE_CONFIGURATION_PROPERTIES =
      builder().namespace(EXTENSION_NAMESPACE).name(SECURE_CONFIGURATION_PROPERTIES_ELEMENT).build();

  ...

  @Override
  public ComponentIdentifier getSupportedComponentIdentifier() {
    return SECURE_CONFIGURATION_PROPERTIES;
  }

  @Override
  public SecureConfigurationPropertiesProvider createProvider(ConfigurationParameters parameters,
                                                              ResourceProvider externalResourceProvider) {
    String file = parameters.getStringParameter("file");
    ..

    String key = parameters.getStringParameter("key");
    ...

    return new SecureConfigurationPropertiesProvider(..);
  }

}
getSupportedComponentIdentifier() によって返される ComponentIdentifier は、次の設定コンポーネントに対して照合されます。
<mule xmlns="http://www.mulesoft.org/schema/mule/core"
      xmlns:xsi="http://www.w3.org/2001/XMLSchema-instance"
      xmlns:secure-properties="http://www.mulesoft.org/schema/mule/secure-properties"
      xsi:schemaLocation="
        http://www.mulesoft.org/schema/mule/core http://www.mulesoft.org/schema/mule/core/current/mule.xsd
        http://www.mulesoft.org/schema/mule/secure-properties http://www.mulesoft.org/schema/mule/secure-properties/current/mule-secure-properties.xsd">

    <secure-properties:config key="decryption-key" file="file1.yaml" name="test">
        <secure-properties:encrypt algorithm="AES" mode="CBC"/>
    </secure-properties:config>

</mule>
Mule は、設定を処理するときに secure-properties:config コンポーネントを検出し、SecureConfigurationPropertiesProvider.createProvider(..) メソッドを呼び出して、設定プロパティを解決するために使用される SecureConfigurationPropertiesProvider のインスタンスを作成します。
public class SecureConfigurationPropertiesProvider extends DefaultConfigurationPropertiesProvider {

  private final static String SECURE_PREFIX = "secure::";
  private final static Pattern SECURE_PATTERN = Pattern.compile("\\$\\{" + SECURE_PREFIX + "[^}]*}");

  private final EncryptionAlgorithm algorithm;
  private final EncryptionMode mode;
  private final boolean fileLevelEncryption;
  private final SecurePropertyPlaceholderModule securePropertyPlaceholderModule = new SecurePropertyPlaceholderModule();


  public SecureConfigurationPropertiesProvider(ResourceProvider resourceProvider, String file, EncryptionAlgorithm algorithm,
                                               String key, EncryptionMode mode, String encoding, boolean fileLevelEncryption) {
      ...
  }

  @Override
  public Optional<ConfigurationProperty> getConfigurationProperty(String configurationAttributeKey) {
    if (configurationAttributeKey.startsWith(SECURE_PREFIX)) {
      String effectiveKey = configurationAttributeKey.substring(SECURE_PREFIX.length());

      ConfigurationProperty originalConfigurationProperty = configurationAttributes.get(effectiveKey);
      if (originalConfigurationProperty == null) {
        return empty();
      }
      String originalString = ((String) originalConfigurationProperty.getRawValue());
      String encryptedValue = originalString.substring(originalConfigurationProperty.getKey().length() + 1,
                                                       originalString.length() - algorithm.name().length() - mode.name().length()
                                                           - 2);
      final String decryptedValue = resolveInnerProperties(securePropertyPlaceholderModule.convertPropertyValue(encryptedValue));
      return of(new ConfigurationProperty() {

        @Override
        public Object getSource() {
          return originalConfigurationProperty.getSource();
        }

        @Override
        public Object getRawValue() {
          return decryptedValue;
        }

        @Override
        public String getKey() {
          return originalConfigurationProperty.getKey();
        }
      });
    } else {
      return empty();
    }
  }

  @Override
  public String getDescription() {
    ComponentLocation location = (ComponentLocation) getAnnotation(LOCATION_KEY);
    return format("<secure-properties file=\"%s\"> - file: %s, line number: %s", fileLocation,
                  location.getFileName().orElse(UNKNOWN),
                  location.getLineInFile().map(String::valueOf).orElse("unknown"));
  }

  ...
}
このリゾルバーに固有のプレフィックス (PREFIX:: 形式) を定義します。プレフィックスにより、ユーザーは特定のリゾルバーに絞り込むことができます。これは、SECURE_PREFIX で定義されるプレフィックスを使用して SecureConfigurationPropertiesProvider に実装されます。
設定では、プレフィックスを次のように使用する必要があります。
<mule xmlns="http://www.mulesoft.org/schema/mule/core"
      xmlns:xsi="http://www.w3.org/2001/XMLSchema-instance"
      xmlns:secure-properties="http://www.mulesoft.org/schema/mule/secure-properties"
      xsi:schemaLocation="
        http://www.mulesoft.org/schema/mule/core http://www.mulesoft.org/schema/mule/core/current/mule.xsd
        http://www.mulesoft.org/schema/mule/secure-properties http://www.mulesoft.org/schema/mule/secure-properties/current/mule-secure-properties.xsd">

    <secure-properties:config key="decryption-key" file="file1.yaml" name="test">
        <secure-properties:encrypt algorithm="AES" mode="CBC"/>
    </secure-properties:config>

    <flow name="main">
        <set-payload value="${secure::property.key2}"/>
    </flow>

</mule>
set-payload の value 属性でどのようにセキュアなプロパティのリゾルバー (secure:: プレフィックス) が使用されているのかを確認してください。
Studio 内でカスタム設定プロパティプロバイダーを有効にする設定要素を作成するには、Mule SDK モジュールを作成する必要があります。
カスタム設定プロパティリゾルバー拡張機能の実装を開始するためのすべてのインフラストラクチャコードが含まれる サンプルプロジェクトをダウンロードまたはチェックアウトできます。
このサンプルプロジェクトは、Mule SDK モジュールです。詳細は、 「Mule SDK の使用開始」を参照してください。
Mule SDK モジュールをカスタマイズする手順は次のとおりです。
サンプルプロジェクトを任意の IDE にインポートします。
pom.xml ファイルを開きます。
モジュールの GAV (groupId、artifactId、version) を定義します。
モジュールの name を定義します。
コードのパッケージ名 (com.my.company.custom.provider.api) を変更します。
resources/META-INF/mule-artifact/mule-artifact.json を開きます。
以前に変更したパッケージ名に合わせて、type 項目を com.my.company.custom.provider.api.CustomConfigurationPropertiesExtensionLoadingDelegate という値に設定します。com.my.company.custom.provider.api には、以前に変更したパッケージ名を指定します。
モジュールに設定する名前を使用して name 項目を設定します。
以前に変更したパッケージ名に合わせて exportedPackages 項目を設定します。
resources/META-INF/services/org.mule.runtime.config.api.dsl.model.properties.ConfigurationPropertiesProviderFactory を開き、以前に変更したパッケージ名に合わせてコンテンツを変更します。
CustomConfigurationPropertiesExtensionLoadingDelegate クラスを開きます。
EXTENSION_NAME 定数をモジュールの名前に変更します。
fromVendor メソッドパラメーターを会社名に変更します。
最後のセクションをカスタマイズして、モジュールの config 要素で設定できるパラメーターを定義します。
CustomConfigurationPropertiesProviderFactory クラスを開きます。
モジュールで解決する必要のある設定プロパティに合わせて、CUSTOM_PROPERTIES_PREFIX 値をわかりやすいプレフィックスに変更します。
カスタムソースのプロパティをルックアップするようにクラス実装を変更します。
新しいモジュール機能をカバーするために、より多くのテストケースで CustomPropertiesProviderOperationsTestCase を更新します。
モジュールの準備ができたら、mvn clean install を使用してローカルにインストールし、Studio からモジュールにアクセスできるようにすることができます。
カスタムプロパティプロバイダーを使用する手順は、次のとおりです。
Studio でアプリケーションを作成します。
新しいモジュールに連動関係を追加します。
pom.xml ファイルを開きます。
GAV を使用して、モジュールに配置する新しい連動関係を <dependencies> タグ内に追加します。
<classifier>mule-plugin</classifier> は、Mule モジュールであるため忘れずに追加します。
変更を保存します。
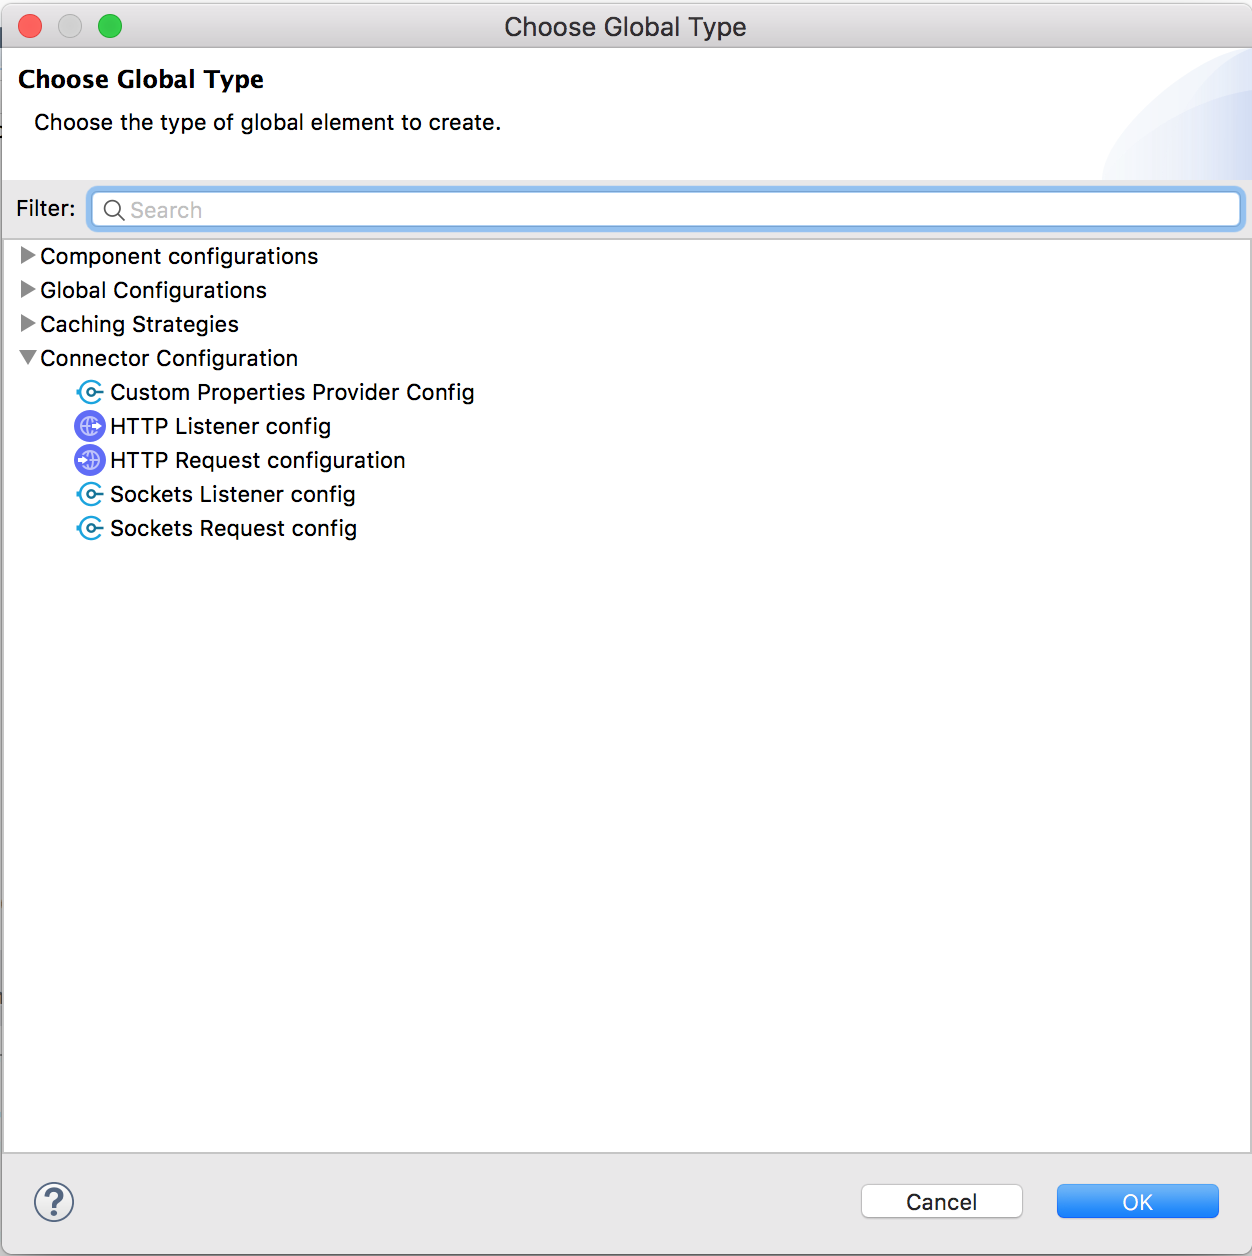
次に、アプリケーション XML ファイルを開き、[Global Elements (グローバル要素)] タブで [Create (作成)] をクリックします。. [Connector Configuration (コネクタ設定)] には、次のようにカスタムモジュールの設定を選択するオプションがあります。

これで、新しいコンポーネントを設定し、モジュールで定義されたプレフィックスのプロパティを使用できるようになりました。