Tutorial: Store and Retrieve Data from Object Store v2
Use this tutorial to configure Anypoint Connector for Object Store (Object Store Connector) in your app so that you can use Object Store v2 to store and view data.
You can send any serializable data as key-value pairs to the object store.
In this tutorial, you:
-
Create a Mule 4.x app in Anypoint Studio 7.x and configure Object Store Connector for Mule 4 in the app.
You then test your app by sending data to the object store and viewing it in Runtime Manager.
Before You Begin
Before you begin this tutorial, you must have:
-
Familiarity with Anypoint Studio, Anypoint Platform, and Runtime Manager
-
If you don’t have an Anypoint Platform login, click Sign up on the Anypoint Platform sign-in page.
-
Anypoint Studio installed on your system. See Download and Install Anypoint Studio
-
An
curlcommand line tool for testingThis tutorial uses the HTTP Listener source to initiate Object Store Connector access and a
curlcommand to send JSON data to your Mule app.Instead of
curl, you can use Postman or browser plugins.
Create a Mule 4.x App with an Object Store in Anypoint Studio 7.x
First, use Studio 7.x to configure an app that includes an HTTP Listener source and Object Store Connector.
Then, deploy the app to CloudHub and use a curl command to send a key and value, and view the key in Runtime Manager.
To configure a Mule 4.x app in Studio 7.x:
-
Start Studio, click File > New > Mule Project, and name the project
osv2-demo. -
Install Object Store Connector for Mule 4:
-
Click the Exchange icon in the toolbar:

-
Enter your Anypoint Platform username and password, if prompted.
-
In Exchange, select Provided by MuleSoft and Connectors, and then search for Object Store Connector:
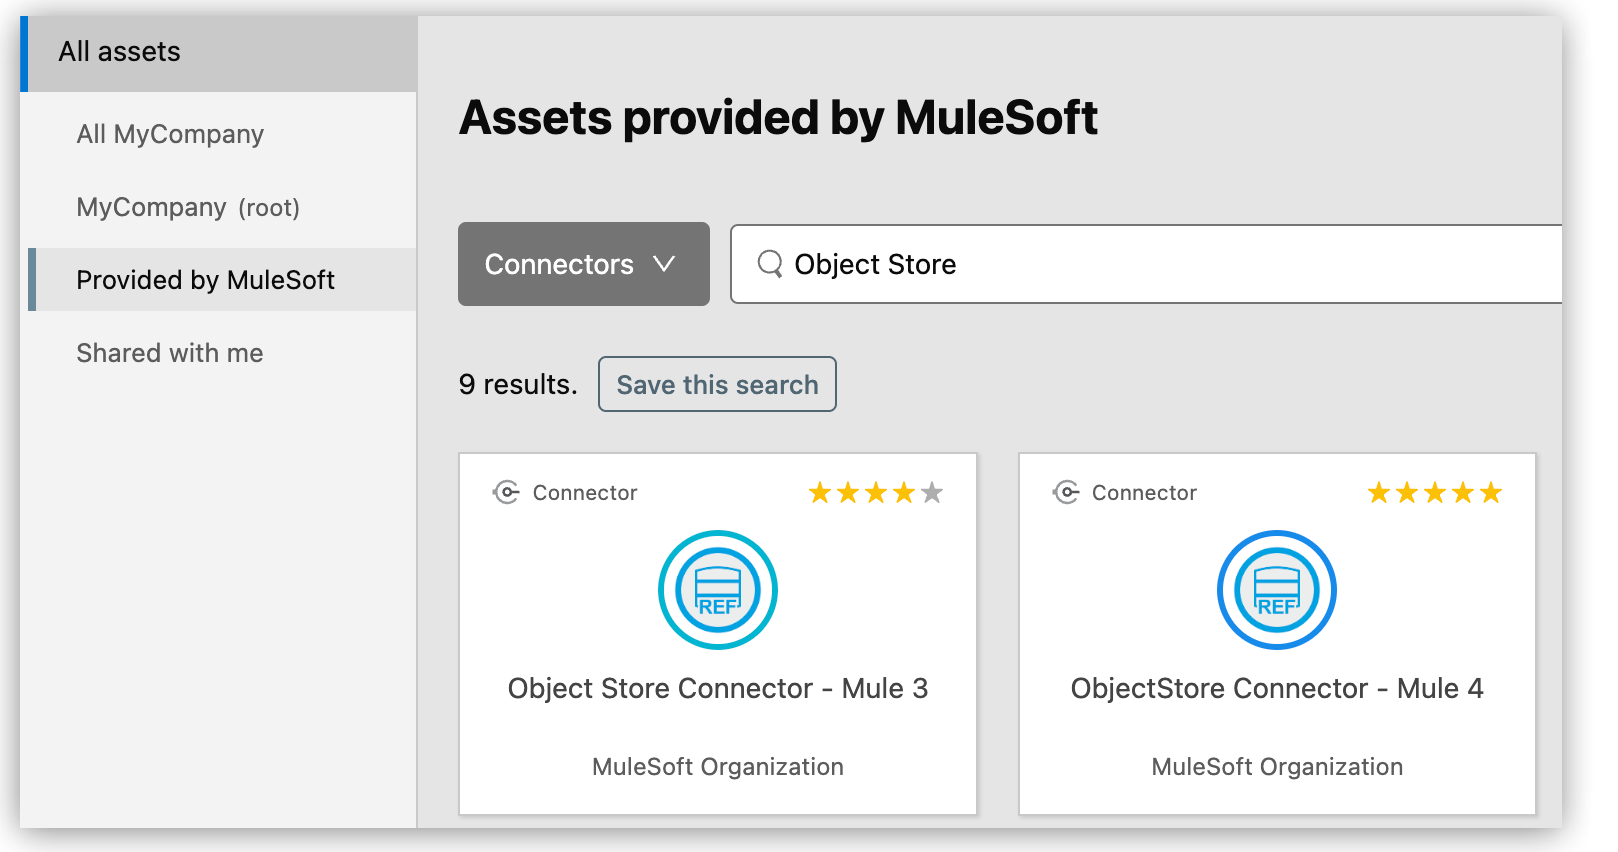
-
Select ObjectStore Connector - Mule 4.
-
Click Add to project:
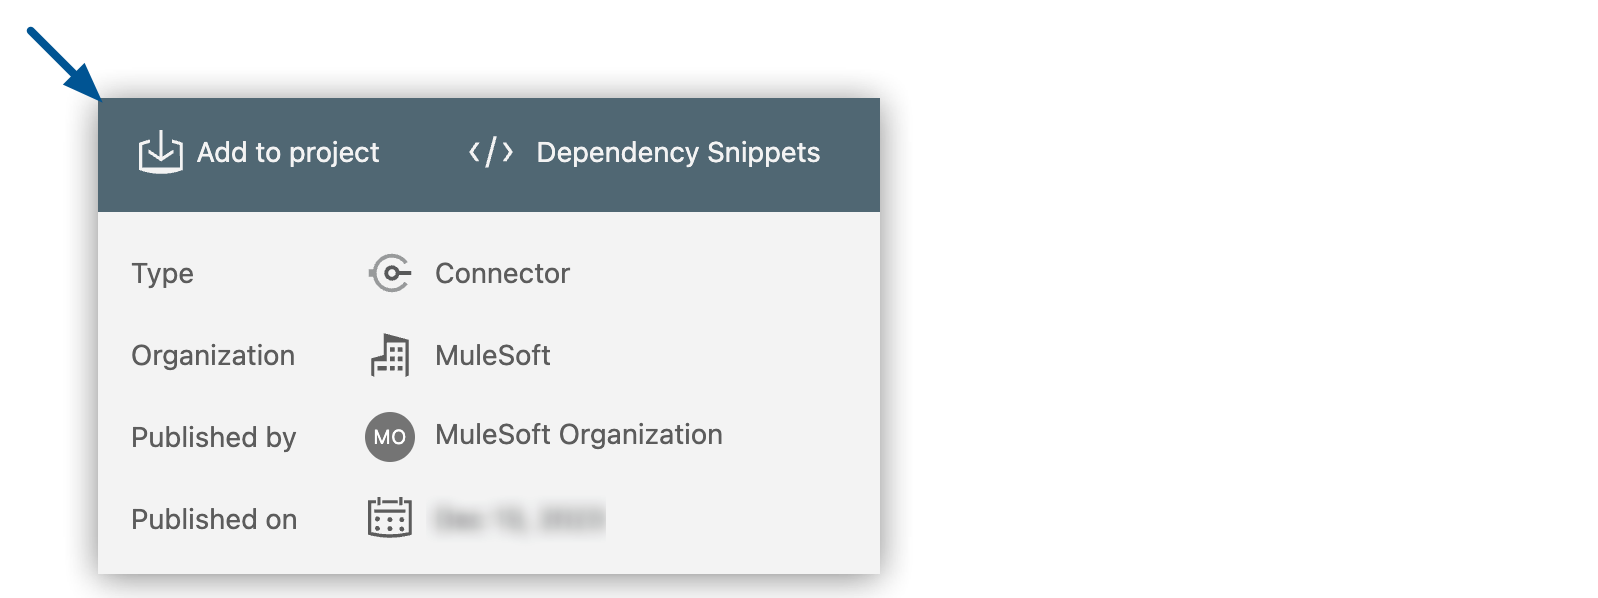
-
At the confirmation prompt, click Proceed and then click OK.
-
-
In the Mule Palette view, click HTTP, and then drag Listener to the Studio canvas:
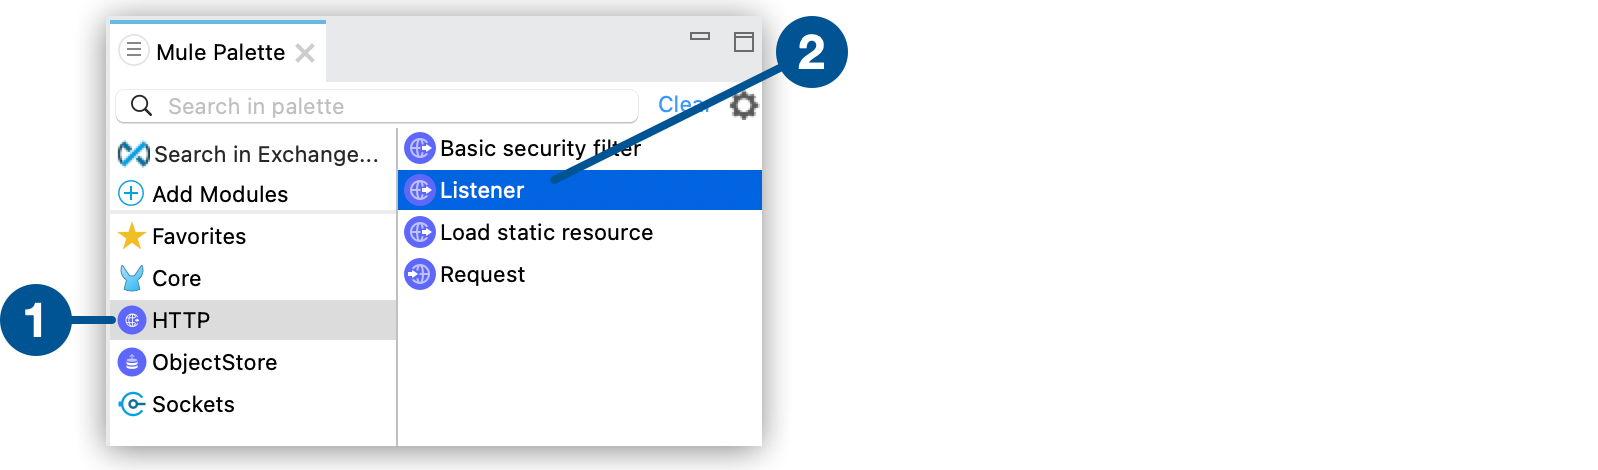
1 HTTP Connector 2 Listener operation -
Click ObjectStore and then drag the Store operation to Listener on the canvas:

-
In the canvas, click Listener.
-
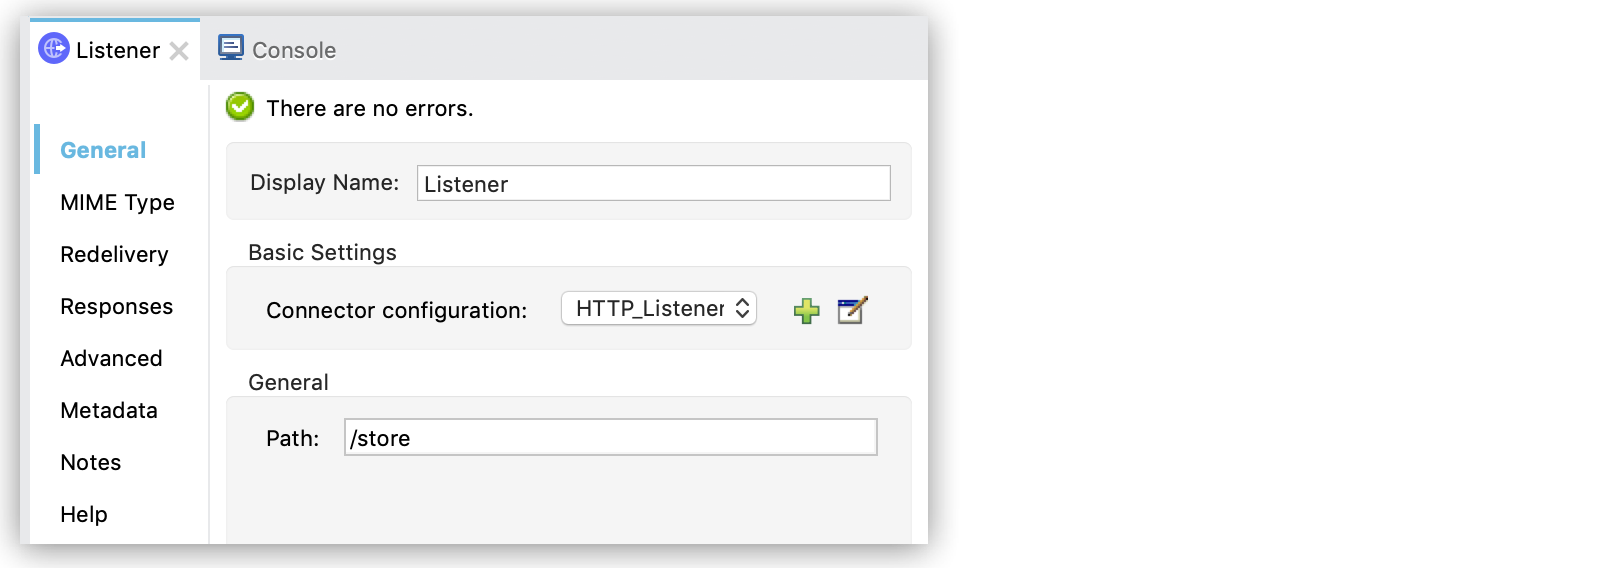
In the Listener properties window, set General > Path to
/store. -
Click the plus icon (+) for the Connector configuration field.
-
In the HTTP Listener Global Element Properties window, verify that the value of Host is
0.0.0.0and Port is8081, and then click OK.The Listener properties window indicates that there are no errors:
-
In the canvas, click the Store operation.
-
In the Store properties window, specify
#[payload.key]in the Key field andpayload.valuein the Value field: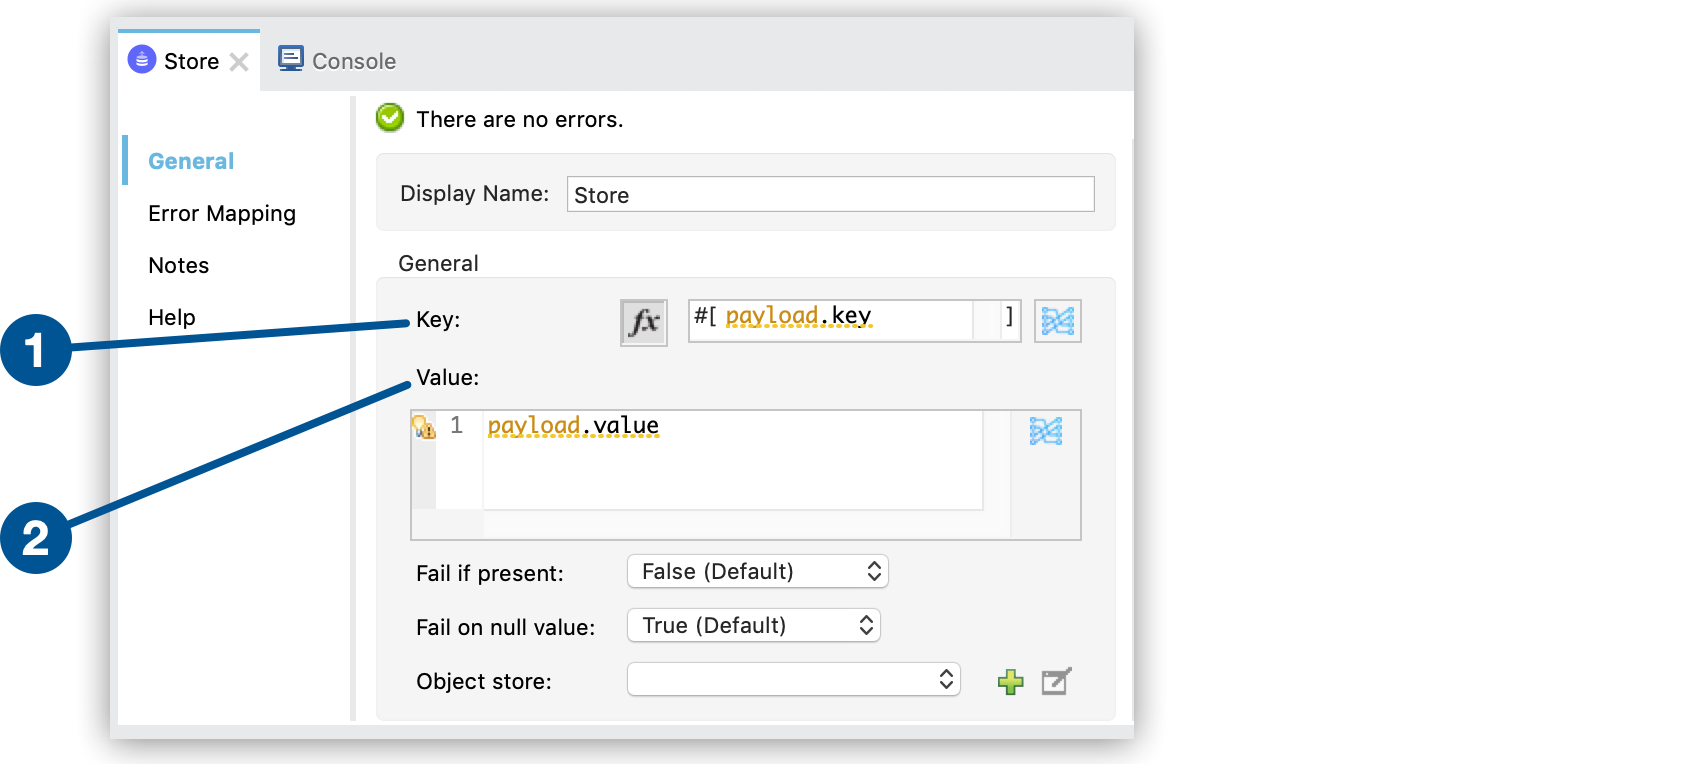
The maximum number of characters in a key is 256.
Object Store v2 for CloudHub doesn’t support using pipe (
|) characters in keys and converts any spaces to plus (+) characters. -
In the canvas, select the flow.
-
In the Flow Configuration properties window, change the name to
Store: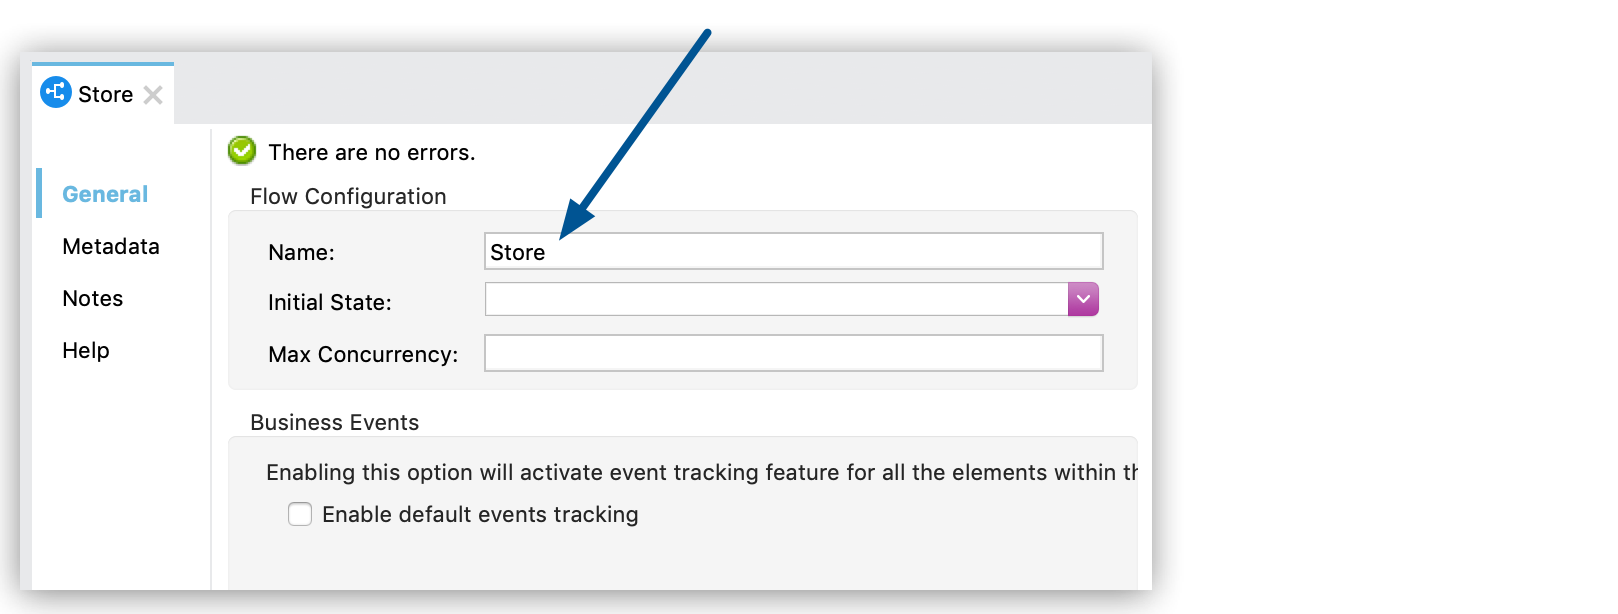
-
In the Mule Palette view, click HTTP and then drag another Listener to the canvas after the first flow.
-
Click ObjectStore and then drag the Retrieve operation after to the Listener in the second flow.
-
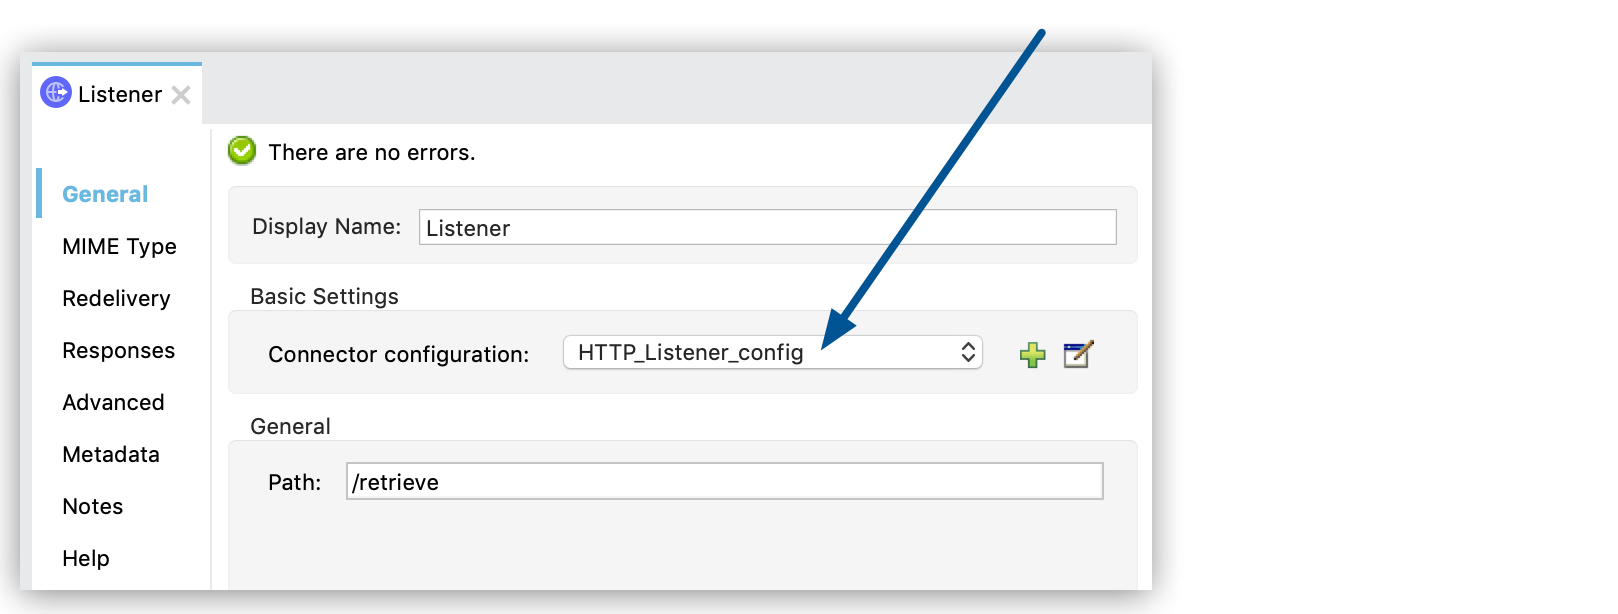
In the canvas, click Listener.
-
In the Listener properties window, set General > Path to
/retrieve. -
In the Connector configuration menu, select the same HTTP_Listener_config option that you set up for the Listener operation in the Store flow:
-
In the canvas, click the Retrieve operation.
-
In the Retrieve properties window, specify
#[attributes.queryParams.key]in the Key field: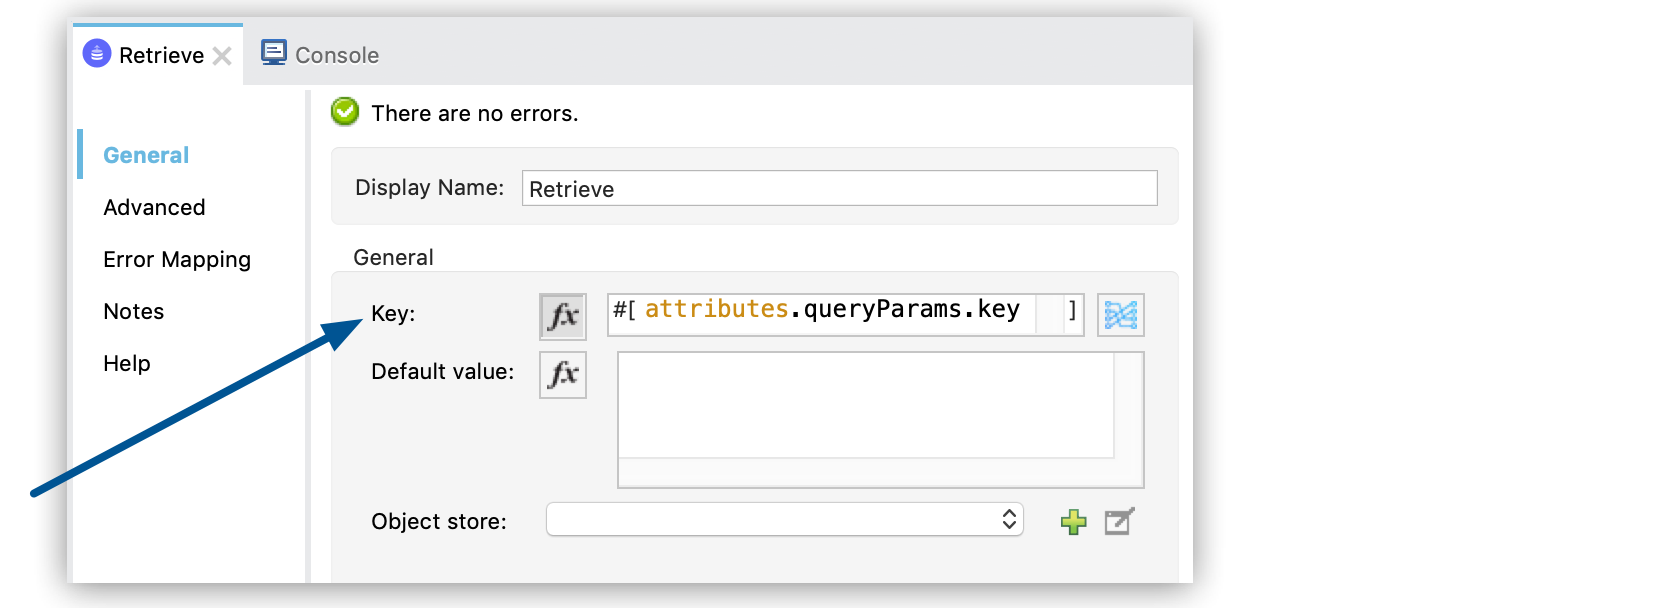
-
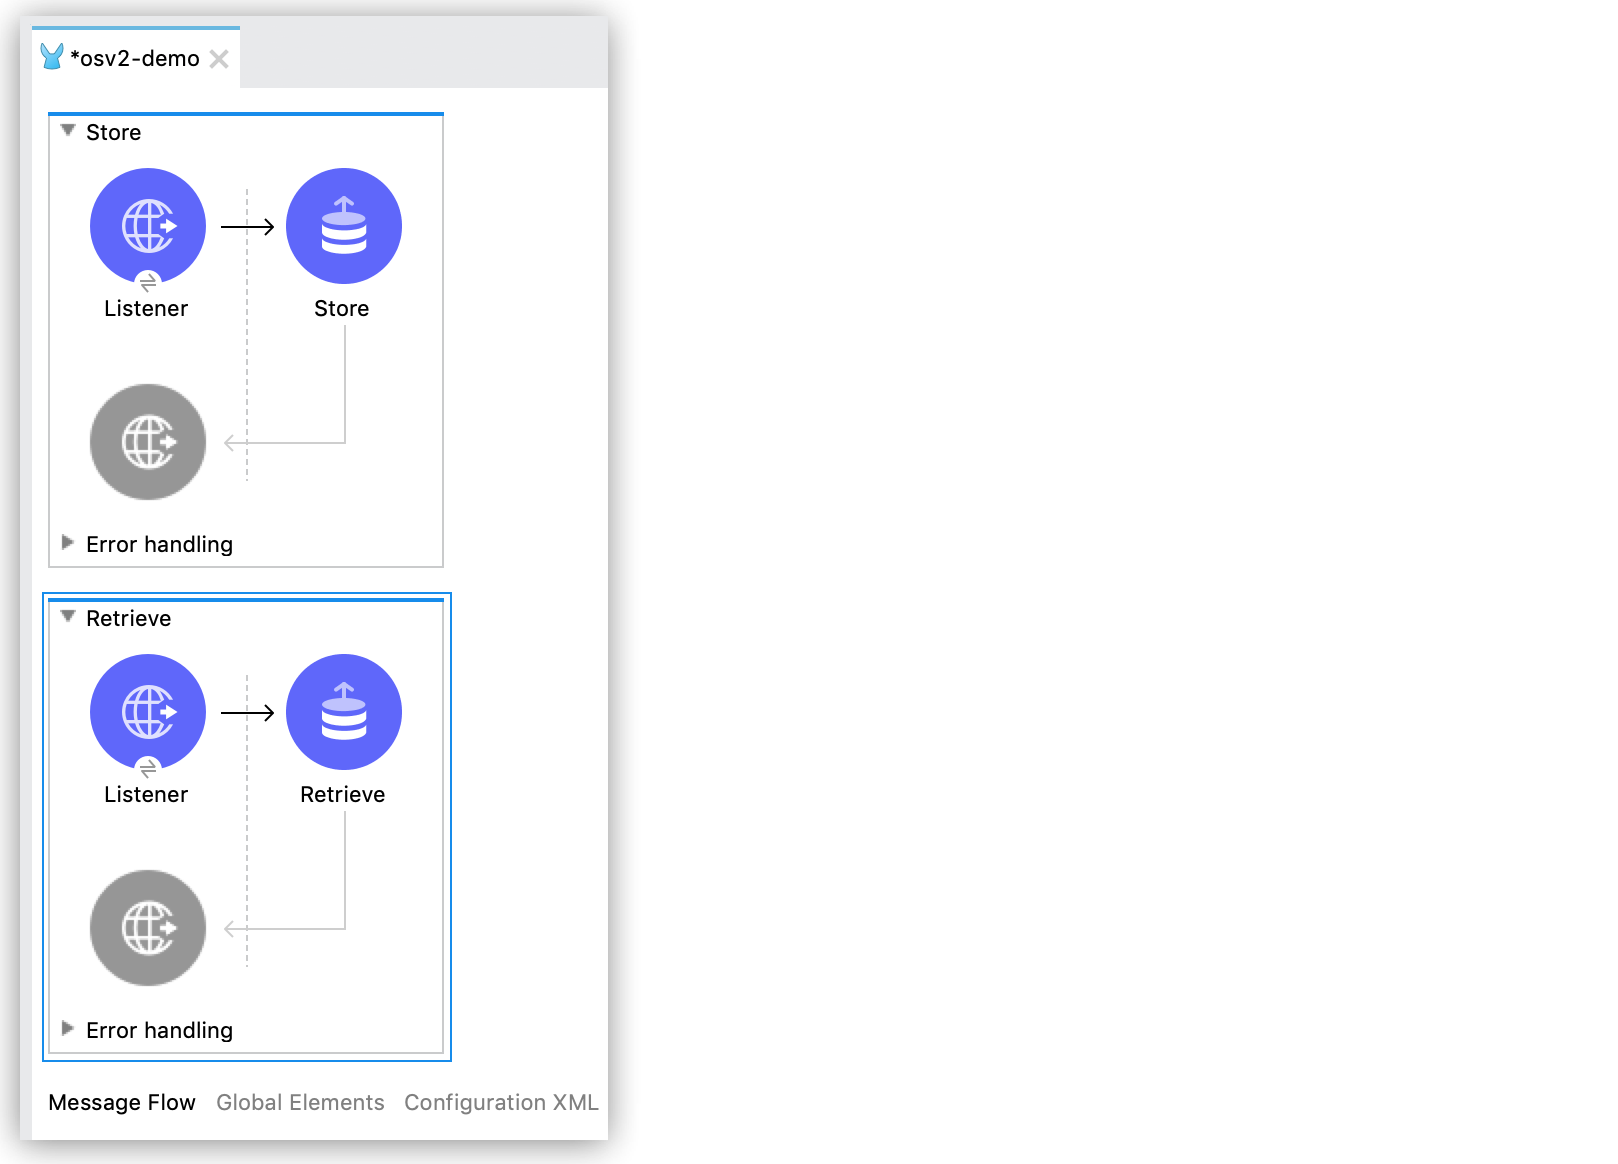
In the canvas, select the second flow and, in the Flow Configuration properties window, change the name to
Retrieve.The flows look like this:
-
In Package Explorer in Studio, right-click
osv2-demoand select Anypoint Platform > Deploy to CloudHub. -
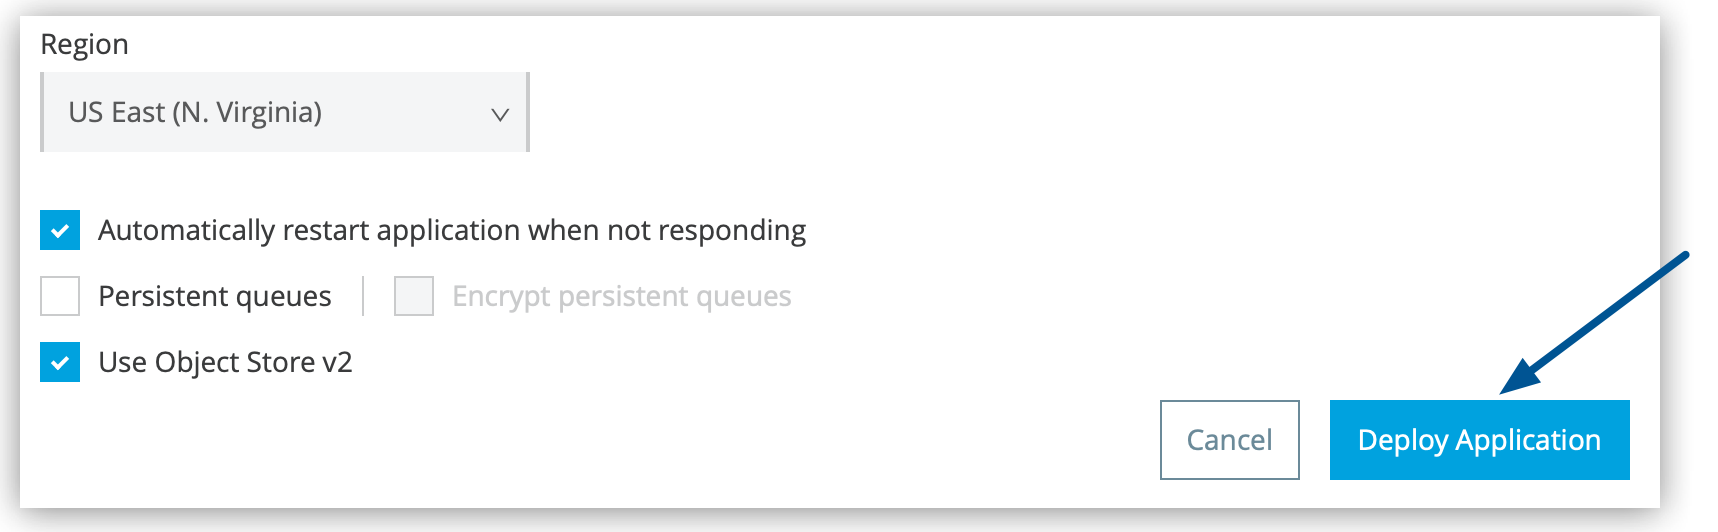
In the Runtime Manager Deploying Application window:
-
Select CloudHub from Deployment Target.
-
Click Deploy Application:
-
-
Click Open in Browser to display the app in Runtime Manager.
If CloudHub displays a permissions error, select a different environment to deploy to.
You have successfully used Studio 7 to configure an app with an object store. Next, you test the connection by submitting REST API commands to the Object Store API and using Runtime Manager to view the results.
Test Your Studio 7.x Application
After you create your app in Studio 7, you can test it by using a curl command to submit a REST API command to the Object Store API.
Then, use Runtime Manager to view the results.
To test your app:
-
In Runtime Manager, click Applications and ensure that the
osv2-demoapp is running. -
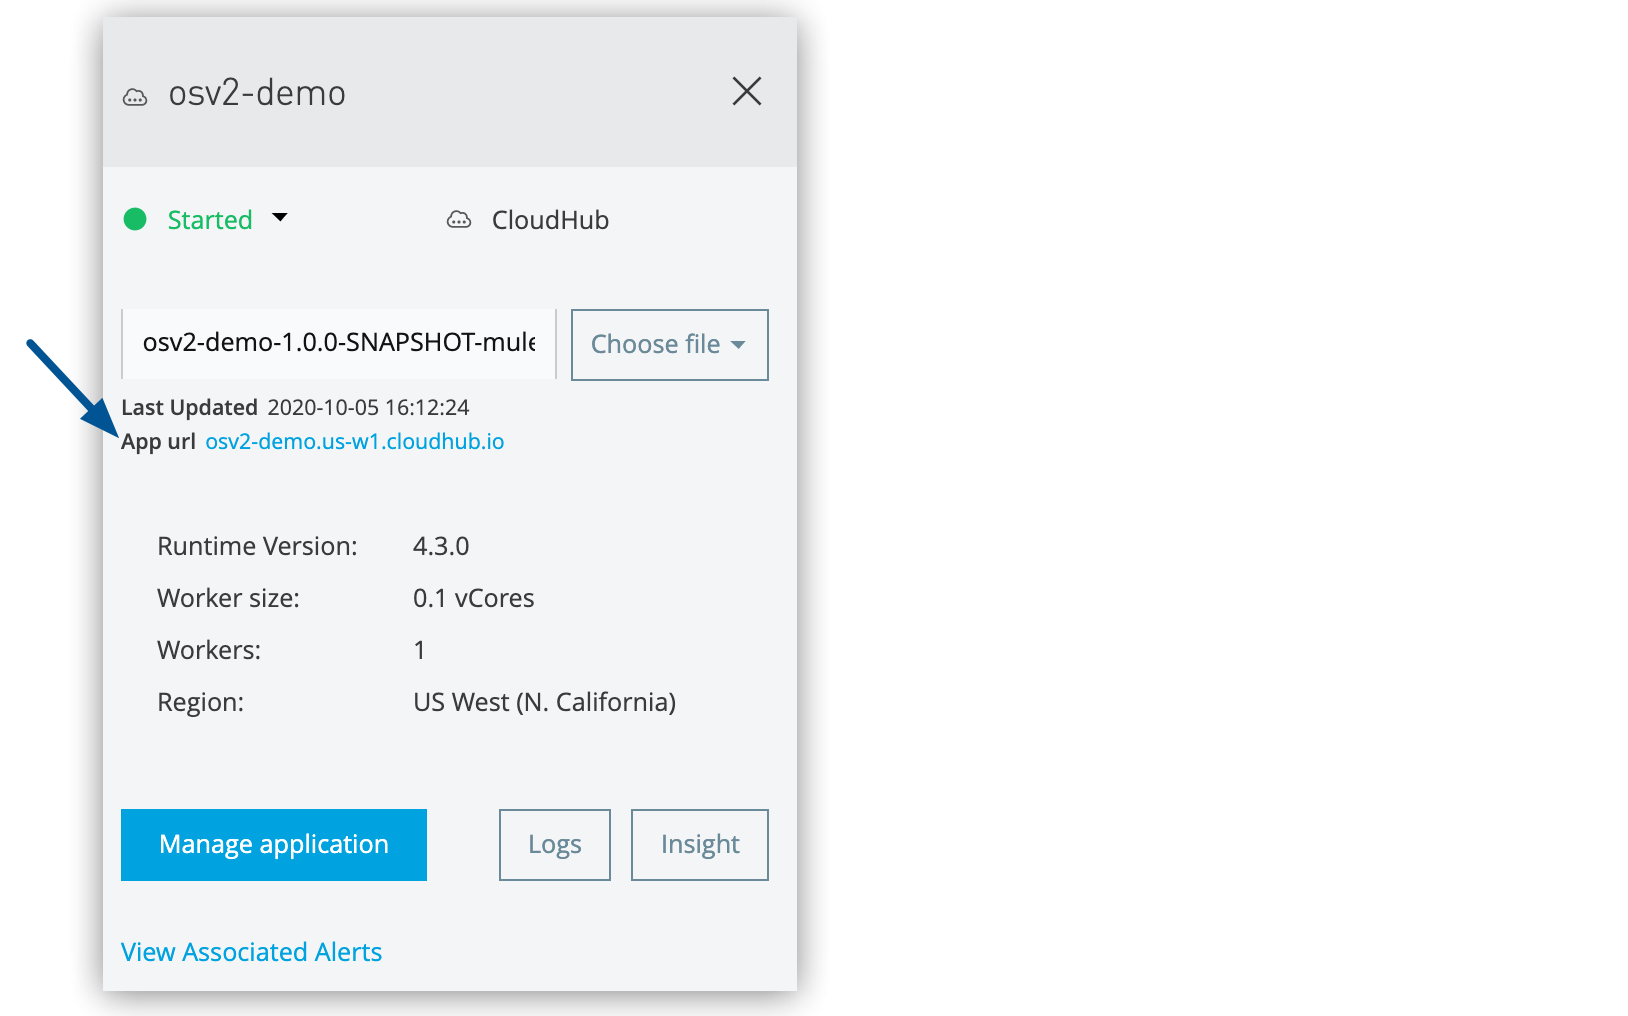
Click the Status column for the
osv2-demoapp to display its details. -
Copy the App url value:
-
From the command line, run this
curlcommand, replacing APP-URL with the App url value that you copied from Runtime Manager:$ curl -X POST -H "Content-Type: application/json" -d '{ "key": "myKey", "value": "OSv2 Test" }' "http://APP-URL/store";echoThe output from this command displays the key-value pair that you sent to the object store:
{ "key": "myKey", "value": "OSv2 Test" } -
In Runtime Manager, click Manage application in the details pane for the application:
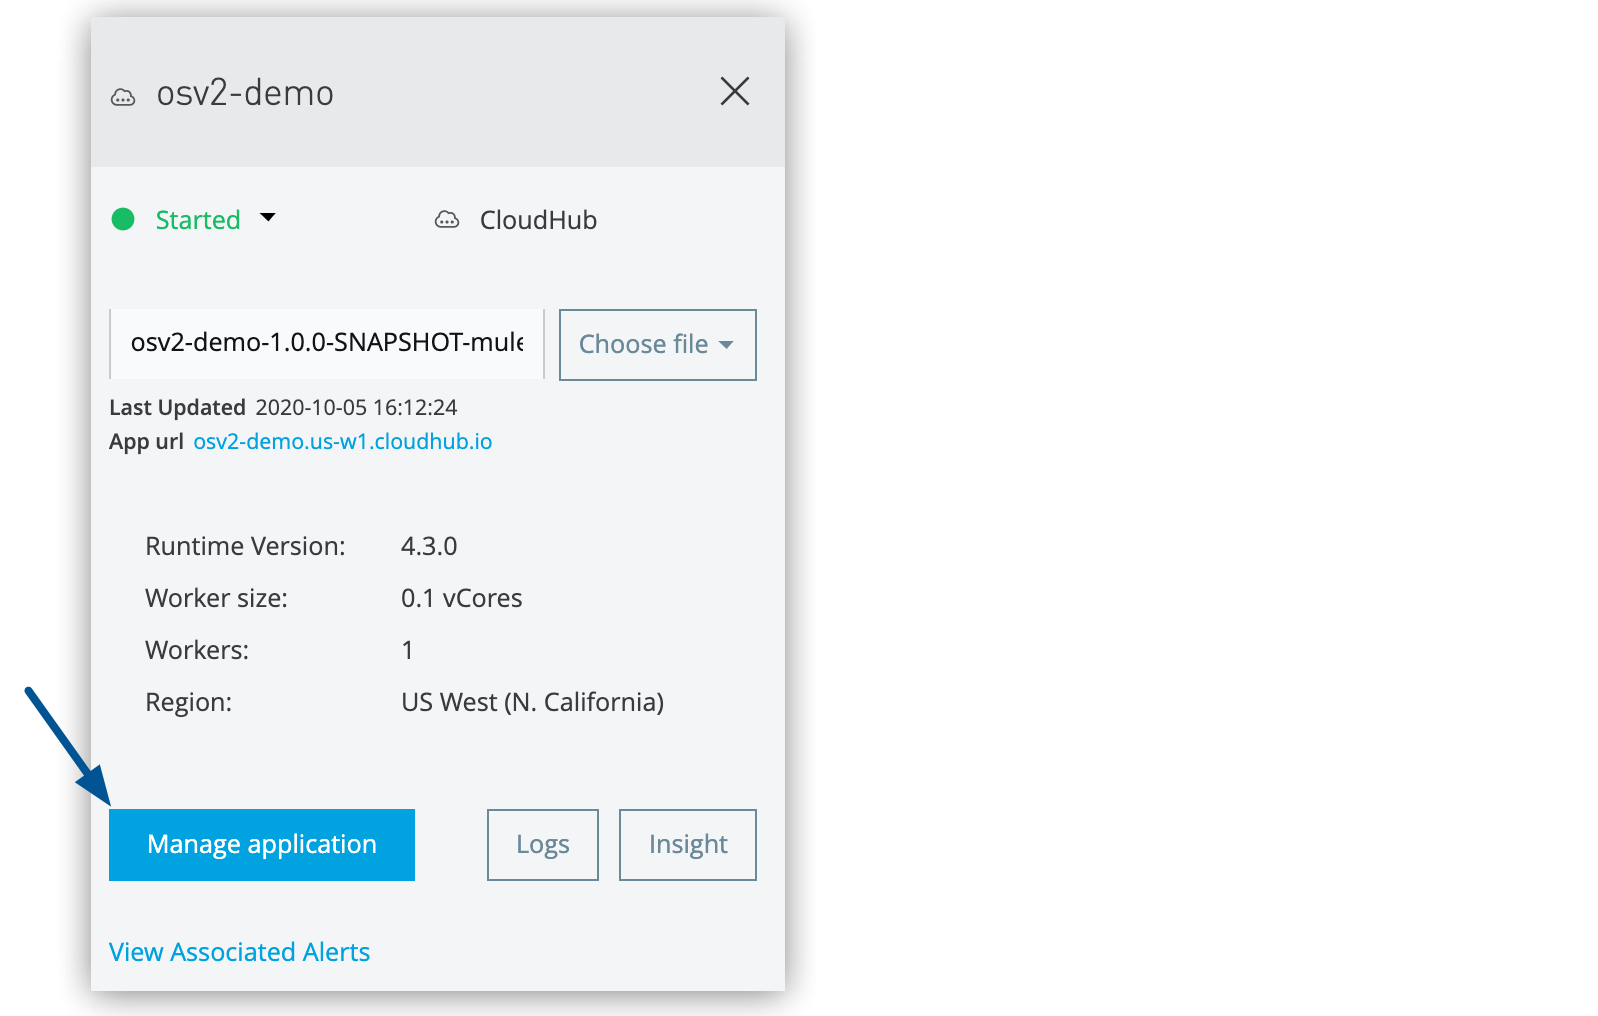
-
Select Object Store from the sidebar.
-
Click the object store, the partition, and then the key:
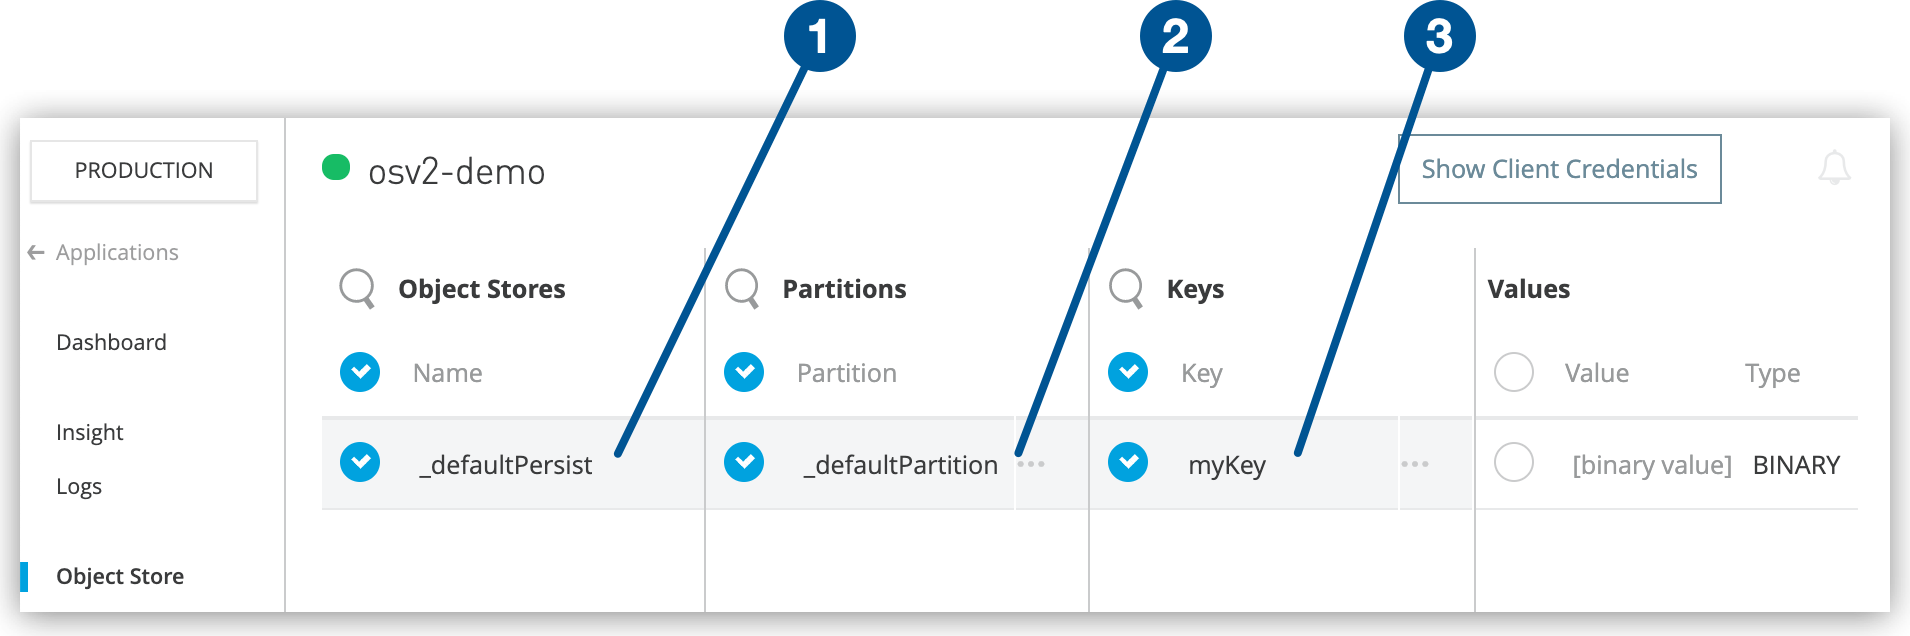
The
myKeykey that you sent fromcurlappears in the object store with the value of[binary value] BINARY. The value is binary because Mule 4 wraps values in a Mule object, which causes them to be visible only as binary in Anypoint Platform. -
From the command line, run this
curlcommand to view the value for the key, replacing APP-URL with the App url value that you copied from Runtime Manager:curl http://APP-URL/retrieve?key=myKey;echoThe output from this command displays the value for the key:
"OSv2 Test"
You have successfully tested your app using a curl command to store and retrieve a key-value pair in the object store and viewed the results in Runtime Manager.
Example App XML for Studio 7.x
Click Configuration XML in Studio and compare your XML to this example. Make corrections if necessary.
<?xml version="1.0" encoding="UTF-8"?>

<mule xmlns:os="http://www.mulesoft.org/schema/mule/os" xmlns:http="http://www.mulesoft.org/schema/mule/http"
	xmlns="http://www.mulesoft.org/schema/mule/core"
	xmlns:doc="http://www.mulesoft.org/schema/mule/documentation" xmlns:xsi="http://www.w3.org/2001/XMLSchema-instance" xsi:schemaLocation="http://www.mulesoft.org/schema/mule/core http://www.mulesoft.org/schema/mule/core/current/mule.xsd
http://www.mulesoft.org/schema/mule/http http://www.mulesoft.org/schema/mule/http/current/mule-http.xsd
http://www.mulesoft.org/schema/mule/os http://www.mulesoft.org/schema/mule/os/current/mule-os.xsd">
	<http:listener-config name="HTTP_Listener_config" doc:name="HTTP Listener config" doc:id="24b76402-e396-4228-a48e-fcd9ac651488" >
		<http:listener-connection host="0.0.0.0" port="8081" />
	</http:listener-config>
	<flow name="Store" doc:id="e7d253f9-534b-41df-a189-de815a42facb" >
		<http:listener doc:name="Listener" doc:id="805c84ec-35d4-4753-846b-49b108044df7" config-ref="HTTP_Listener_config" path="/store"/>
		<os:store doc:name="Store" doc:id="d4800501-0fa8-4472-a23e-5213f04155e8" key="#[payload.key]">
			<os:value ><![CDATA[#[payload.value]]]></os:value>
		</os:store>
	</flow>
	<flow name="Retrieve" doc:id="1db04ffc-76c1-48b4-ba33-57807a6404a8" >
		<http:listener doc:name="Listener" doc:id="faed2a0f-3005-4244-a6c6-77407b34d53a" path="/retrieve" config-ref="HTTP_Listener_config"/>
		<os:retrieve doc:name="Retrieve" doc:id="3f907cfc-59e5-49cd-879a-7b2675d488a5" key="#[attributes.queryParams.key]">
		</os:retrieve>
	</flow>
</mule>