Analyzing Problems with Analysis Packages
After a business process runs locally in RPA Builder, you can upload it to RPA Manager, move it to the test phase, run it on an RPA Bot, and start a long-term test. Run tests for at least three days before using the business process productively. If menu runs contain errors, RPA Manager generates Analysis Packages that you can download.
The Analysis Package provides detailed information on the run in the same format as if you had executed the Workflow locally. Use this information to fix any errors. Elements, which have caused an error or a warning, are marked with an expandable red or yellow frame. This frame contains more detailed information concerning the run results. Use the Analysis Packages to understand and fix errors for each failed Workflow run. If you see the same error repeatedly, fix the error once and start collecting results again.
Download and Analysis Package
To download an Analysis Package for a Workflow that throws an error:
-
In RPA Manager, open the Process Management module.
-
Open the process for which you want to download the Analysis Package.
-
Start a test and wait a few minutes for the test to complete.
If you don’t have any test plans available, click Create new test plan and follow the instructions to create one.
-
Click Update to refresh the test run results.
-
Click the result number in the Failure column.
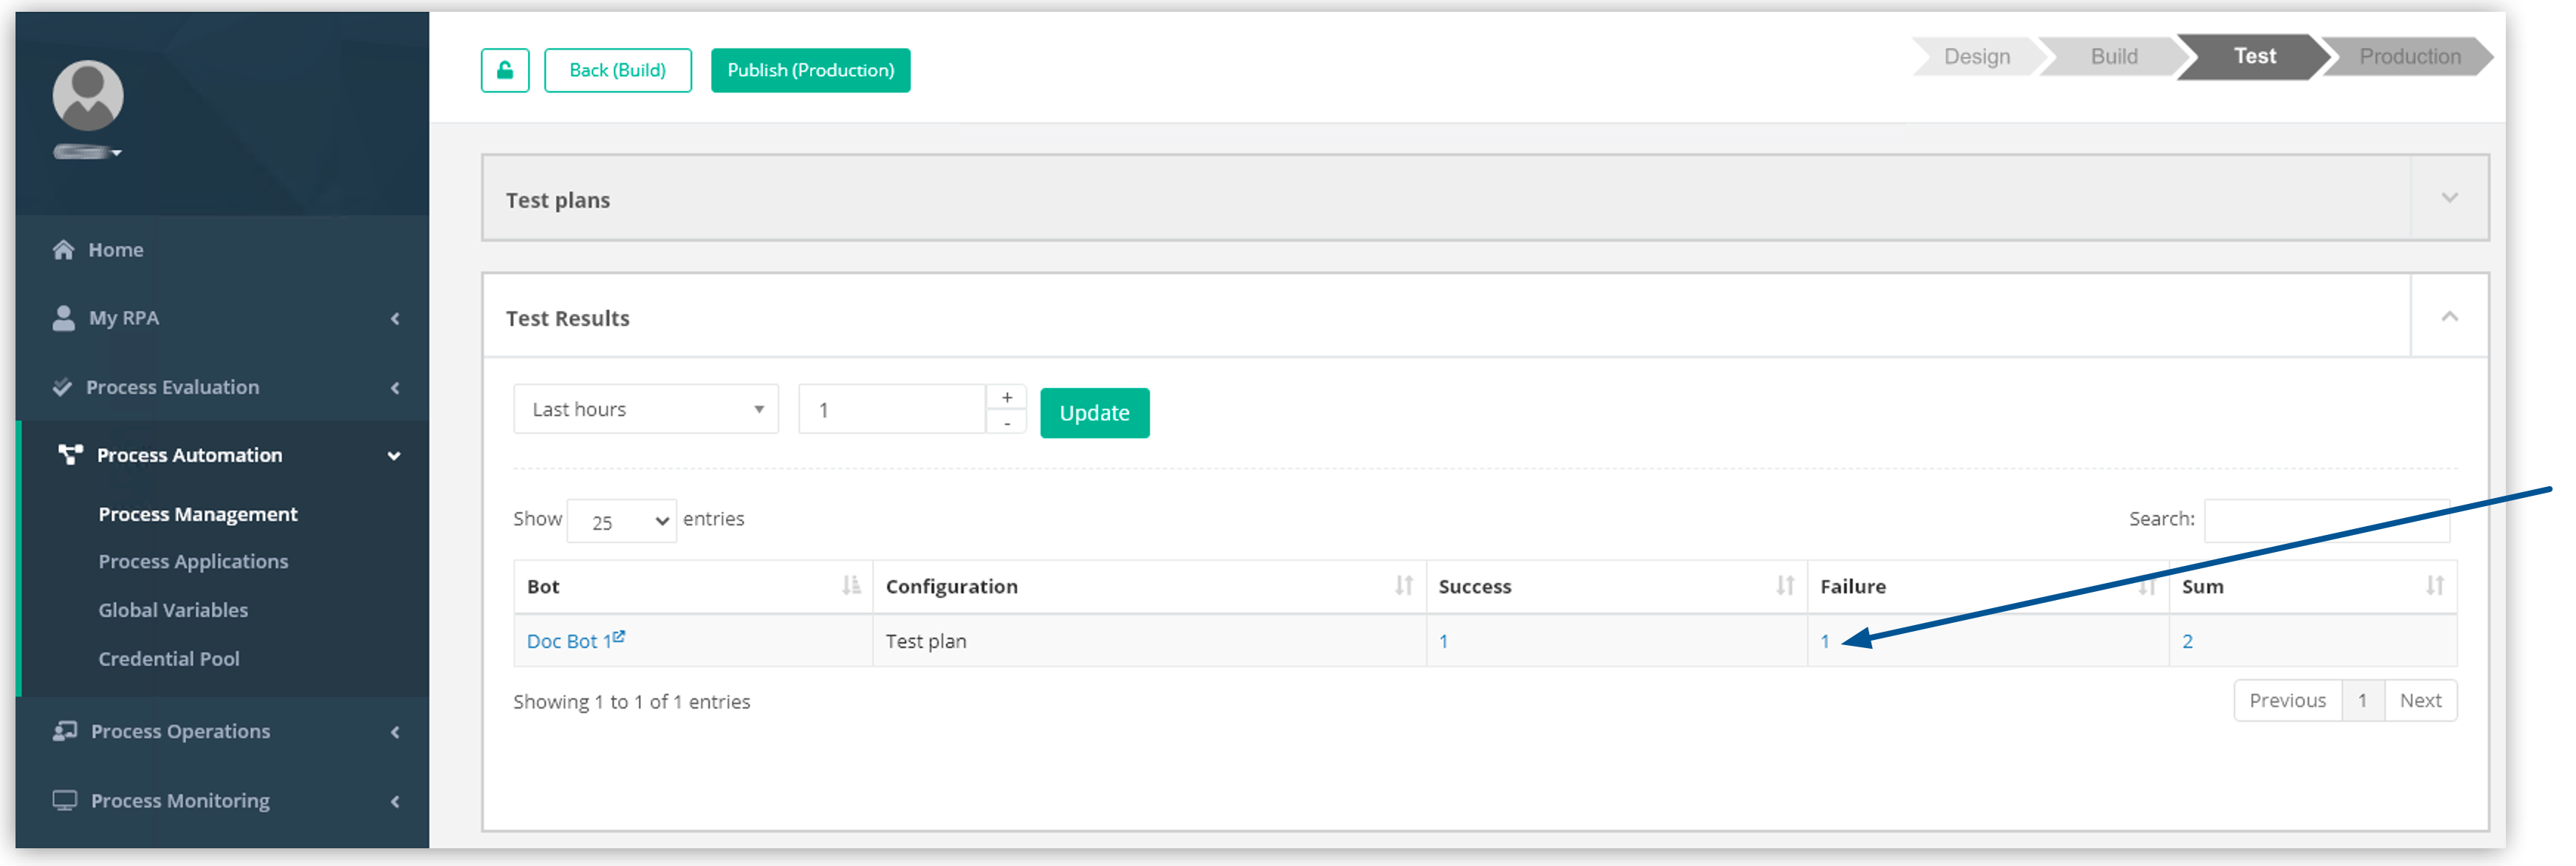
If there are no errors, the Failure column shows
0results and there’s no Analysis Package available to download. -
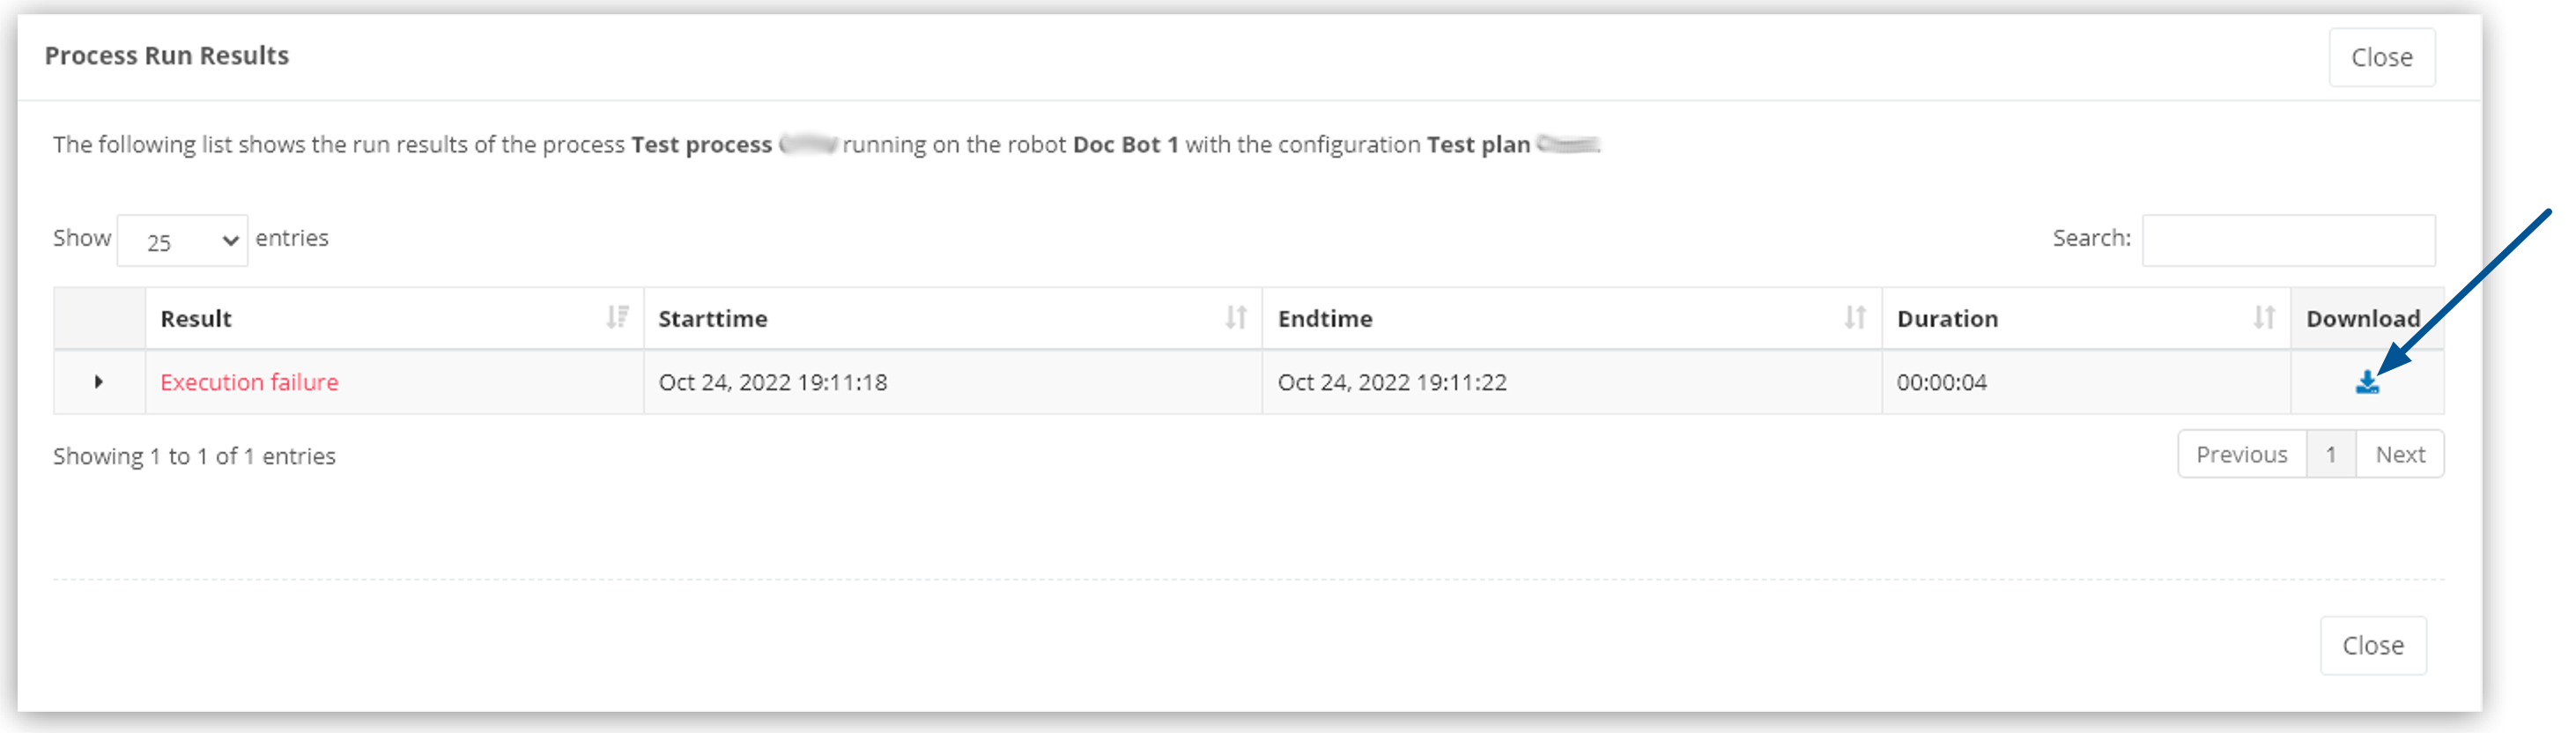
Click the Download button.
Load and Analysis Package
To load an Analysis Package:
-
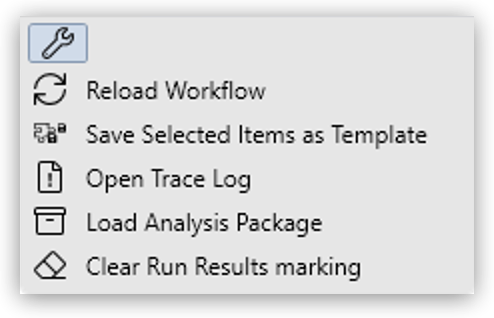
In RPA Builder, open any Workflow to make the Workbench menu appear.
-
In the Workbench menu, click Tools.
-
Click Load Analysis Package and select the location of the Analysis Package file.
Analysis Package Directory
After you start the workflow locally for the first time, either with the Run Workflow button or by pressing F7, RPA Builder creates the custom directory. The path to the custom directory is: C:\Users\[UserName]\Documents\MuleSoft\Cache\[Process-GUID]\[Activity- GUID]\Robot\custom\.
Right-click on the Workflow tab and select Open Workflow Location to open the C:\Users\[UserName]\Documents\MuleSoft\Cache\[Process-GUID]\[Activity- GUID]\ folder.
You can add extra data like screenshots or log files to the Analysis Package by saving them to the project’s custom folder. RPA Manager packs all files from this folder into the Analysis Package in case of an error.
Note that when an RPA Bot executes the Workflow, it saves the Analysis Package on the machine on which the bot is running.