Exporting Mule Projects
 Cloud IDE
 Desktop IDE
A Mule application is an integration or implementation application that runs on Mule runtime engine. To share the application across different teams, or to deploy the application elsewhere, you can export and package a snapshot of Mule application resources. Additionally, you can publish a Mule project to Exchange as either a template or an example.
Shareable JAR
A shareable JAR file is lightweight, packaging only the source code of the application. The source code includes configuration files but not libraries or other dependencies required for your application to run and deploy successfully.
The shareable JAR includes:
-
The configuration XML and other files in the
srcfolder, including resource files -
mule-artifact.json -
pom.xml
The IDEs generate the dependencies automatically based on the settings in the POM file (pom.xml). You or your teammates can import the JAR file and continue developing in Anypoint Code Builder or Anypoint Studio (Studio).
To import a shareable JAR, see Import a Shareable Project JAR File into the Desktop IDE and Import a Shareable Project JAR File into the Cloud IDE.
If you are migrating from Cloud IDE to Desktop IDE, see Migrate a Project from Cloud IDE to Desktop IDE for migration options and steps.
Deployable JAR
A deployable JAR file contains the compiled code and all dependencies. For a deployable JAR, you can select Include project sources while exporting the project so the JAR can be opened in Anypoint Code Builder or Studio and also used for deployment. When this option is selected, the JAR also includes the configuration XML and other files in the src folder (including resource files), mule-artifact.json, and pom.xml, the same project sources as in a shareable JAR.
You can deploy the JAR file to any supported environment, such as CloudHub or on-premises. You don’t need to create a deployable JAR file to deploy to CloudHub. * To deploy an app directly from Anypoint Code Builder, see Deploying Mule Apps to CloudHub and CloudHub 2.0. * To deploy a JAR file to CloudHub, see Deploy to CloudHub.
For more information on deployment options, see Runtime Plane Hosting Options and Deploy Mule Applications.
Export Mule Project
To create a deployable or shareable JAR file from your project:
-
Open the configuration XML file in a project for the Mule application to export.
-
Open the Command Palette.
Show me how
-
Use the keyboard shortcuts:
-
Mac: Cmd+Shift+p
-
Windows: Ctrl+Shift+p
-
-
In the desktop IDE, select View > Command Palette.
-
In the cloud IDE, click the
 (menu) icon, and select View > Command Palette.
-
-
Select the following command:
MuleSoft: Export Mule Project -
Alternatively, right-click the configuration XML file in the Explorer and select Export Mule Project.
-
In the Export Mule Project dialog, under Select an Export Type choose Deployable JAR or Shareable JAR.
For Deployable JAR, you can select Include project sources.
-
Set the file name and location for the exported file.
-
Click Export.
-
The terminal window in the IDE opens automatically to provide the status of the packaging process, which includes execution of the export command, a scan for the project to export, and the packaging of the project snapshot into a JAR file.
Find or download the JAR
When packaging completes, find or download the JAR file by following the prompts that appear in the IDE:
-
In the desktop IDE, click Open Folder to open the directory that contains the JAR file in the Explorer view.
-
In the cloud IDE, click Download File to download the JAR file to a directory on your local machine:
-
For a JAR file that is 32 MB or smaller, the IDE automatically downloads the file to your Downloads folder.
-
For a JAR file that is larger than 32 MB, the IDE disallows downloads to built-in folders that contain system files, such as the Downloads, Desktop, or Documents folder.
-
Select a folder for the download.
-
At the prompt, click View files to allow the site to view the files in the folder you select.
-
Click Save Changes.
-
-
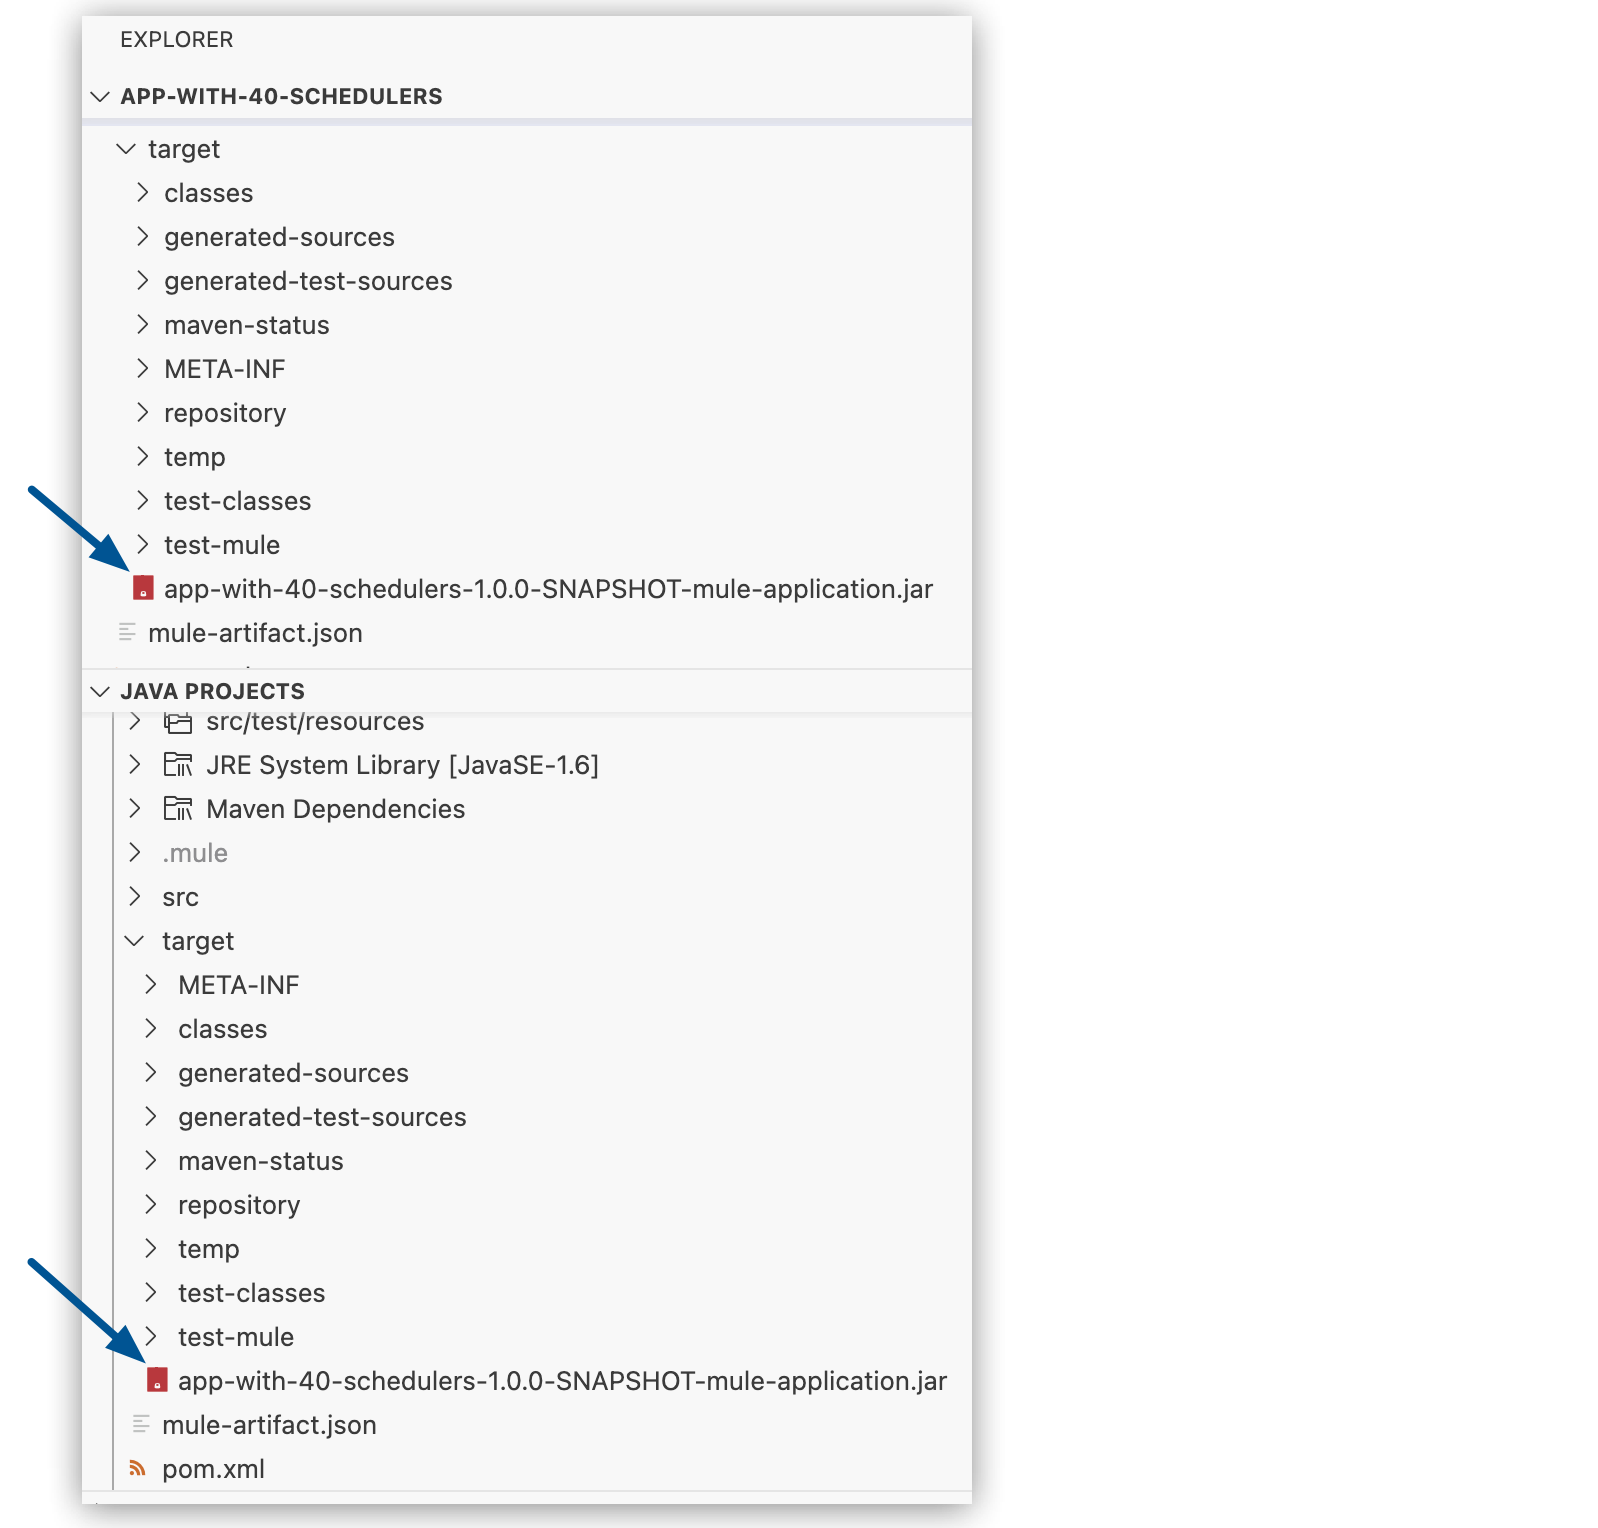
The terminal window in the IDE also provides the path to the JAR, in the /target directory under your project folder. In the desktop IDE, you can find the JAR file in the Explorer, under Java Projects:
Publish a Mule Project to Exchange
You can publish a project as either a template or an example.
A project template is a pre-configured, reusable project setup that serves as a starting point for developing Mule applications. These templates provide a structured framework that includes common configurations, example code, and best practices.
A project example is a sample application that demonstrates specific functionalities or use cases. These examples provide practical, real-world scenarios to help developers implement various features and integrations.
To publish a Mule project to Exchange as either a template or an example:
-
In Anypoint Code Builder, on the Explorer view, right-click on your root XML file, for example,
/src/main/mule/flights-implementation.xml. -
Select Publish Mule Project to Exchange from the options menu.
-
In the Publish to Exchange form, select an Asset Type.
Select either an Example or a Template.
-
Ensure that the following fields contain the correct values for your asset:
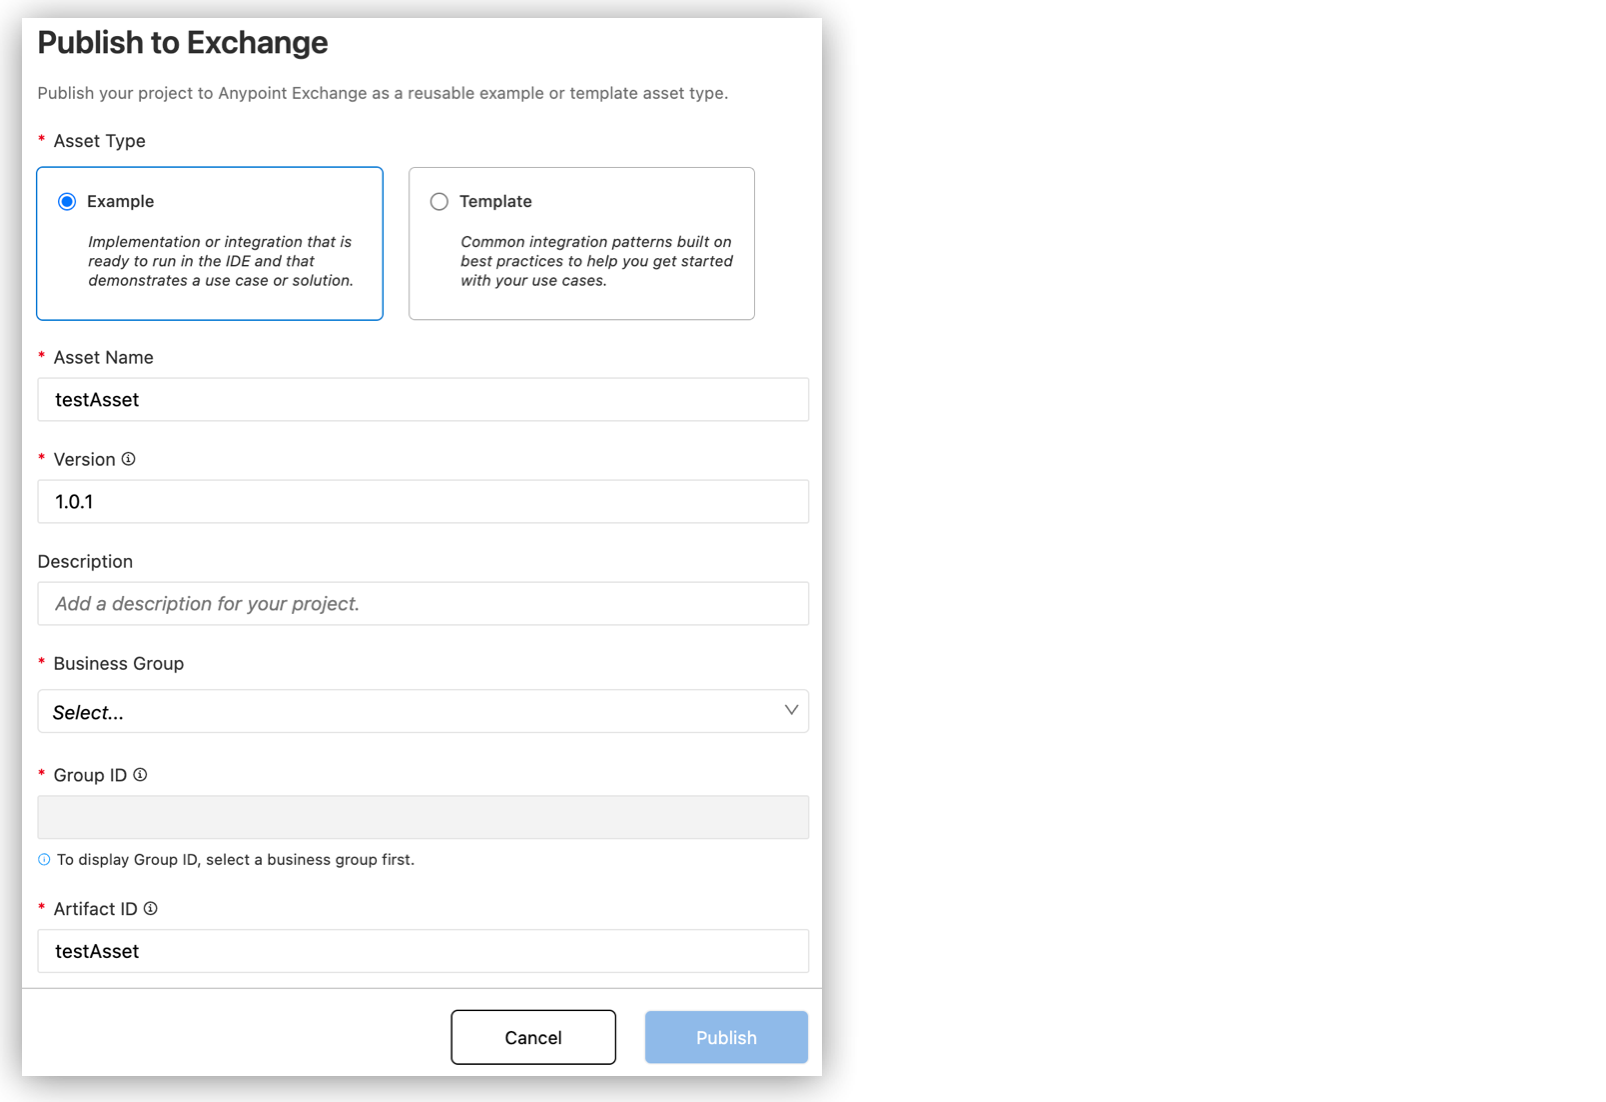
Field Name Field Value Asset Name
Name that Exchange uses to identify the published project.
Version
Version number to display in the Version section of the page that Exchange creates for the asset.
If you are publishing the asset for the first time, you can use any valid number. A typical starting version is
1.0.0.If you are republishing the asset, Anypoint Code Builder automatically populates the Version field. You can change this number, but the republish fails if you use a version number that has already been used to publish a stable version of this asset.
Description
Optional description of your asset.
Business Group
Business unit in Anypoint Platform that the asset belongs to.
Group ID
ID of the business unit in Anypoint Platform that the asset belongs to.
Artifact ID
Unique ID that Exchange uses to identify the published asset. Use the default value unless a published asset has the same ID.
-
In Advanced Options, make sure that these fields contain the correct values for your asset:
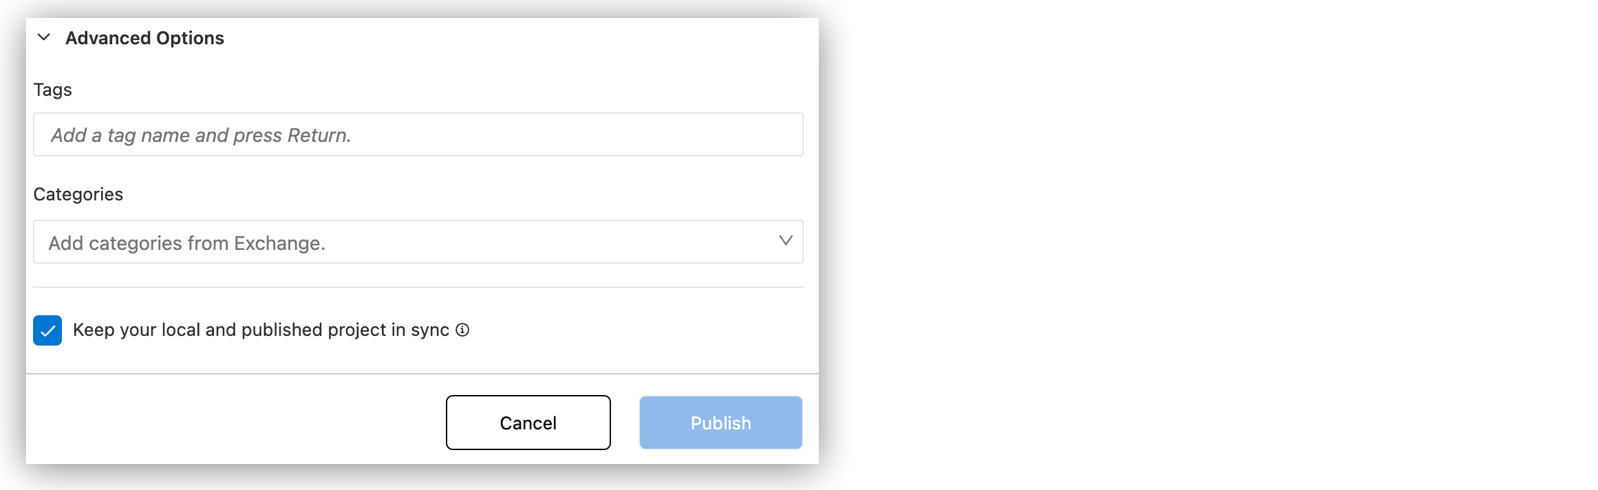
Field Name Field Value Tags
Descriptors that Exchange uses to search for assets.
Categories
Category that was previously added to Exchange. Refer to the Managing Categories documentation to learn how to create Categories for your organization.
-
In Advanced Options, select the Keep your local and published project in sync checkbox to sync your local project information with the data you entered. If deselected, your project deploys with the provided data, but your local project doesn’t include the updated information.
-
Click Publish.
The publication of your project as a new asset begins. After publication succeeds, select View Asset to view the asset in Exchange.