User Interface
Following are the descriptions of every section and element in the RPA Recorder UI.
Home
The Home section contains the main controls of RPA recorder. If RPA recorder is started from RPA Manager, the existing BPMN of the process also shows here.

Recording
The Recording Toolbar appears on the screen when RPA Recorder starts recording a process and contains the following buttons:
| Icon | Name | Description | Hotkey |
|---|---|---|---|
|
Start Recording |
Starts a new recording session. |
|
|
Pause Recording |
Pauses the current recording session. |
|
|
Finish Recording Session |
Finishes the current recording session and triggers the generation of Documents. |
— |
|
Take Screenshot |
Opens the Define Screenshot dialog. |
|
|
Add Comment |
Opens the Add Comment dialog. |
|
|
Add Activity |
Opens the Add Activity dialog. |
|
Toast Notifications While Recording
When a recording state changes, a toast notification appears indicating current state. The notification stays for two seconds and disappears automatically.
Define Screenshot
Before you take a screenshot manually, the screen automatically freezes. You can select a method for taking manual screenshots:
-
Press
F9while recording to open the Define Screenshot window.
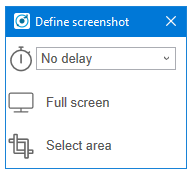
-
Select a freezing delay (in seconds), or no delay, from the dropdown menu.
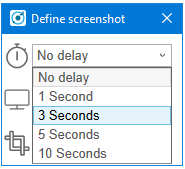
| The timer delay mechanism takes effect regardless of the chosen screenshot method. |
Add Comment
You can add a comment as part of the recording to enrich the documentation with insight about a specific step.
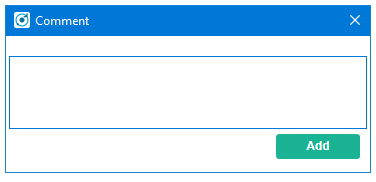
| Pause the recording before adding a comment. If you open the Add Comment window while the recording is running, it pauses automatically. |
Add Activity
You can manually add an activity as part of the BPMN recording. Enter a name for the activity and select its type.
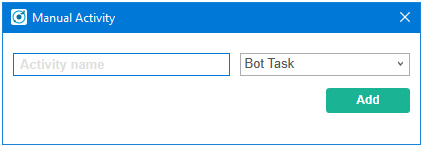
Possible activity types are:
-
Web Task
-
Bot Task
-
User Task
When you create a Web Task, you can choose to continue using the session of the last closed Web Task.
For User Tasks, RPA Recorder does not save documentation. You must enter a description.
To continue recording, add a Bot Task.
| Pause the recording before adding an activity or changing the creation mode of the activities. If you open the pop-up using the respective hotkey while the recording is running, the recording automatically pauses. |
Web Recording Browser
Use the Web Recording Browser to record website navigation actions. It behaves as a regular web browser and enables you to:
-
Automatically identify elements of a website with which you interact and determine their XPath and attributes.
-
Save your attribute selection of a web element to reuse it when recording the same web elements on a website.
-
Record mouse hover positioning during web navigation.
Adding a Web Task opens the Web Recording Browser. When you add more than one Web Task, you can select Continue with already existing web session to display the last loaded page from the previous Web Task and continue from that point.
Otherwise, you can enter a URL in the address bar of the browser, and it loads this URL when you press Enter or click the Go button (![]() ).
).
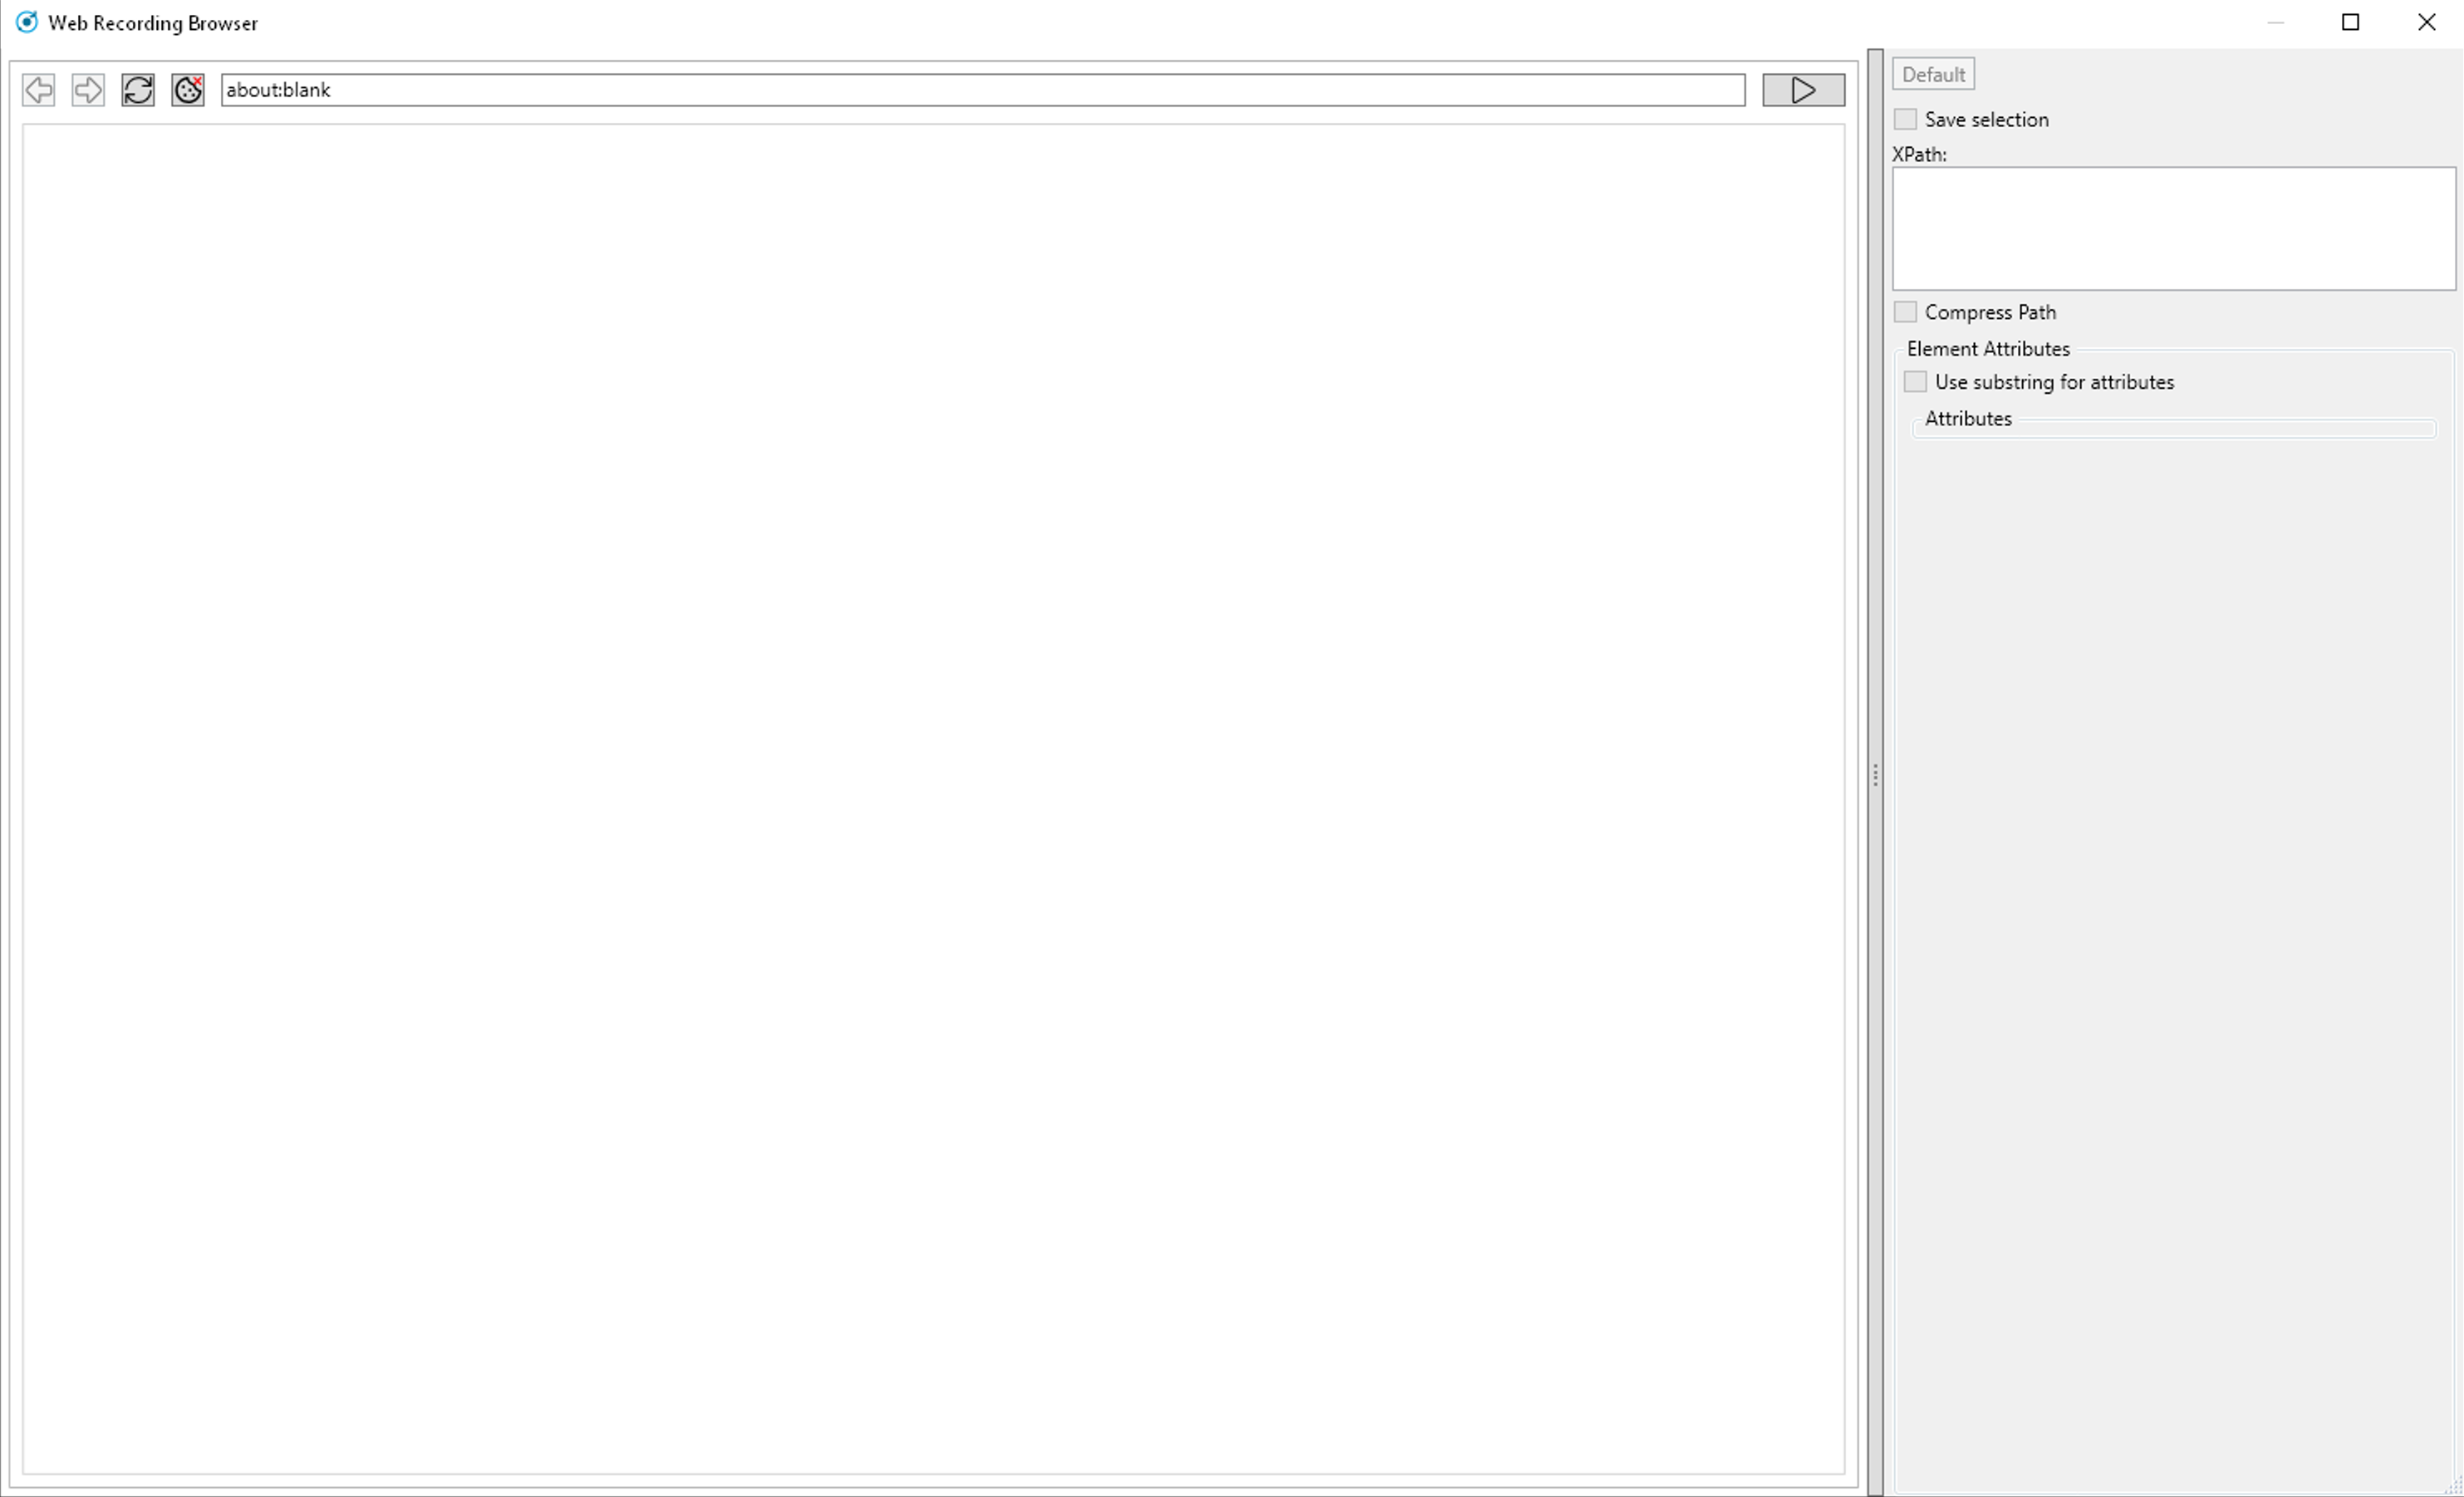
Select Web Elements
When you hover the cursor over a web element, a blue border frames the element so that you know the area is clickable. The border also indicates you can record a mouse click on the element. After an interaction with an element (such as a mouse click or key press on the keyboard), the element’s XPath and available attributes show on the Attribute Selection panel.
To record the mouse hover event on a framed element, press F2.
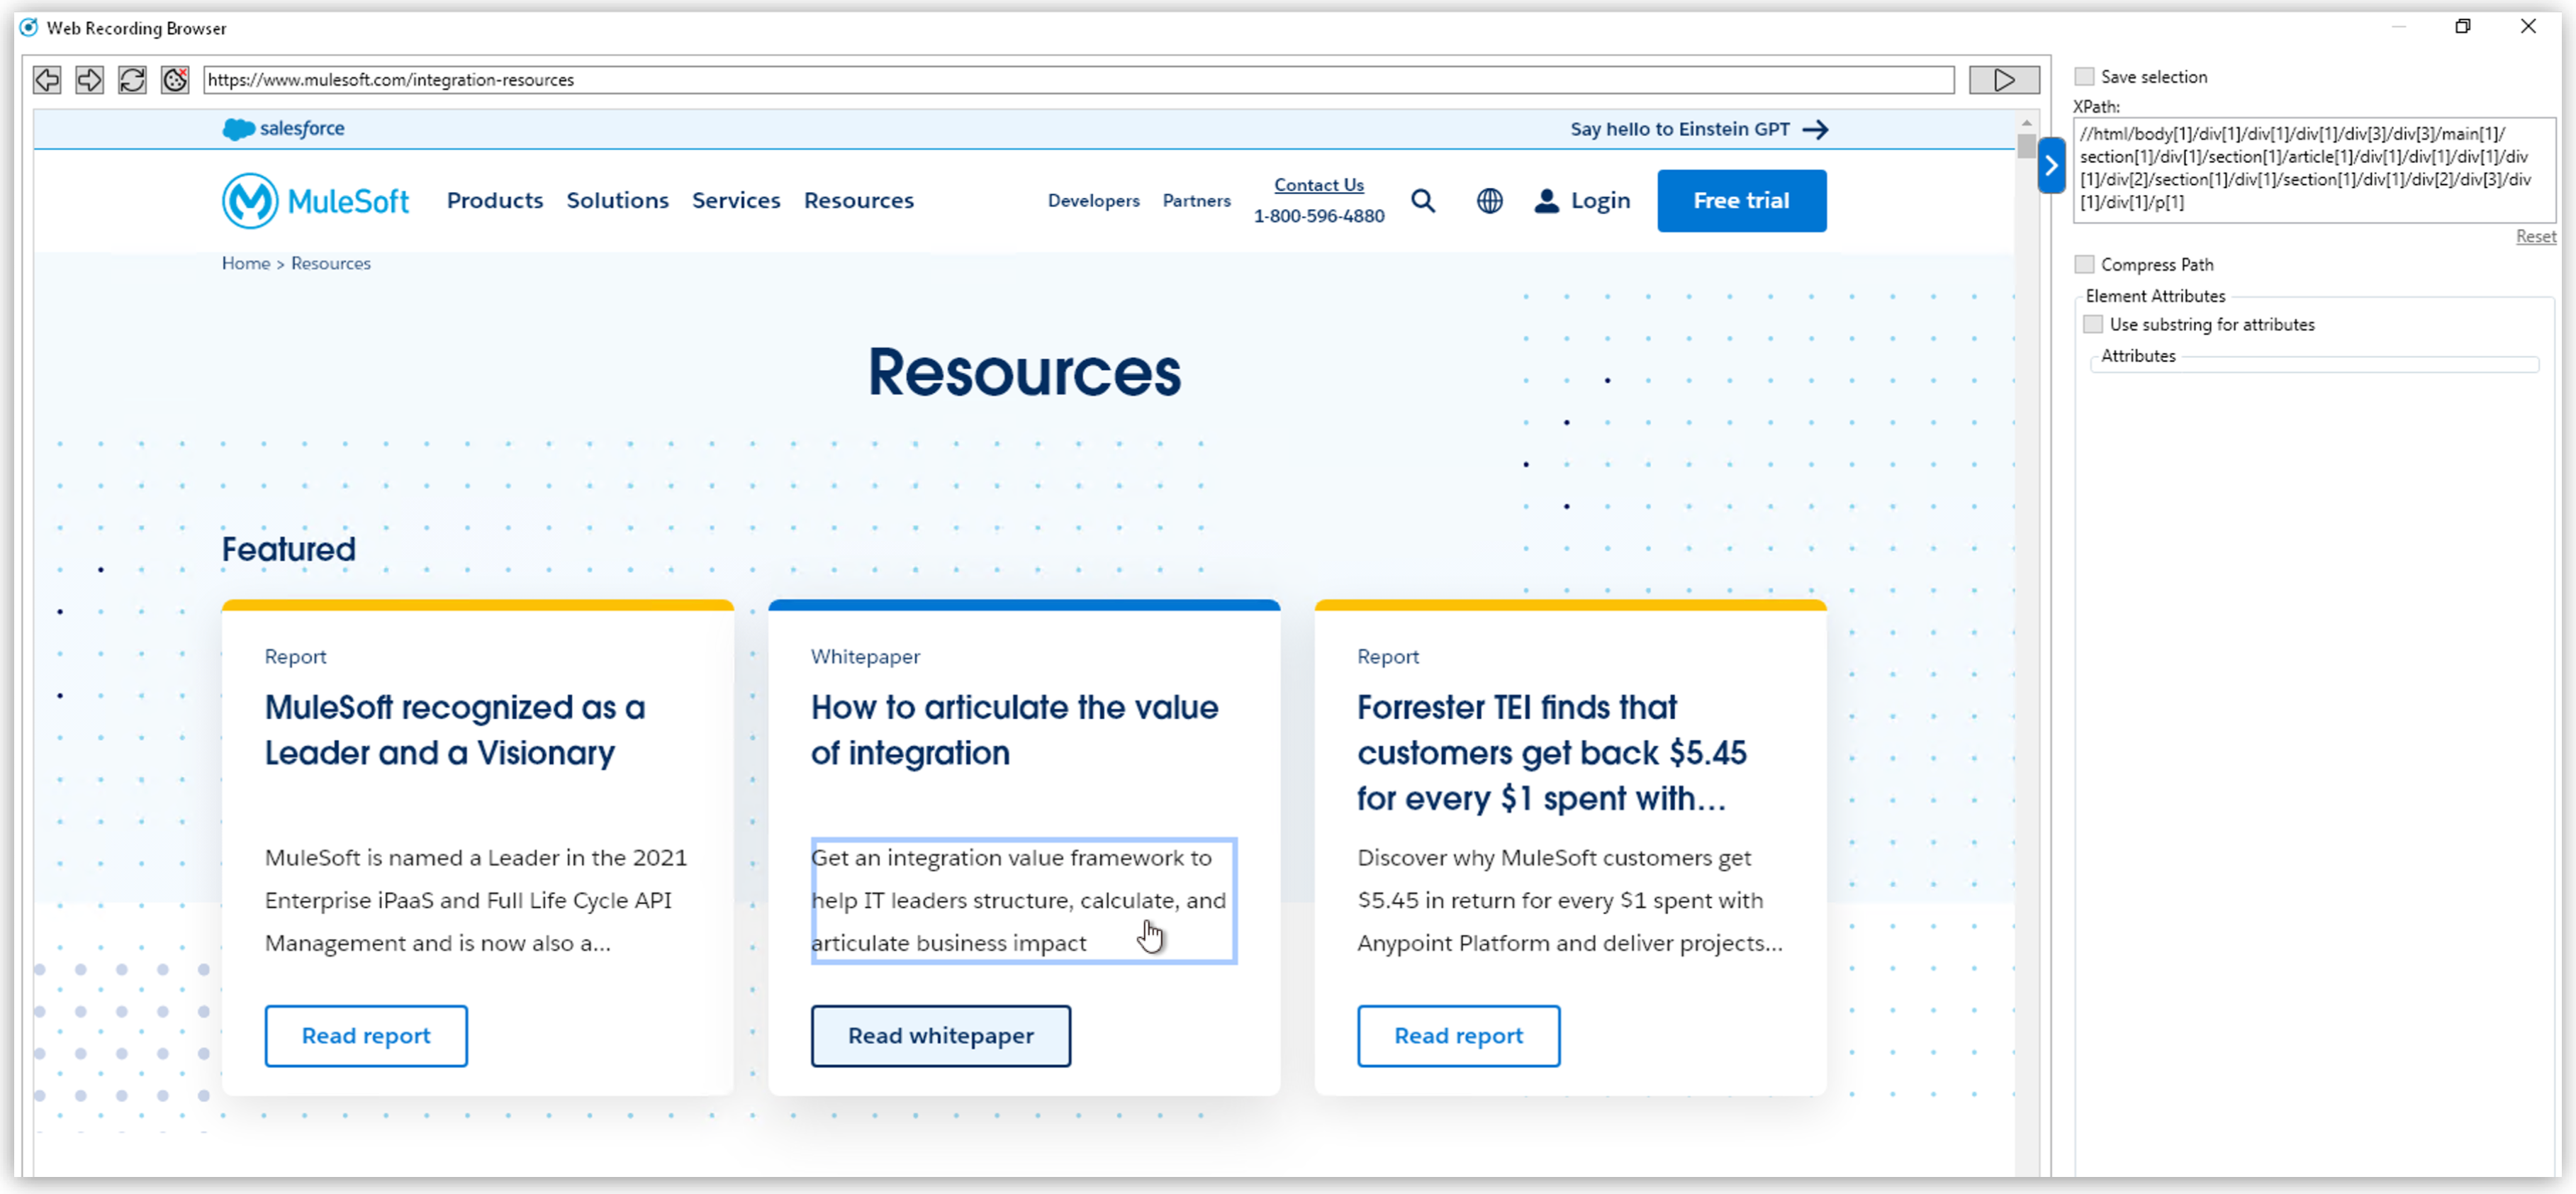
By default, the Attribute Selection panel is hidden. Click on the right border of the Web Recording Browser to extend or collapse it.
Save Web Element Attributes
The Attribute Selection panel shows the default extracted XPath and all the attributes of the selected web element. Select one or more attributes by checking the box next to them. After you select an attribute, RPA Recorder adds the attribute and its value to the extracted XPath.
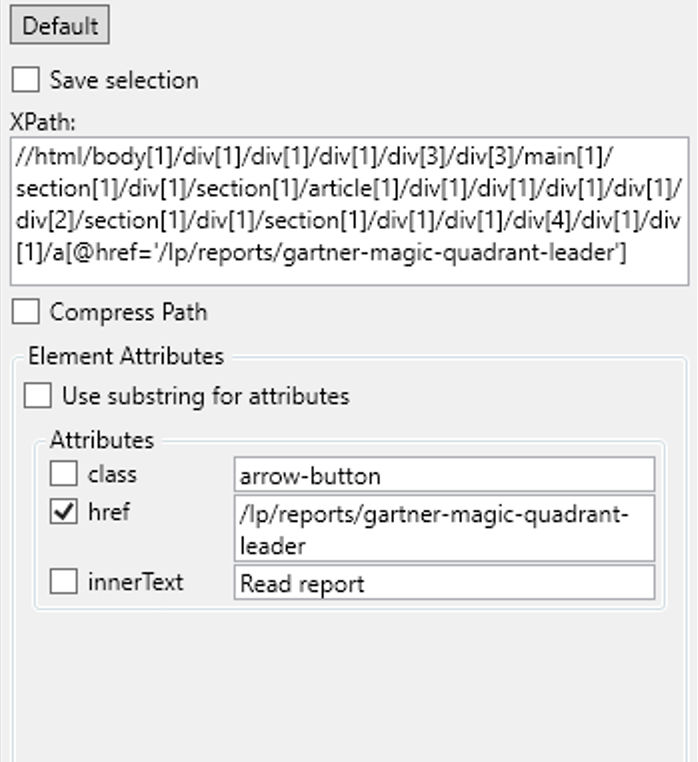
You can save your attribute selection for a web element to use it for future recorded events by checking Save selection.
If you select the saved element while recording the same website later on, the saved attribute displays as already selected in the attribute selection panel and appears as added to the extracted XPath.
If you don’t want to use the saved attributes for a given web element, click the Default button (![]() ) to revert back to the default extracted XPath for that web element.
) to revert back to the default extracted XPath for that web element.
Save Mouse Hover
You can record your mouse hover positioning while using the Web Recording Browser. This is particularly useful for capturing navigation through drop down menus.
To capture a mouse hover action during web recording, press F2 on a web element. This capture is indicated by a blue flashing box around the selected web element.
RPA Recorder Configuration
You can configure RPA Recorder and set preferences.
The configuration section is divided into the following sections:
Settings
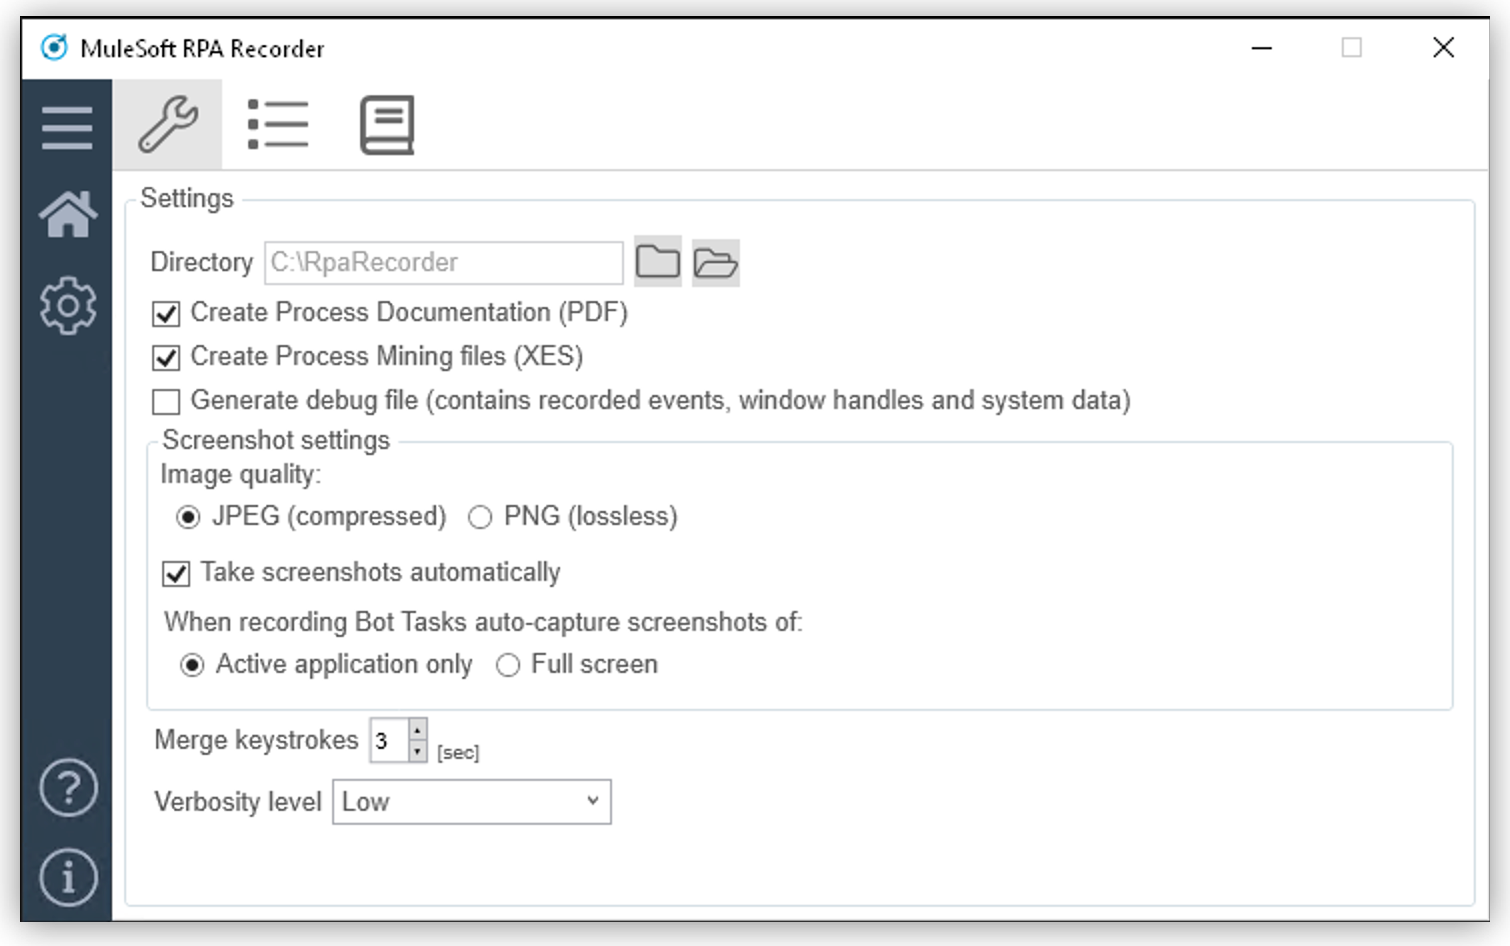
Use the following settings to configure RPA Recorder:
-
Directory
The local folder for storing documents (BPMN, PDF and XES) and application logs.
-
Create Process Documentation (PDF)
Select this option to save a process documentation file as a PDF after the recording session stops.
-
Create Process Mining files (XES)
Select this option to generate a XES process file after the recording session stops.
-
Generate debug file (contains recorded events, window handles and system data)
Select this option to generate a debug file after the recording session stops.
-
Screenshot Settings
-
Image quality:
Select the quality of the screenshots on every mouse click. Available options are: JPEG (compressed) and PNG (lossless).
-
Take screenshot automatically
Select this option to automatically take a screenshot on every mouse click.
-
When recording Bot Tasks auto-capture screenshots of:
Select the area to capture when RPA Recorder takes screenshots. Available options are: Active application only and Full screen.
-
-
Merge keystrokes
Concatenates keyboard entries entered during the recording into meaningful words and sentences based upon the timestamps when they were entered. The number is expressed in seconds and can range from 2 to 10 seconds.
-
Verbosity level
Defines wether to show detailed process information in the documentation. If you select Low, the information does not show in the documentation.
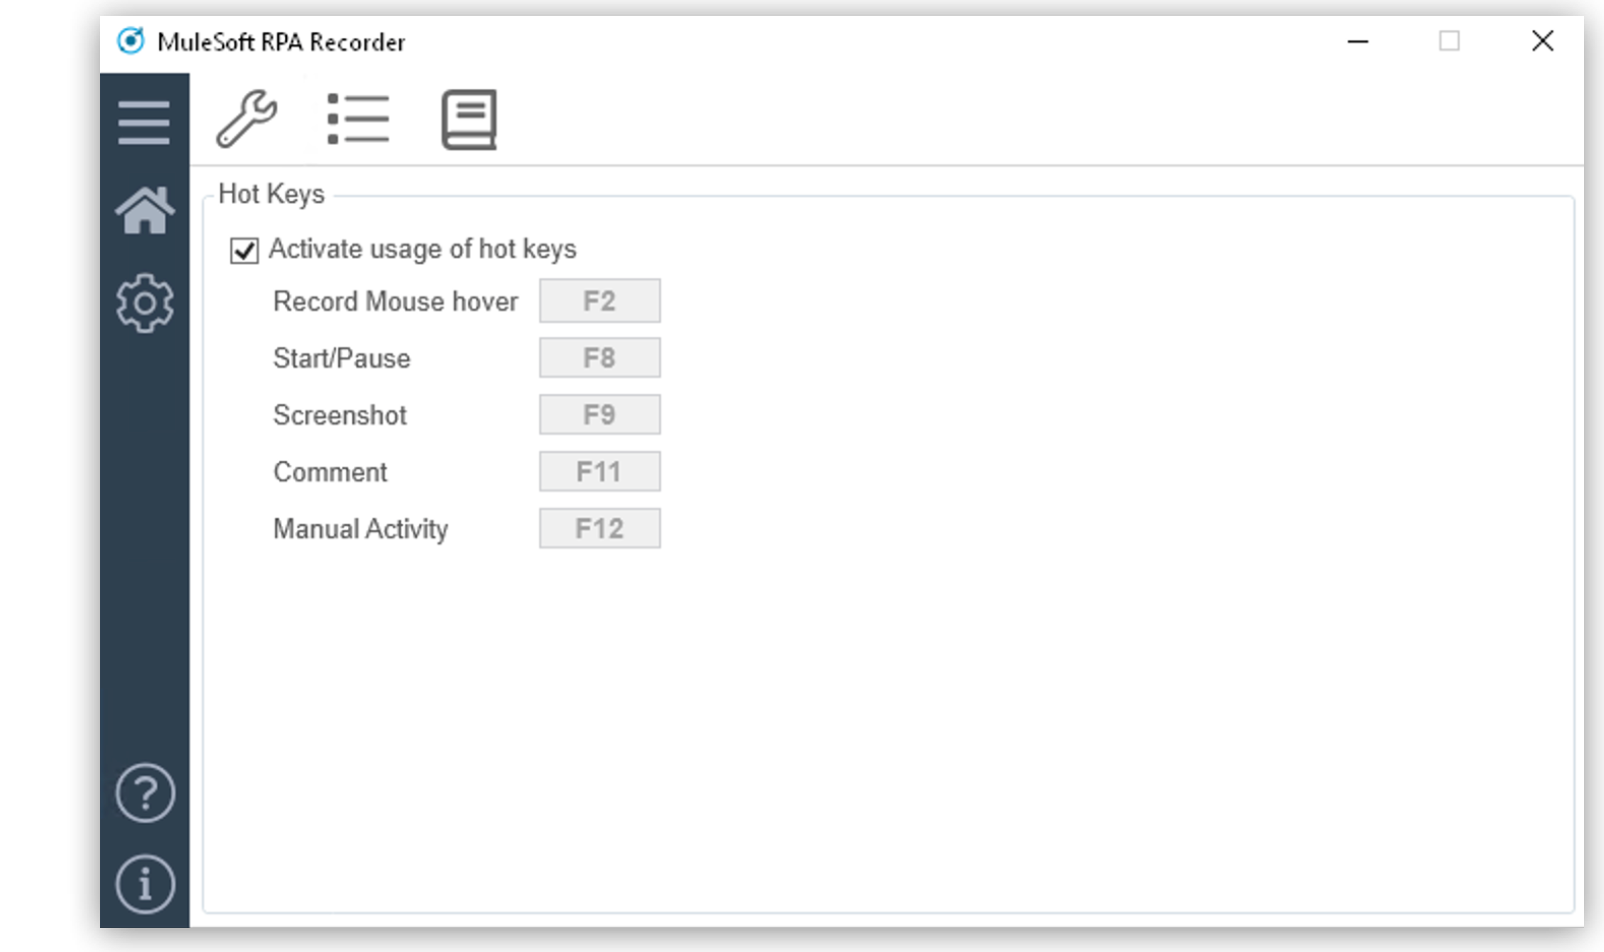
Hotkeys
This section displays information about the specific hotkeys that can be used, and their description. Hotkeys cannot be customized.
You can activate or deactivate the hotkeys function by checking or unchecking the Activate usage of hot keys box. If activated, the hot keys invoke the corresponding action. If deactivated, the hot keys cannot control the recorder, and any hot key presses during a recording are recorded as normal key strokes.
The hotkeys function is activated by default.
About Screen
The about screen contains general information about RPA Recorder:
-
Version number
-
Copyright information