
Adding a Component to Your Project
These examples illustrate basic configurations for adding components to your project from the canvas, and the code editor. The examples assume you are beginning with an empty integration project.
-
In the Explorer, open the configuration XML file for your project:, such as
my-project-name.xml.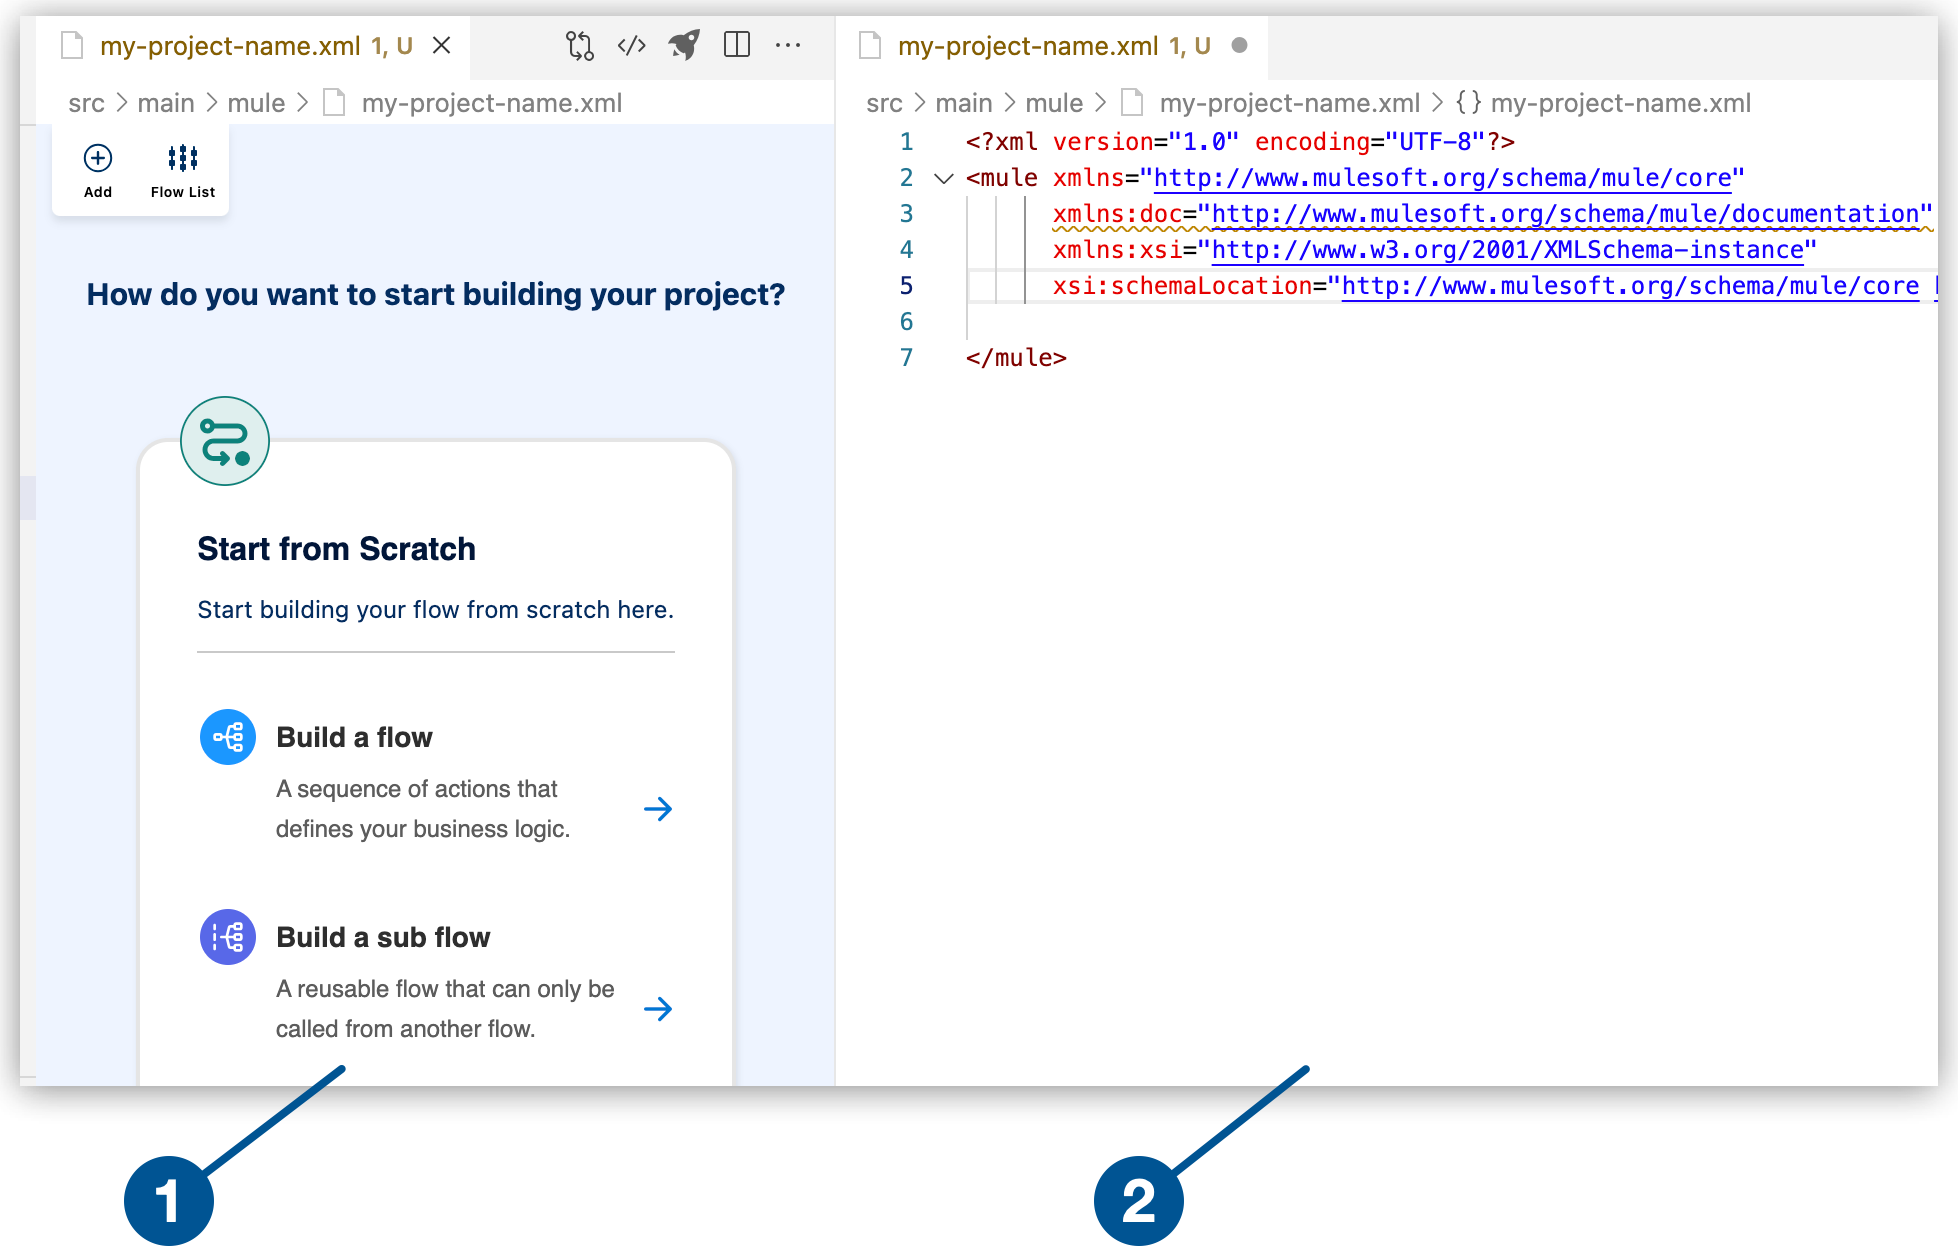
1 The canvas provides space for a visual representation of your Mule flows or subflows. 2 The code editor displays the configuration file for your Mule application. -
Select Build a Flow from the canvas to create an empty flow within a Mule integration application.
-
Change the default name of the flow from the canvas or from the code editor.
-
From the canvas
-
From the code editor
Click Flow name1 to open the configuration panel for the Flow component, change the flow name, and click the check mark to set the new name.
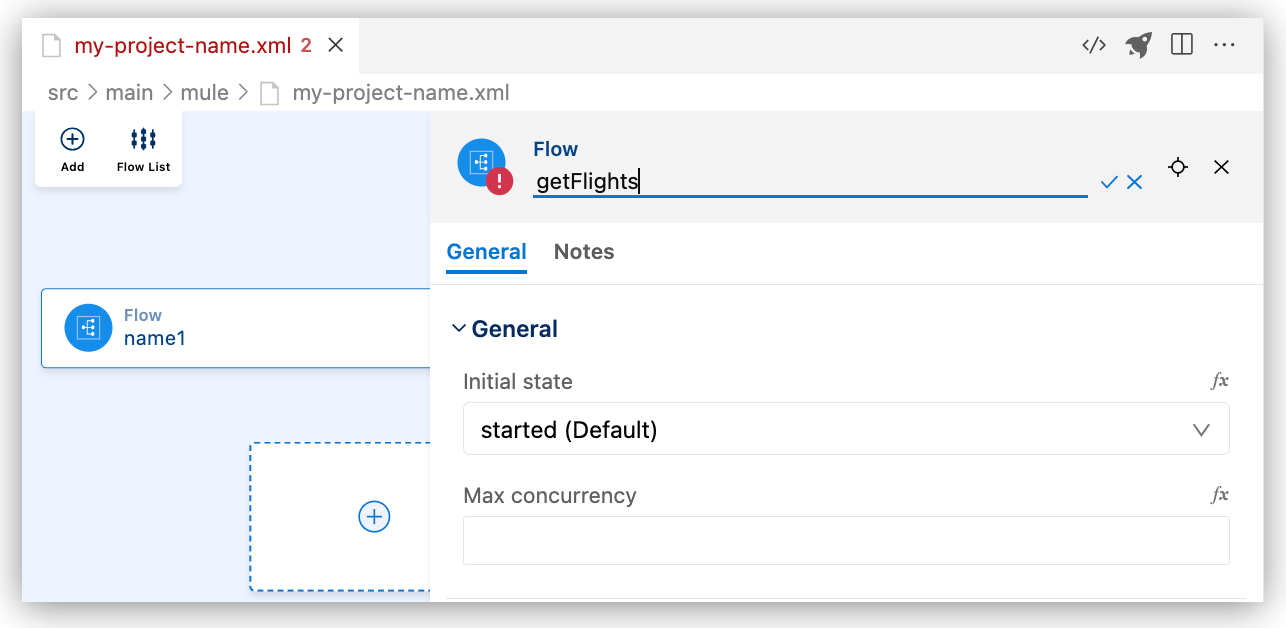
Replace the default name of the flow (
name1) with your flow name, such asgetFlights, for example:<flow name="my-flow" > </flow> -
-
Add a component to your project from the canvas.
For example, add the HTTP Listener component:
-
In the canvas, click the
 (Add component) icon.
 -
In the Add Component panel, search for and select Listener from the HTTP results:
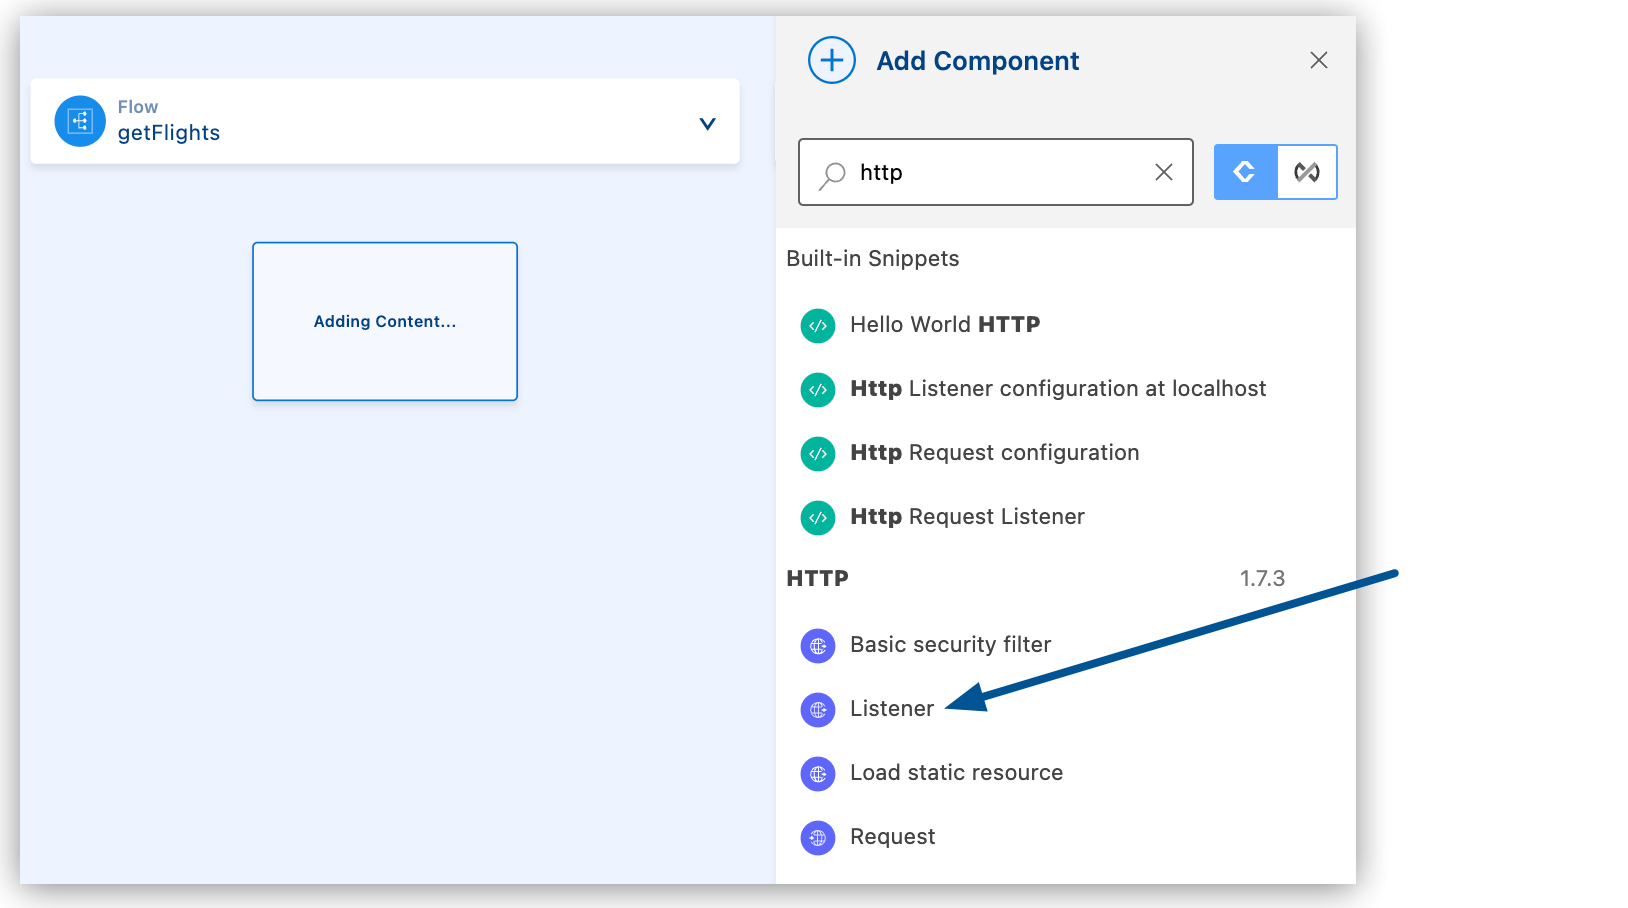
The configuration XML file now includes the XML for the HTTP Listener within the
<flow/>element, for example:<flow name="getFlights" > <http:listener path="mypath" config-ref="config-ref" doc:name="Listener" doc:id="rrjiqa" /> </flow>
-
-
Add another component, this time using the code editor.
In the code editor, place your cursor before the opening
<flow>tag. Ensure that the cursor is not inside the<flow/>element. Add the following code:<http:listener-config name="HTTP_Listener_config" > <http:listener-connection host="0.0.0.0" port="8081" /> </http:listener-config>-
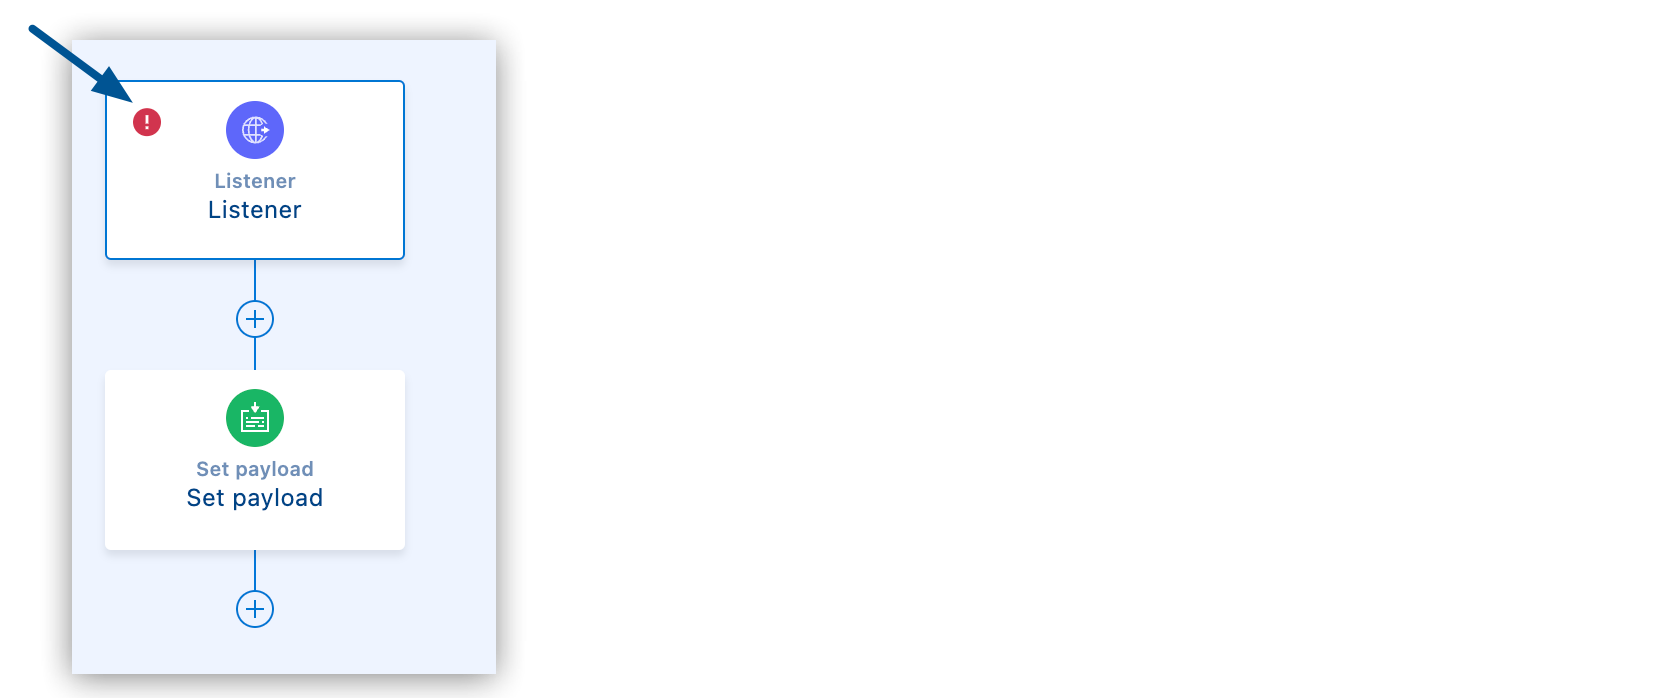
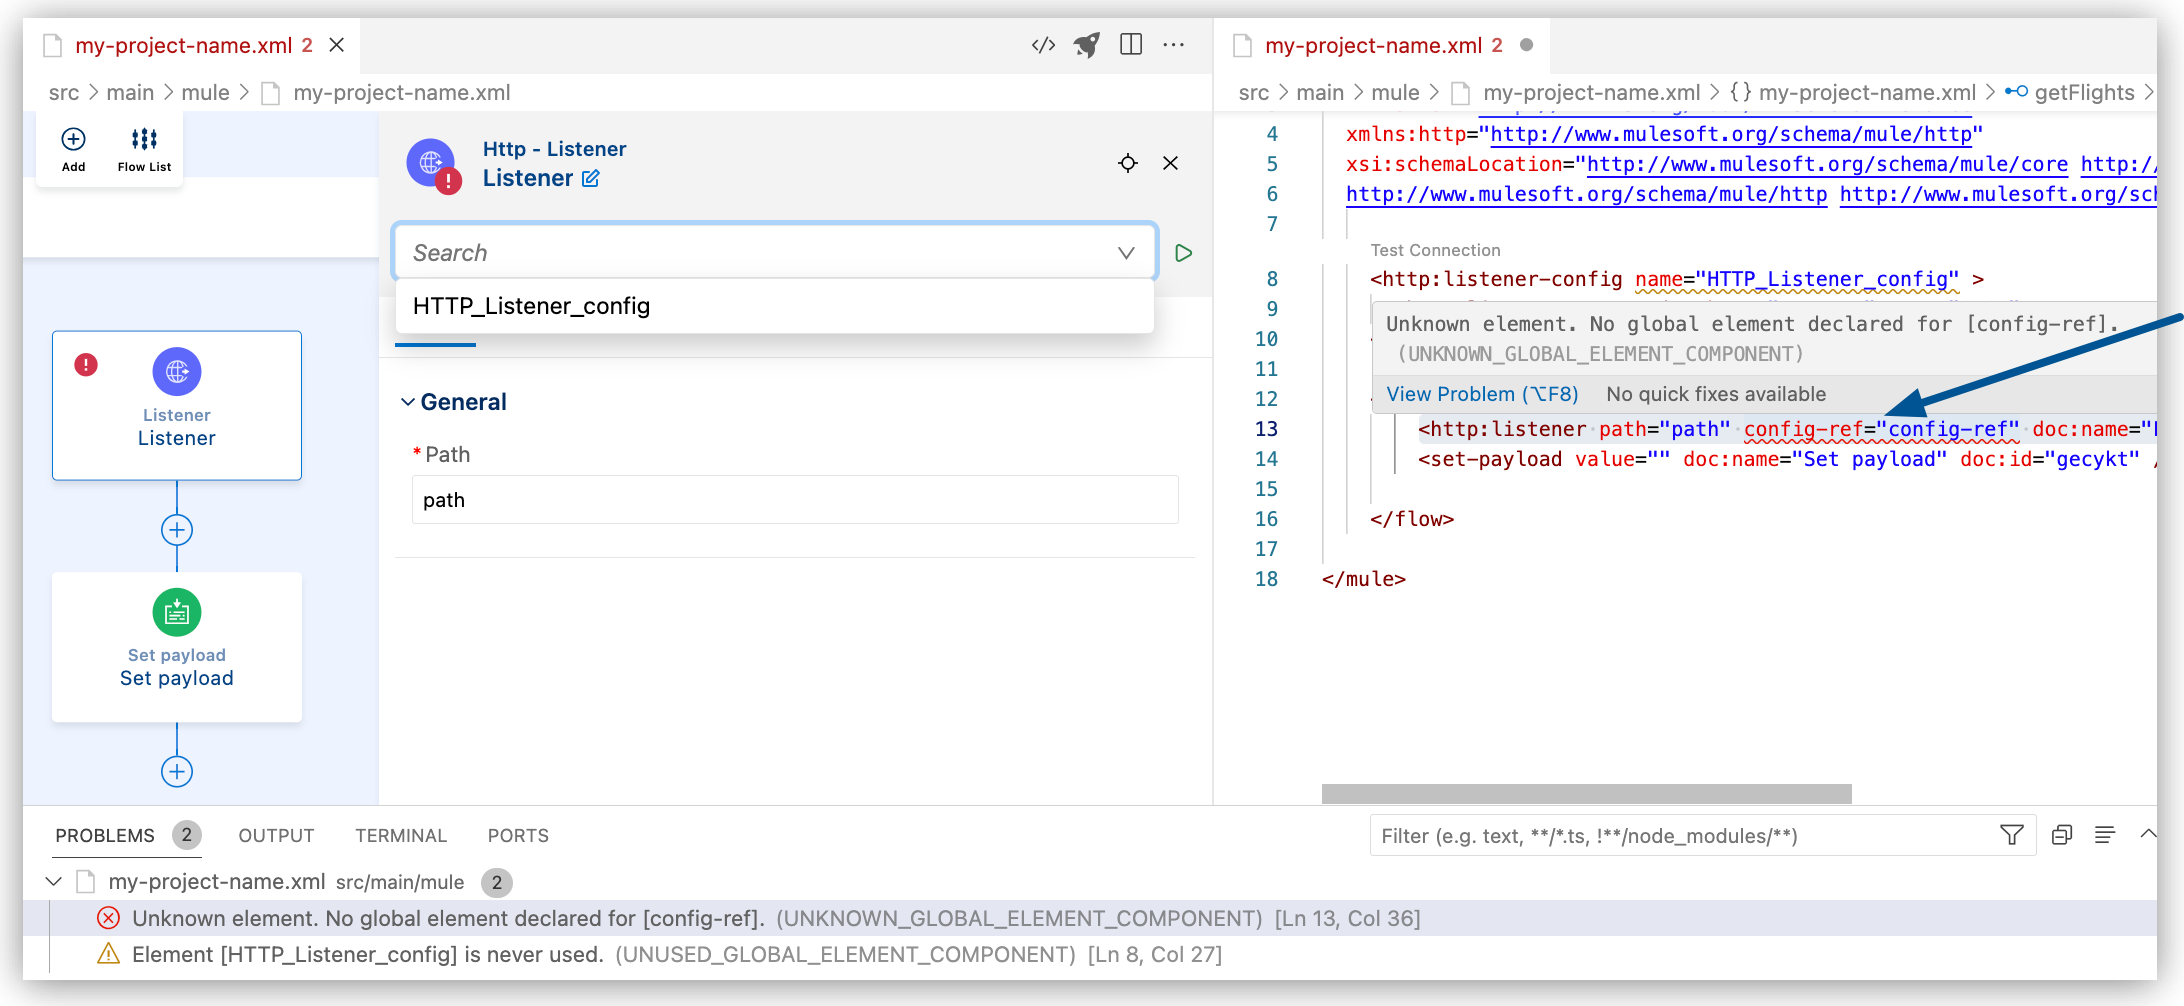
Notice that the Listener component in the canvas now displays an error:
-
To determine where the error is, select the processor in the canvas.
Anypoint Code Builder highlights its location in the code editor, and you can mouse over the issue for more information, for example:
-
To fix the error, change the value of the
nameattribute inhttp:listener-configto match the name of theconfig-refvalue in yourhttp:listenerconfiguration:<http:listener-config name="config-ref" > <http:listener-connection host="0.0.0.0" port="8081" /> </http:listener-config>The HTTP listener within your flow now references the HTTP listener configuration, a global connection configuration that resides outside of the flow. For more information about debugging, see Debugging Mule Applications.
-
-
Add another component to your flow.
For example, add a Set Payload component to your HTTP Listener operation:
-
In the canvas, click the
(Add component) icon. -
In the Add Component panel, search for and select Set payload from the Transformer results.
-
In the canvas, click Set payload to open its configuration panel, and add a string value, DataWeave expression, Mule variable, or configuration property.
-
To add a string, type a value such as
my value. For example: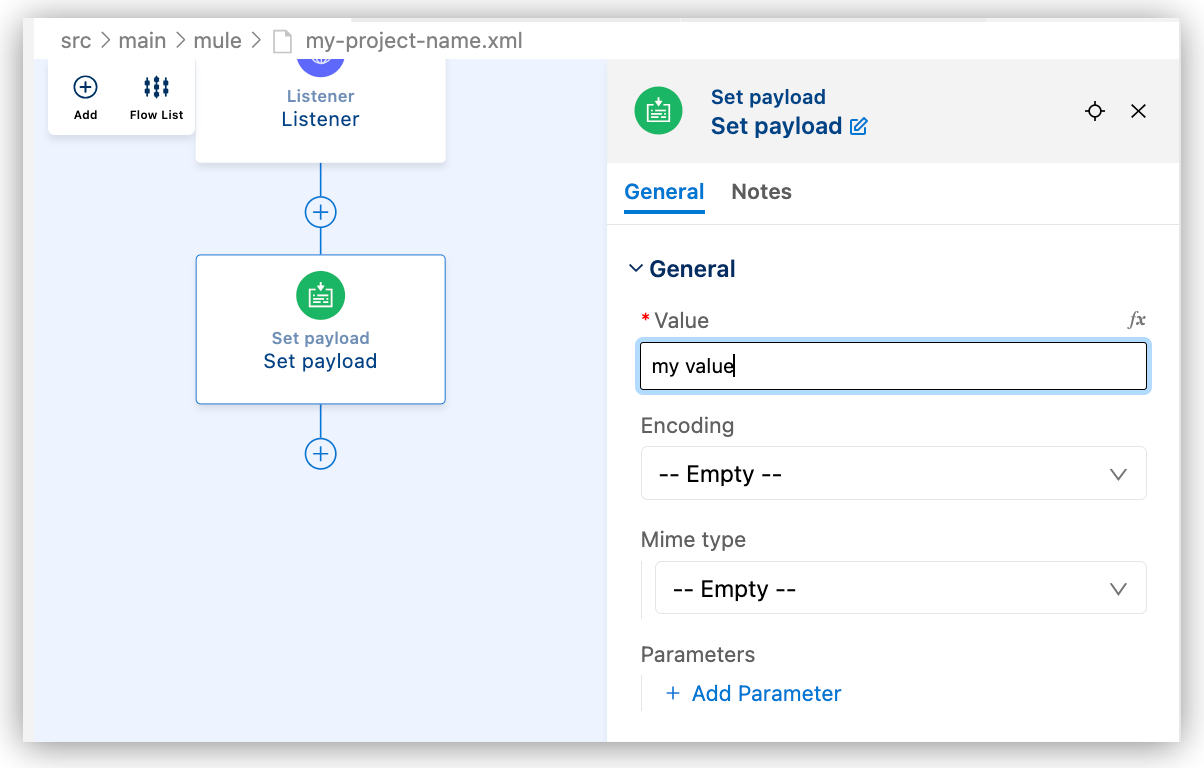
-
To add a DataWeave expression or a Mule variable as a value, such as
payload, click fx (located before the field), and provide the value, for example: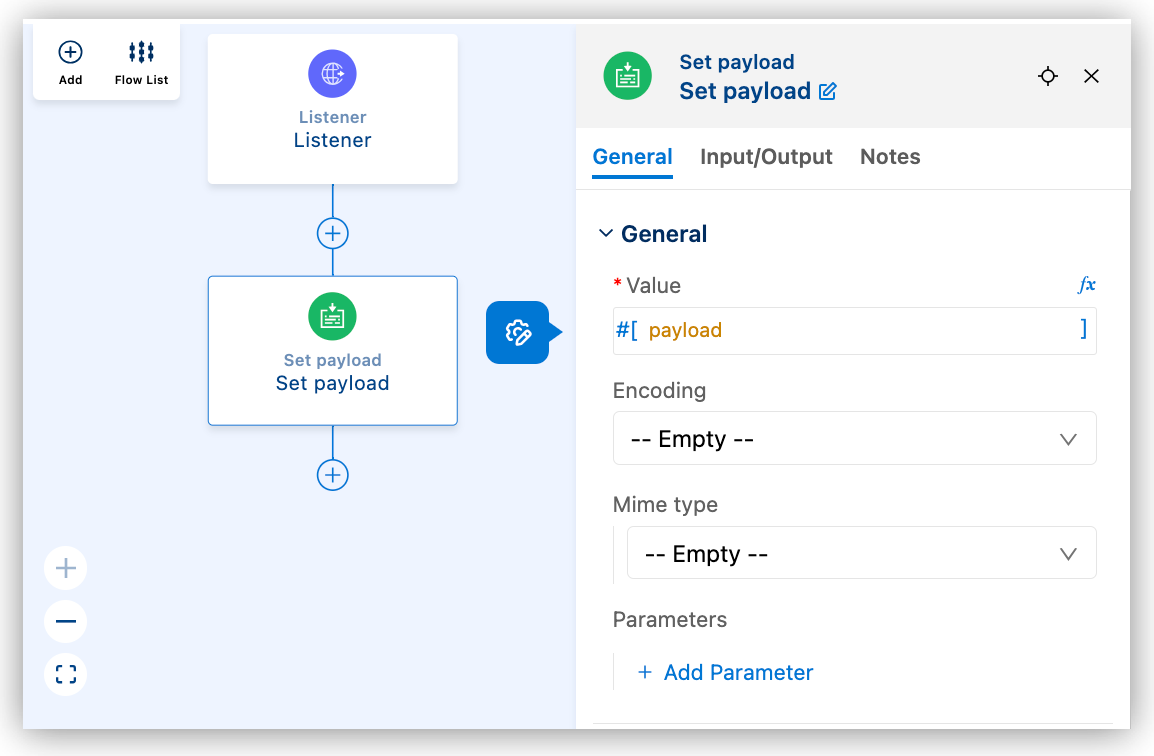
-
For more information about configuring DataWeave expressions, see Using DataWeave Expressions and Transformations in Anypoint Code Builder.
-
To add a configuration property as a value, type a value such as
${secure::mysensitiveprop}.For more information about configuration properties, see Defining and Securing Properties for a Mule Application.
Your configuration XML file now looks similar to the following:
<http:listener-config name="config-ref" > <http:listener-connection host="0.0.0.0" port="8081" /> </http:listener-config> <flow name="getFlights" > <http:listener path="path" config-ref="config-ref" doc:name="Listener" doc:id="rrjiqa" /> <set-payload value="my value" doc:name="Set payload" doc:id="gecykt" /> </flow> -
-
Add another component to your flow.
For example, add the Create operation from Anypoint Connector for Salesforce to insert an Account record.
Use this pattern when your flow receives data through an HTTP Listener and must create Salesforce records. If you completed the earlier steps that add Set payload with a fixed string, remove or replace that processor so you can shape the payload before Create.
For more information about using Create with Account records, see Salesforce Connector 12.0 Examples.
-
In the configuration XML, add a global Salesforce connection element above your
<flow>element (not inside the flow).Use configuration properties for credentials instead of literals; for example:
<salesforce:sfdc-config name="Salesforce_Config" doc:name="Salesforce Config">
  <salesforce:basic-connection username="${salesforce.username}" password="${salesforce.password}" securityToken="${salesforce.token}" />
</salesforce:sfdc-config>
For more information about connection types and authentication fields, see Salesforce Connector 12.0.
-
In the canvas, click the
(Add component) icon after HTTP Listener. -
In the Add Component panel, search for Set payload, and add the component.
-
Configure Set payload with a DataWeave expression that builds a JSON object whose fields match your HTTP API (they need not match Salesforce field names yet).
For example, use fx to enter DataWeave with
output application/jsonand sample fields such ascompanyName,industry, andphoneNumber.Alternatively, add Transform Message and use the same DataWeave in
<ee:set-payload/>.For more information about Transform Message, see Transform (<ee:transform/>).
-
From the canvas, click the
(Add component) icon after Set payload (or Transform Message). -
In the Add Component panel, click Connectors, select Salesforce, and select Create.
-
In the configuration panel for Create, set:
-
Connection config: The global Salesforce configuration name (for example,
Salesforce_Config). -
Type:
Account.If Type stays empty until you establish a working Salesforce connection, set
type="Account"on<salesforce:create/>in the code editor. -
Records: A DataWeave expression that resolves to the records to create.
If the incoming payload uses different property names than Salesforce expects, map those properties in Records, as shown in the configuration XML example that follows. If the payload is already an array of Java objects with Salesforce field names (
output application/java), you can use#[payload].
For more information about connector fields for this operation, see Salesforce Connector 12.0.
Picklist fields such as Industry must use values that exist in your Salesforce organization. This configuration listens on
/accounts, builds a JSON payload, maps it to Account fields inside<salesforce:records/>, and calls Create. Alignconfig-refon<http:listener/>with thenameof your<http:listener-config/>(for example,config-reffrom the earlier steps in this topic).<http:listener-config name="config-ref" > <http:listener-connection host="0.0.0.0" port="8081" /> </http:listener-config> <salesforce:sfdc-config name="Salesforce_Config" doc:name="Salesforce Config"> <salesforce:basic-connection username="${salesforce.username}" password="${salesforce.password}" securityToken="${salesforce.token}" /> </salesforce:sfdc-config> <flow name="createSalesforceAccountFlow" > <http:listener path="/accounts" config-ref="config-ref" doc:name="Listener" doc:id="rrjiqa" /> <set-payload doc:name="Set Payload" value="#[%dw 2.0 output application/json --- { companyName: 'Anypoint Inc.', industry: 'Technology', phoneNumber: '415-229-2000' }]" /> <salesforce:create doc:name="Create" type="Account" config-ref="Salesforce_Config"> <salesforce:records>#[%dw 2.0 output application/java --- [{ Name: payload.companyName, Industry: payload.industry, Phone: payload.phoneNumber }]] </salesforce:records> </salesforce:create> </flow>If the message payload is already an array of Java objects with Salesforce field names, you can omit
<salesforce:records/>and set Records to#[payload], or use a self-closing<salesforce:create/>element with that default.You can achieve the same result by adding Transform Message with
output application/javafollowed by<salesforce:create type="Account" config-ref="Salesforce_Config"/>with Records set to#[payload]. -
-