Integrating American Flights Processes
 Cloud IDE
 Desktop IDE
Start by creating a basic integration for the American Flights example. This integration is a Mule application that provides some of the logic for processing requests from the American Flights API.
Before You Begin
Complete these procedures:
-
Designing the American Flights API Spec (all tasks from creating the API specification to publishing the specification to Exchange)
-
Installing a REST client such as Postman or Advanced REST Client.
Create a Mule Application
Start an integration application for the American Flights example.
-
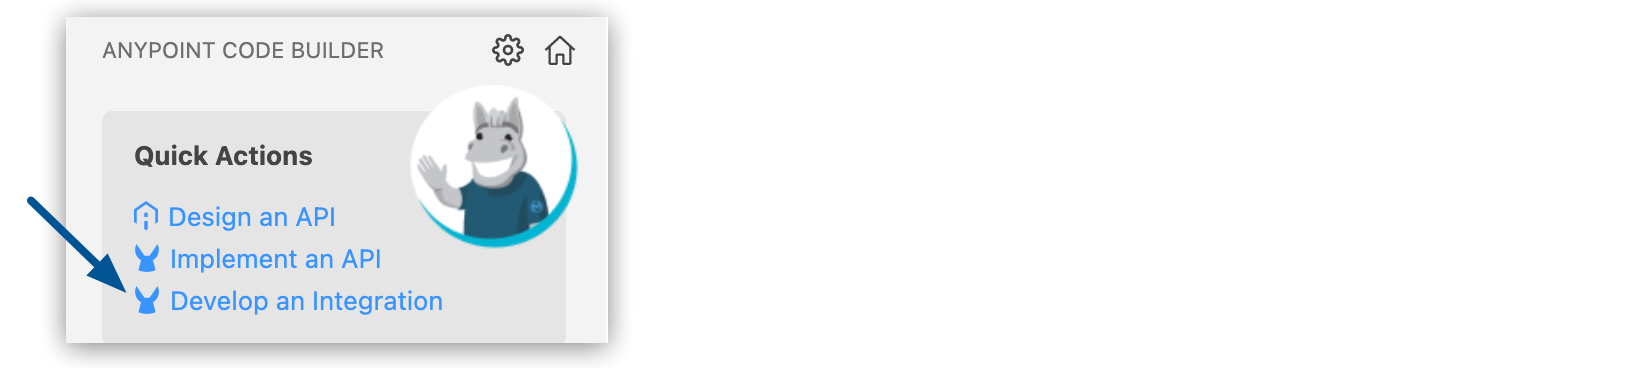
In the activity bar of the IDE, click the
 (Anypoint Code Builder) icon.
-
From Create, click Develop an Integration:
-
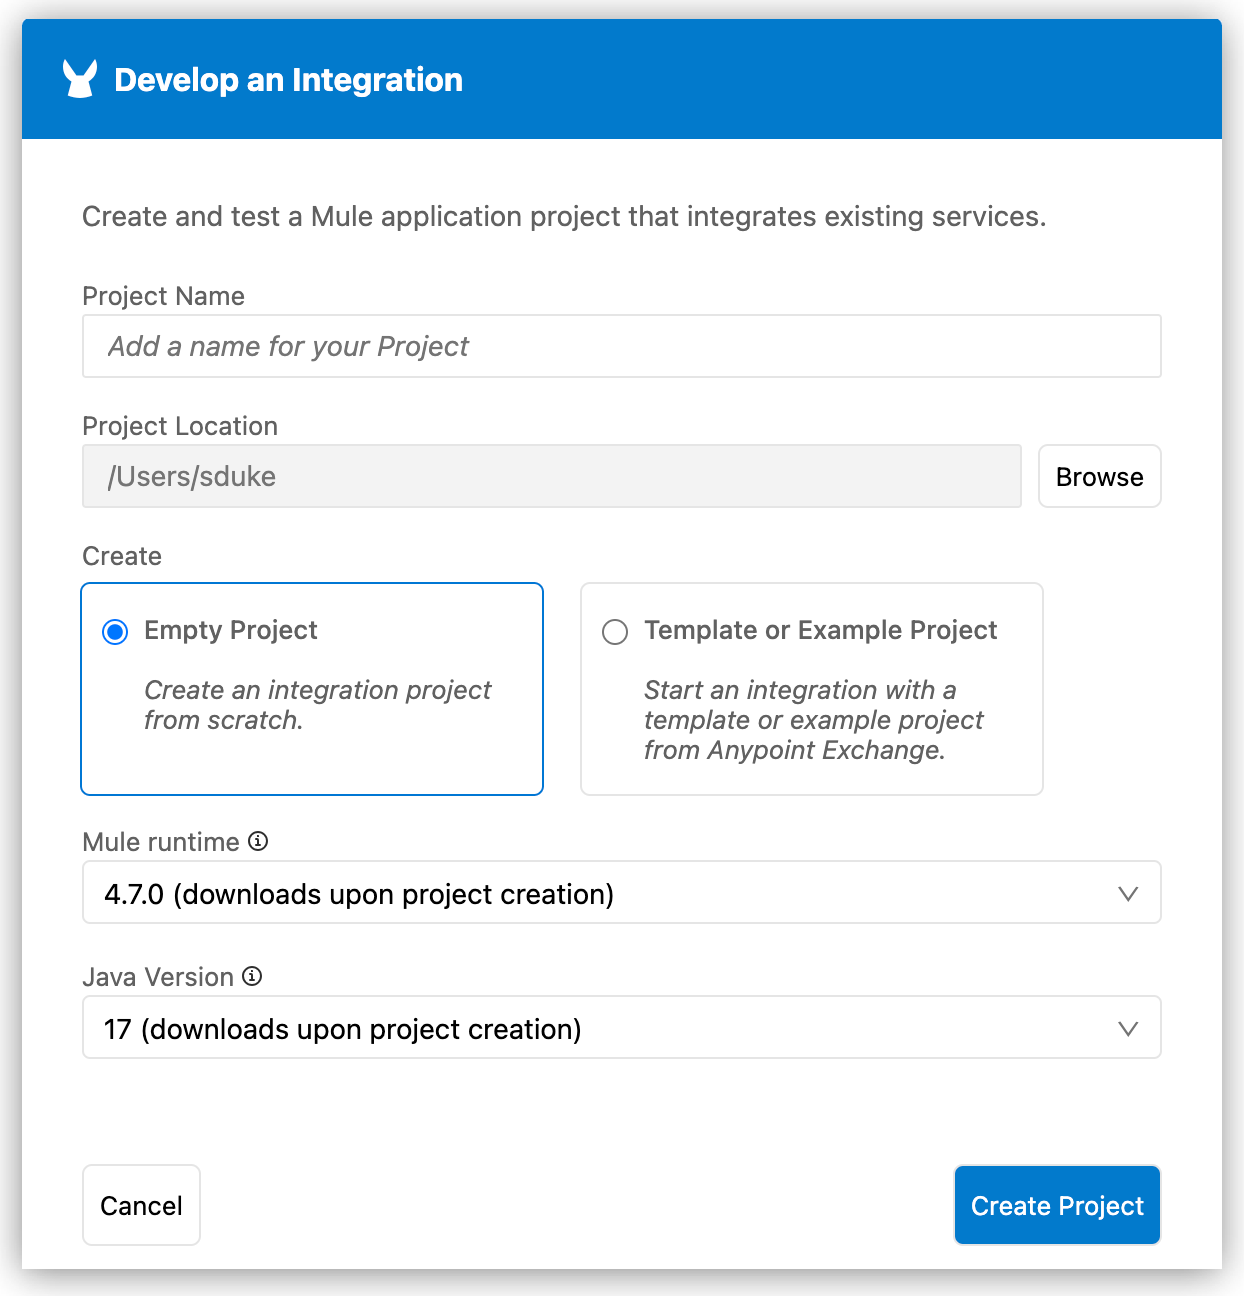
Provide integration project properties to the Develop an Integration form:
-
Under Project Name, type
american-ws-anypoint-code-builder. -
Under Project Location, select Browse, and then select your home directory.
-
Under Create, select Empty Project.
-
Select Mule runtime and Java versions.
You can select from locally available Mule runtime and Java versions. The dropdown shows only the Mule runtime versions that are installed on your local disk, including bundled Mule runtime versions that are available immediately after installation. The IDE saves your version settings to the project’s
mule-artifact.jsonfile. Bundled Mule runtime versions enable instant project opening and design. To install additional Mule runtime versions, use theMuleSoft: Install Runtimecommand. For information about version support and automated Mule patch updates, see Mule and Java version support. To set default Mule runtime and Java versions for the projects you create, see Version Settings for Mule, Java, and Connectors.
-
-
Click Create Project.
Projects open instantly using the bundled Mule runtime versions. The IDE provides a notification only if you must download a specific Mule runtime version or Java version for running or debugging your application. The Mule runtime versions download to
${user.home}/AnypointCodeBuilder/runtimes, and the selected Java version downloads to${user.home}/AnypointCodeBuilder/java. -
Proceed to Configure an HTTP Listener Operation and Set a Payload.
Configure an HTTP Listener Operation and Set a Payload
The listener is for triggering the flow, and Set Payload provides some test data for the integration:
-
If the canvas and configuration XML for the project are not open, navigate to
american-ws-anypoint-code-builder.xmlfrom the Explorer.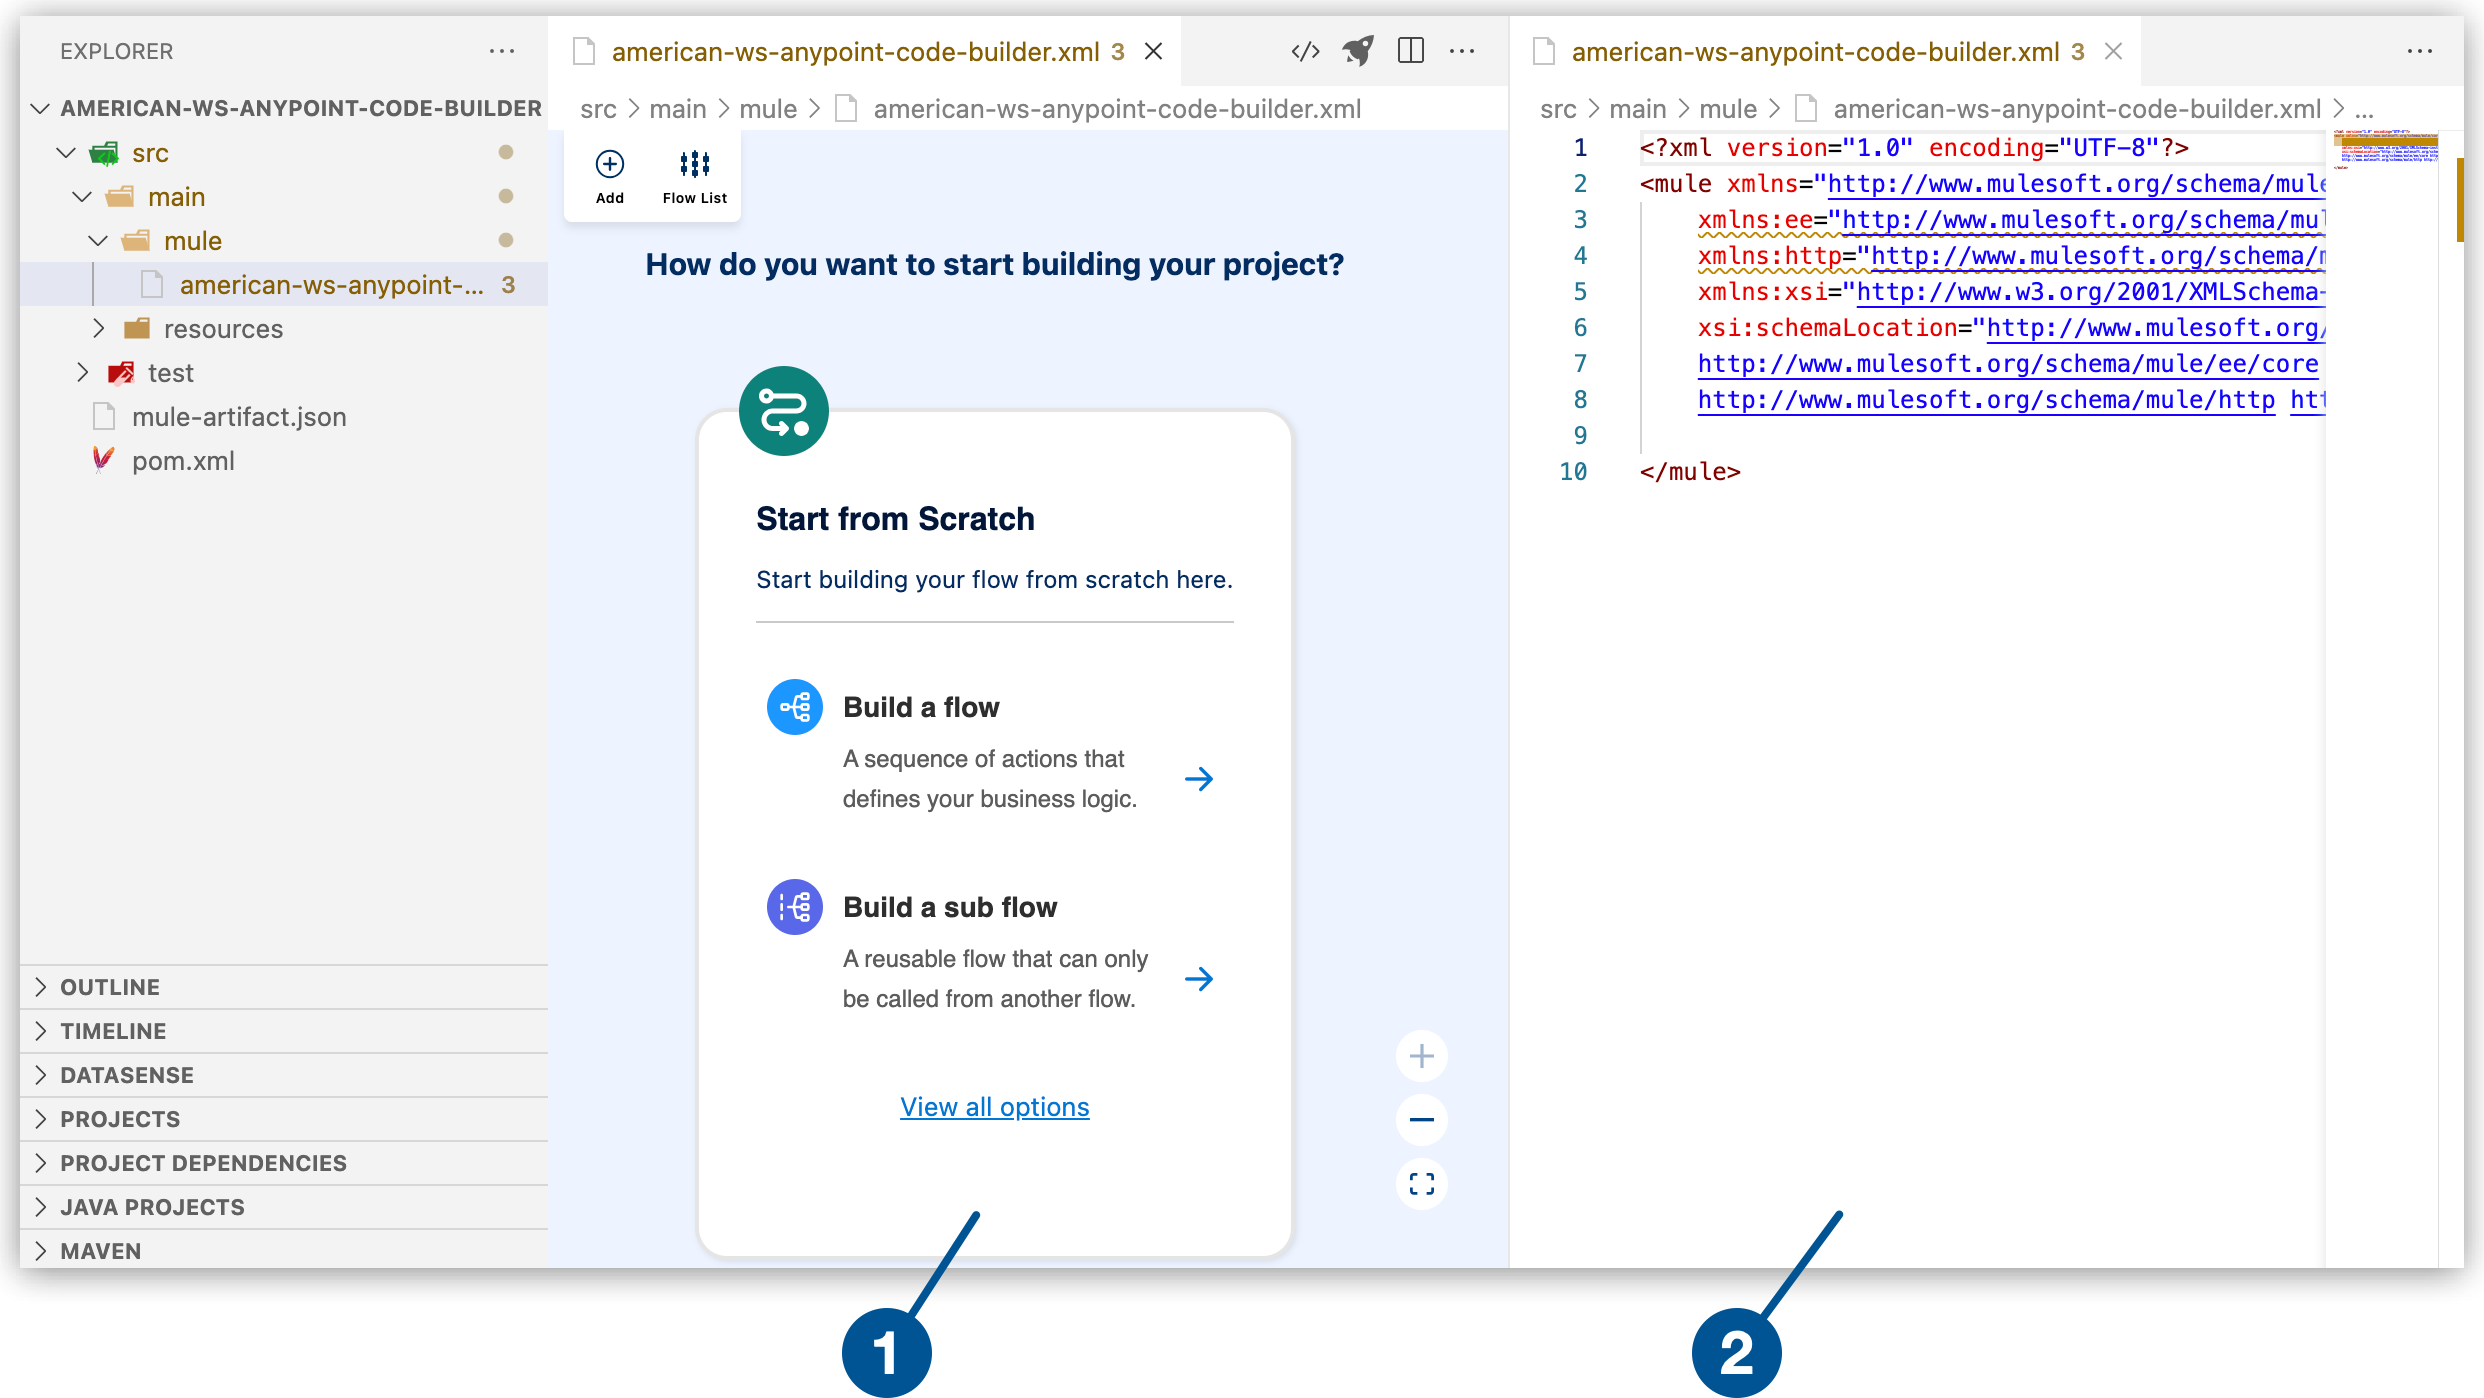
1 The canvas provides space for a visual representation of your Mule flows or subflows. 2 The configuration XML editor displays the configuration file for your Mule application. -
Select Build a Flow from the canvas to create an empty flow within a Mule integration application.
-
Change the default name of the flow from the canvas or from the configuration XML.
-
From the canvas
-
From the configuration XML
Click Flow name1 to open the configuration panel for the Flow component, change the flow name to
getFlights, and click the check mark to set the new name.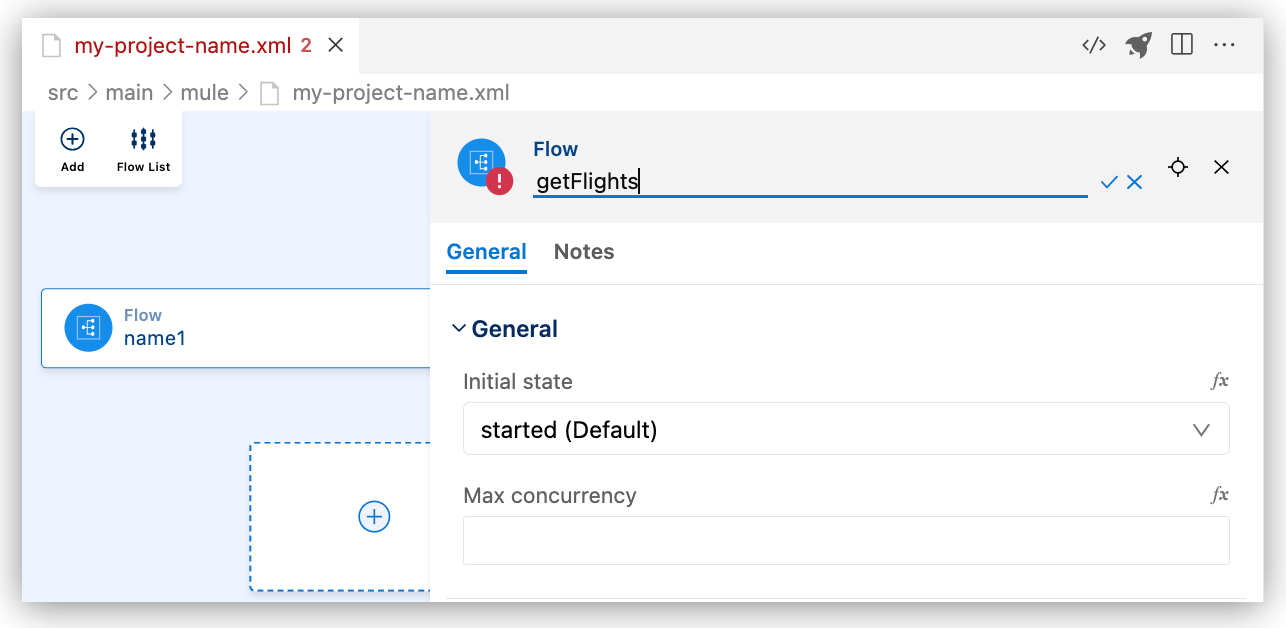
Replace the default name of the flow (
name1) withgetFlights.Automatically Generated Flow Element Renamed Flow Element <flow name="name1" > </flow><flow name="getFlights" > </flow> -
-
Add the HTTP Listener component to your configuration XML:
-
In the canvas, after your Flow component, click the
 (Add component) icon:
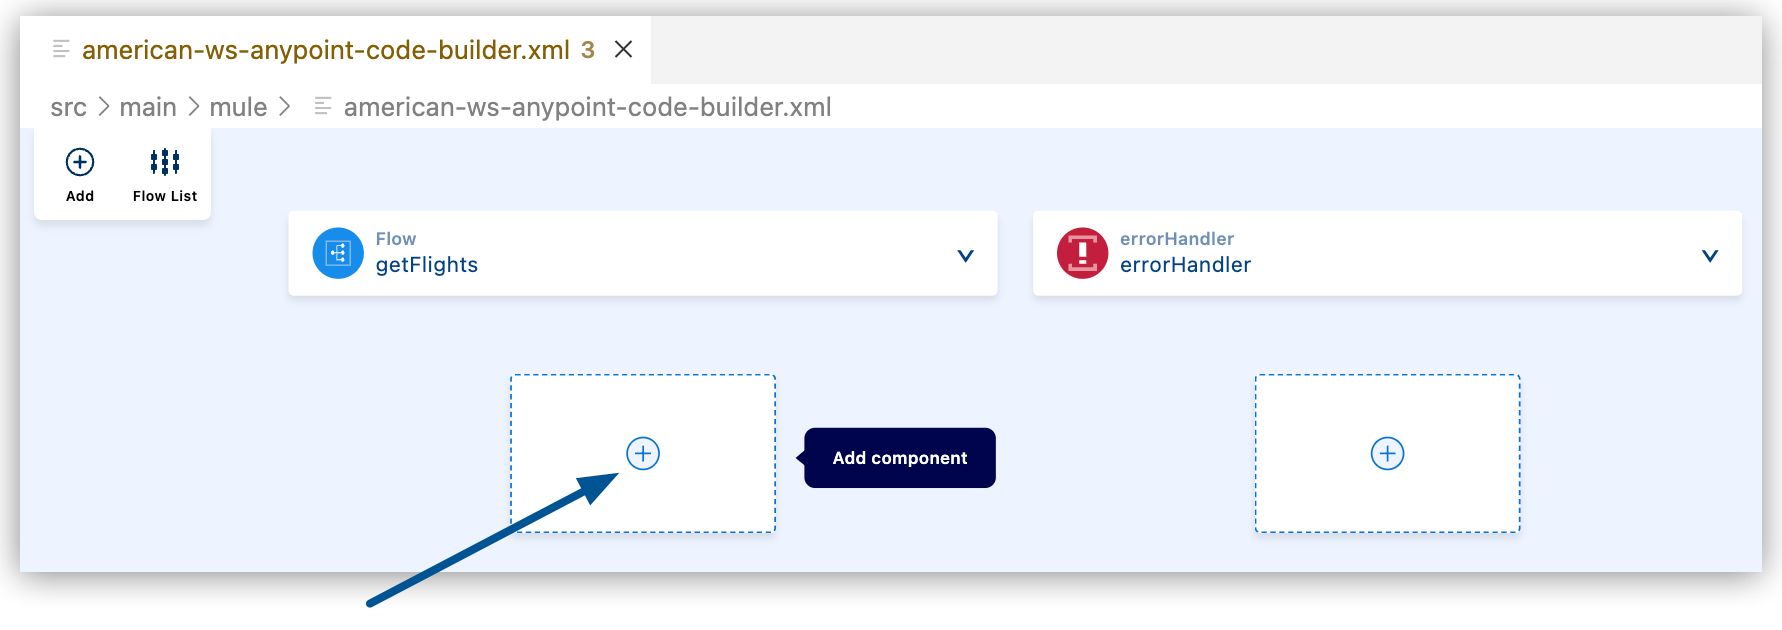
-
Search for and select Listener from the HTTP results:
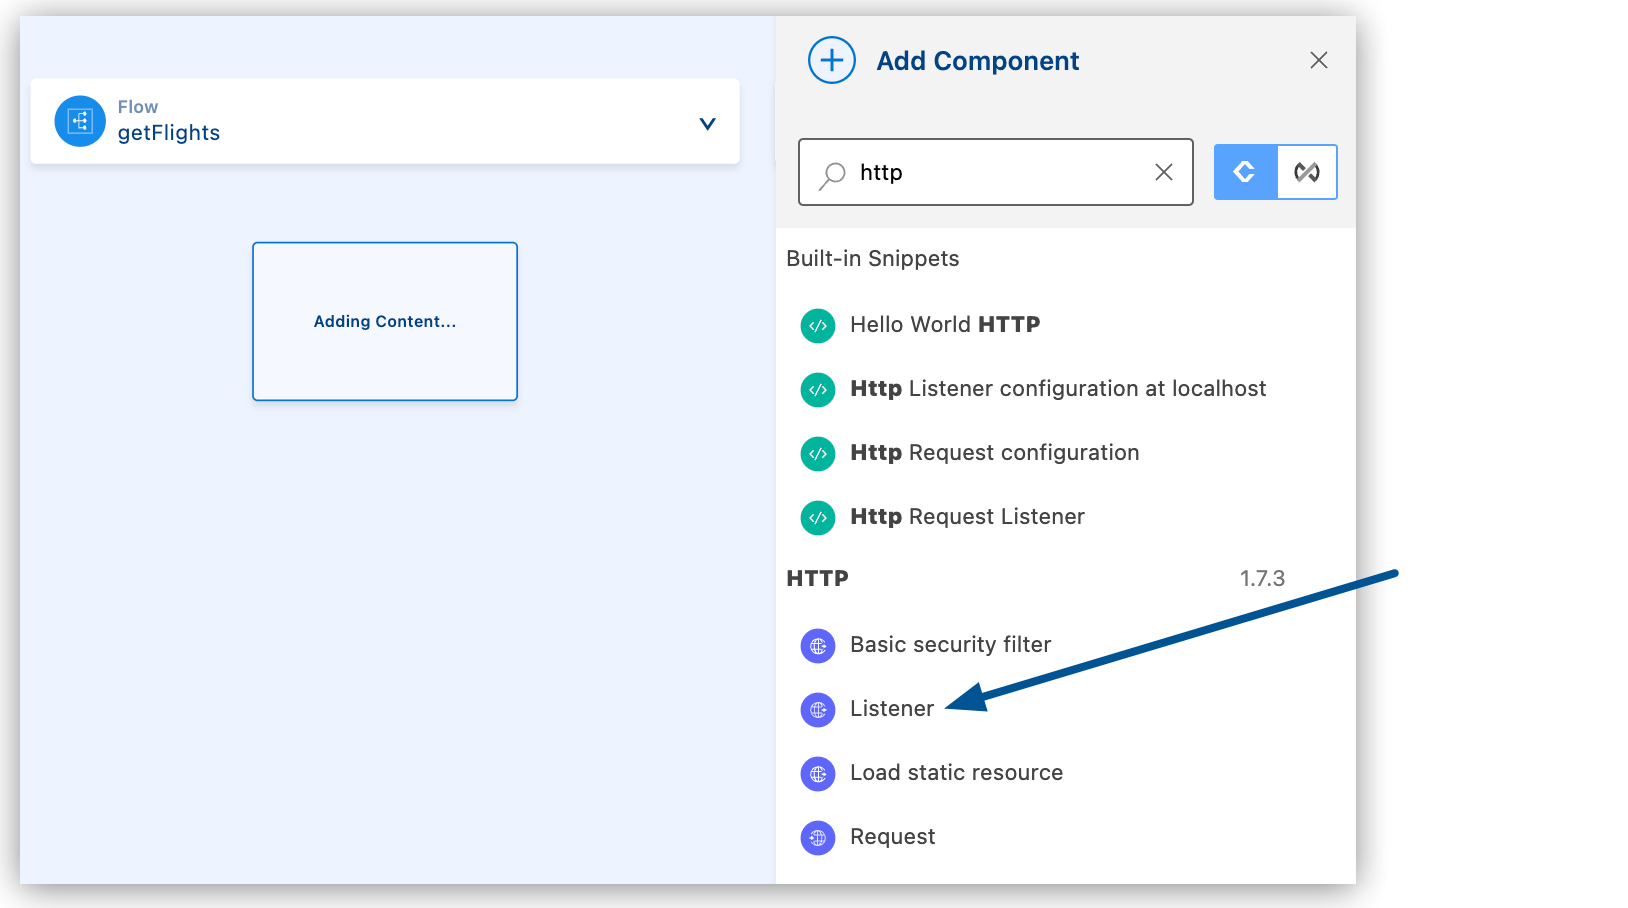
The configuration XML file adds the XML for the HTTP Listener into the
<flow/>element, for example:<flow name="getFlights" > <http:listener path="" config-ref="" doc:name="Listener" doc:id="ojzfry" /> </flow>
-
-
In the configuration XML, place your cursor before the opening <flow> tag, and copy the following code:
<http:listener-config name="HTTP_Listener_config" > <http:listener-connection host="0.0.0.0" port="8081" /> </http:listener-config> -
In the configuration XML, configure the attributes for the HTTP Listener configuration
<http:listener-config/>:<http:listener-config name="inbound-request" doc:name="Listener Config" doc:id="b5c62f-a84a3a"> <http:listener-connection host="0.0.0.0" port="8081"/> </http:listener-config>In
<http:listener-config/>and its child element<http:listener-connection/>, set the attributes to values provided in the example.Notice that the
nameattribute changes toinbound-request. Thedoc:idis randomly generated and does not require a change. -
Configure the attributes for the HTTP Listener configuration:
-
From the canvas
-
From the configuration XML
Click the Listener operation to open its configuration panel, and set the HTTP Listener attributes to the following values:
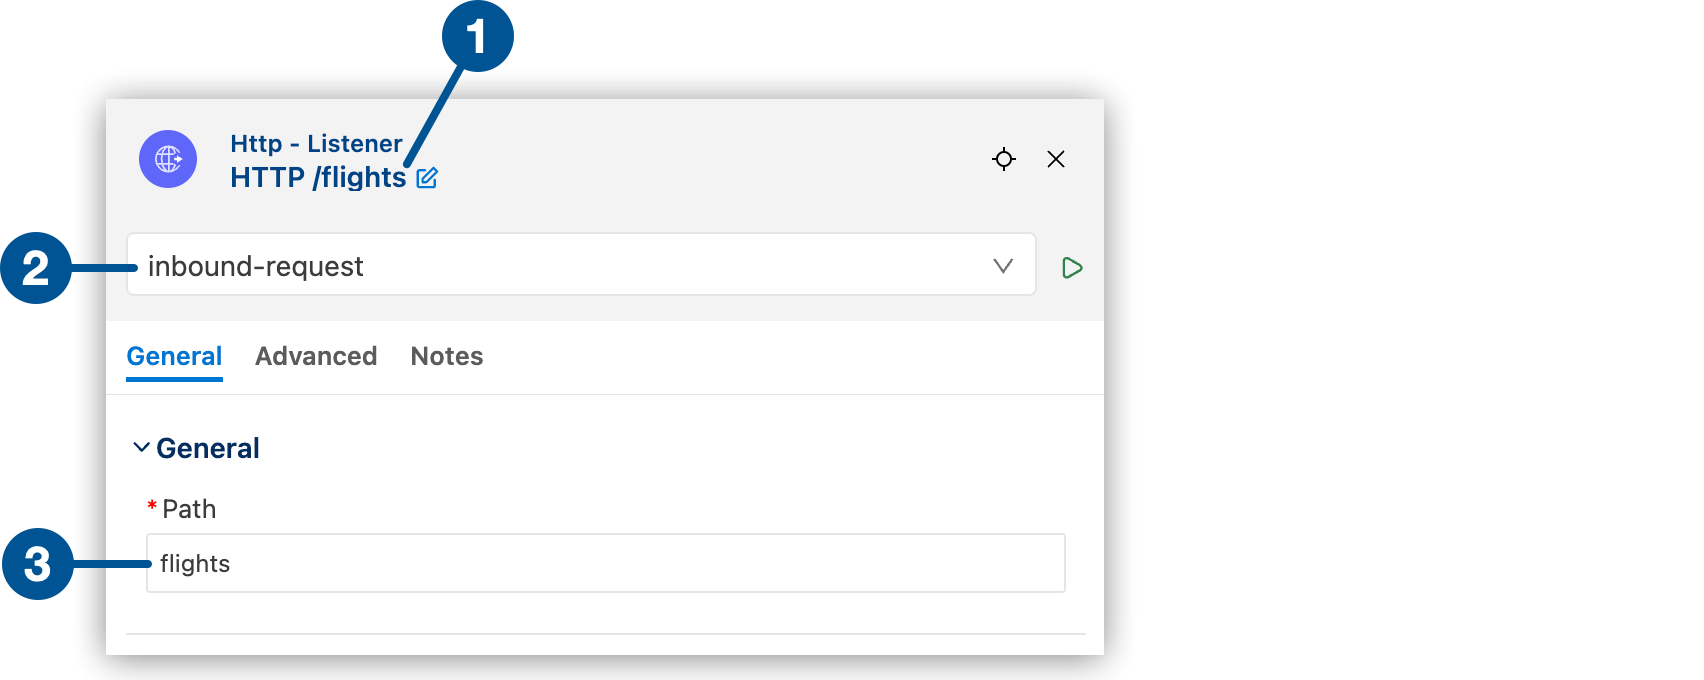
1 Change the operation name to HTTP /flights.2 Select inbound-requestfrom the configuration reference dropdown menu.3 Set the Path attribute to flights.In
<http:listener/>, set the attributes to the values provided in the example.<flow name="getFlights"> <http:listener path="flights" config-ref="inbound-request" doc:name="HTTP /flights" /> </flow> -
-
From the canvas, add a Set Payload component after your HTTP Listener operation.
-
Configure the Set Payload component attributes:
-
From the canvas
-
From the configuration XML
Click the Set Payload component to open its configuration panel, and set the attributes to the following values:
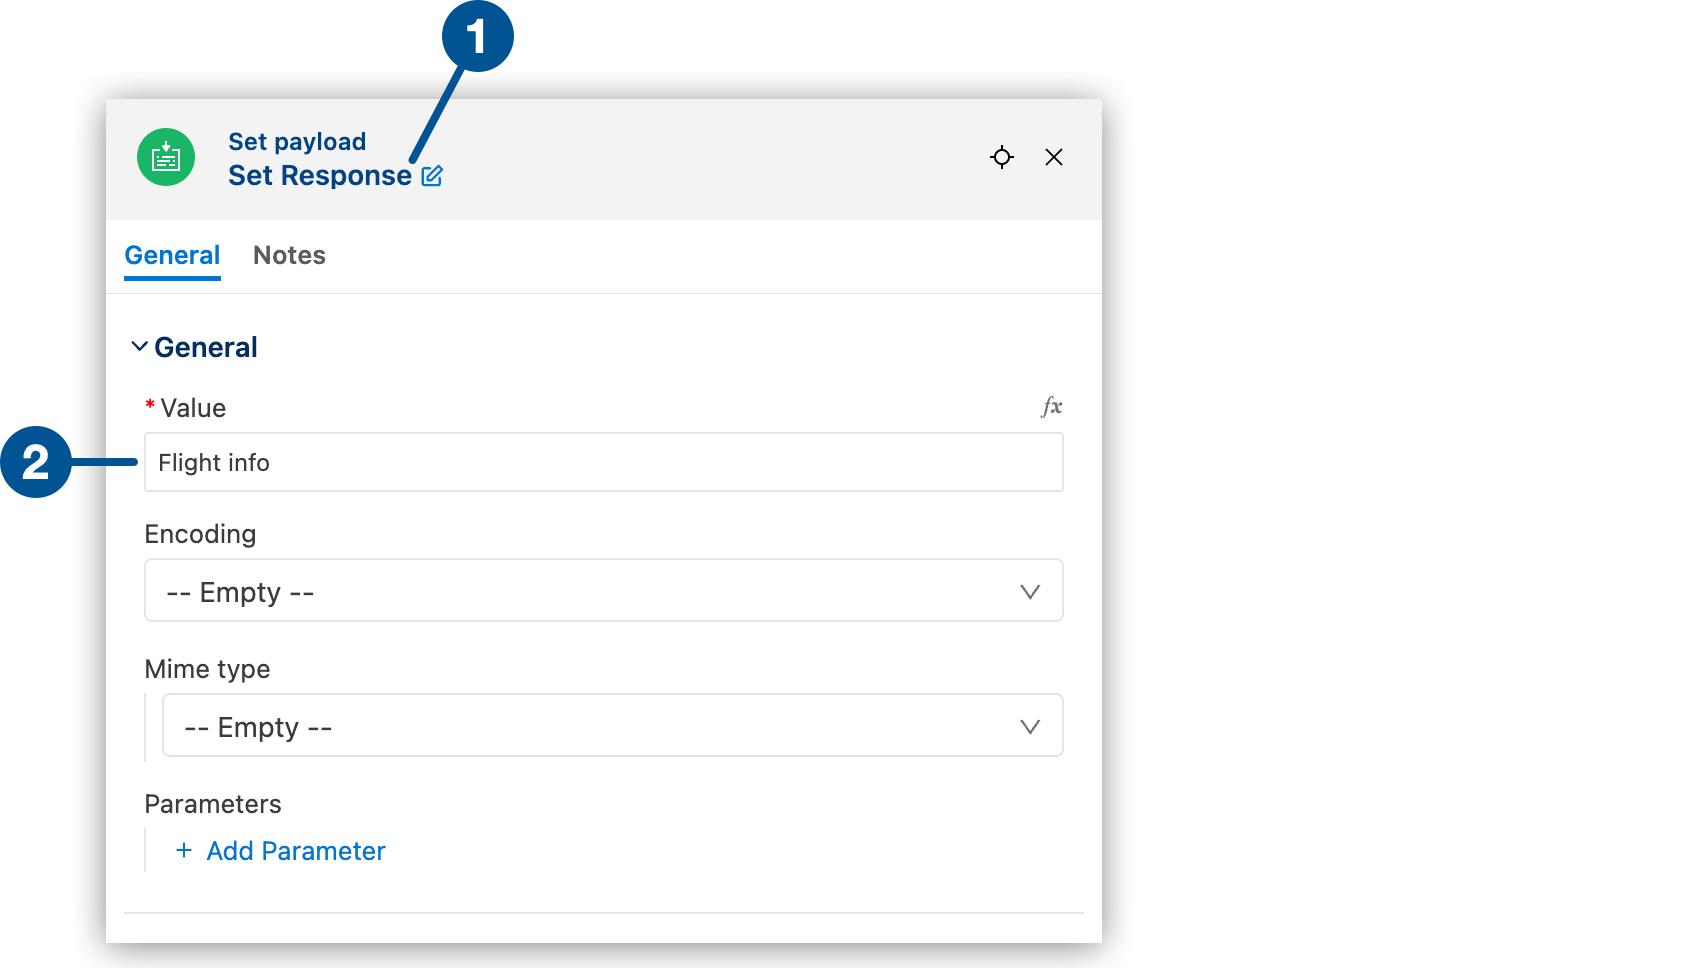
1 Change the component name to Set Response.2 Set the Value attribute to Flight info.In
<set-payload/>, set the attributes to the values provided in the example.<http:listener-config name="inbound-request" doc:id="b5c62f-a84a3a"> <http:listener-connection host="0.0.0.0" port="8081" /> </http:listener-config> <flow name="getFlights" > <http:listener path="flights" config-ref="inbound-request" doc:name="HTTP /flights" doc:id="htprur" /> (1) <set-payload value="Flight info" doc:name="Set Response" doc:id="e43e98-1a9a01"/> </flow>1 Set the valueattribute toFlight infoand thedoc:nametoSet Response. -
-
Before
<http:listener-config/>in the configuration XML, click Test Connection to check the HTTP Listener connection.The UI provides status:
-
Verifying connection inbound-request indicates that the test is in progress.
-
Connection is valid indicates a successful connection.
-
Invalid Connection Got status code: 500 when trying to resolve a Mule Runtime operation indicates a connection error.
A common code
500error isport 8081: Address already in use. For port conflicts, configure a different port, such as8082, and retest the connection.
-
-
After receiving the Connection is valid message, proceed to Run Your Application in Debug Mode.
Run Your Application in Debug Mode
-
Open the Run and Debug panel.
Show me how
-
Click the
 (Run and Debug) icon in the activity bar.
 -
Use the keyboard shortcuts:
-
Mac: Cmd+Shift+d
-
Windows: Ctrl+Shift+d
-
-
In the desktop IDE, select View > Run.
-
In the cloud IDE, click the
 (menu) icon, and select View > Run.
-
-
Click the
 (Start Debugging (F5)) icon for Debug Mule Application:
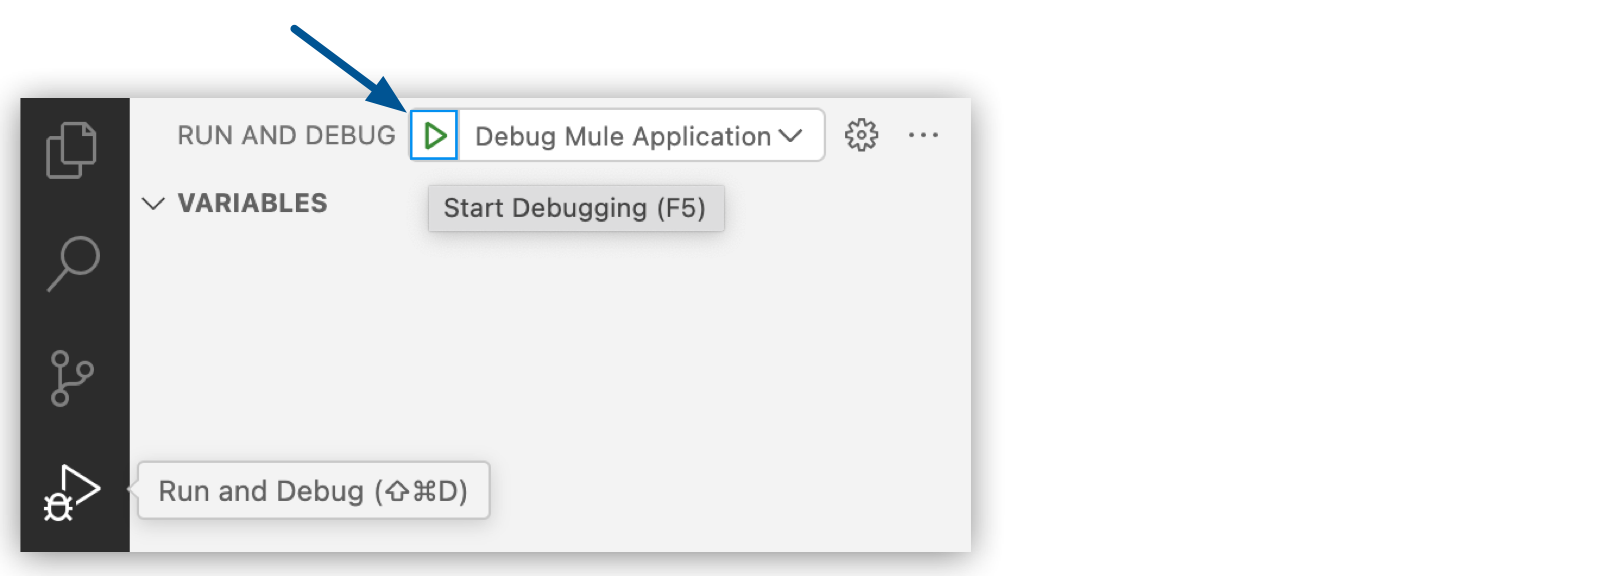
Anypoint Code Builder uses Maven to build and deploy your application to its embedded Mule runtime engine.
Note that using Run > Start without Debugging produces an error.
-
From your IDE, open the Terminal window in the console:
-
In the desktop IDE, select View > Terminal.
-
In the cloud IDE, click the
(menu) icon, and select Terminal > New Terminal. -
For either IDE: Press Ctrl and then press the backtick key (`).
*******************************************************************************
* - -  + APPLICATION + - -   *   - - + DOMAIN + - -      * - - + STATUS + - - *
*******************************************************************************
* american-ws-anypoint-code-builder-1.0.0-SNAPS * default   * DEPLOYED        *
*******************************************************************************
-
-
Proceed to Test Your Application.
Test Your Application
Use the IDE’s terminal to trigger the flow.
-
Submit a
curlcommand from the terminal with the URL to the/flightsendpoint to trigger the flow:curl http://0.0.0.0:8081/flightsFor guidance, see Trigger a Flow.
-
In your REST client or browser, check for the response Flight info.
If you do not receive this response or if you receive a connection error, review your XML configuration, make sure your application is deployed, and recheck your HTTP Listener connection.
-
After receiving the Flight info response, proceed to Stop Your Application.
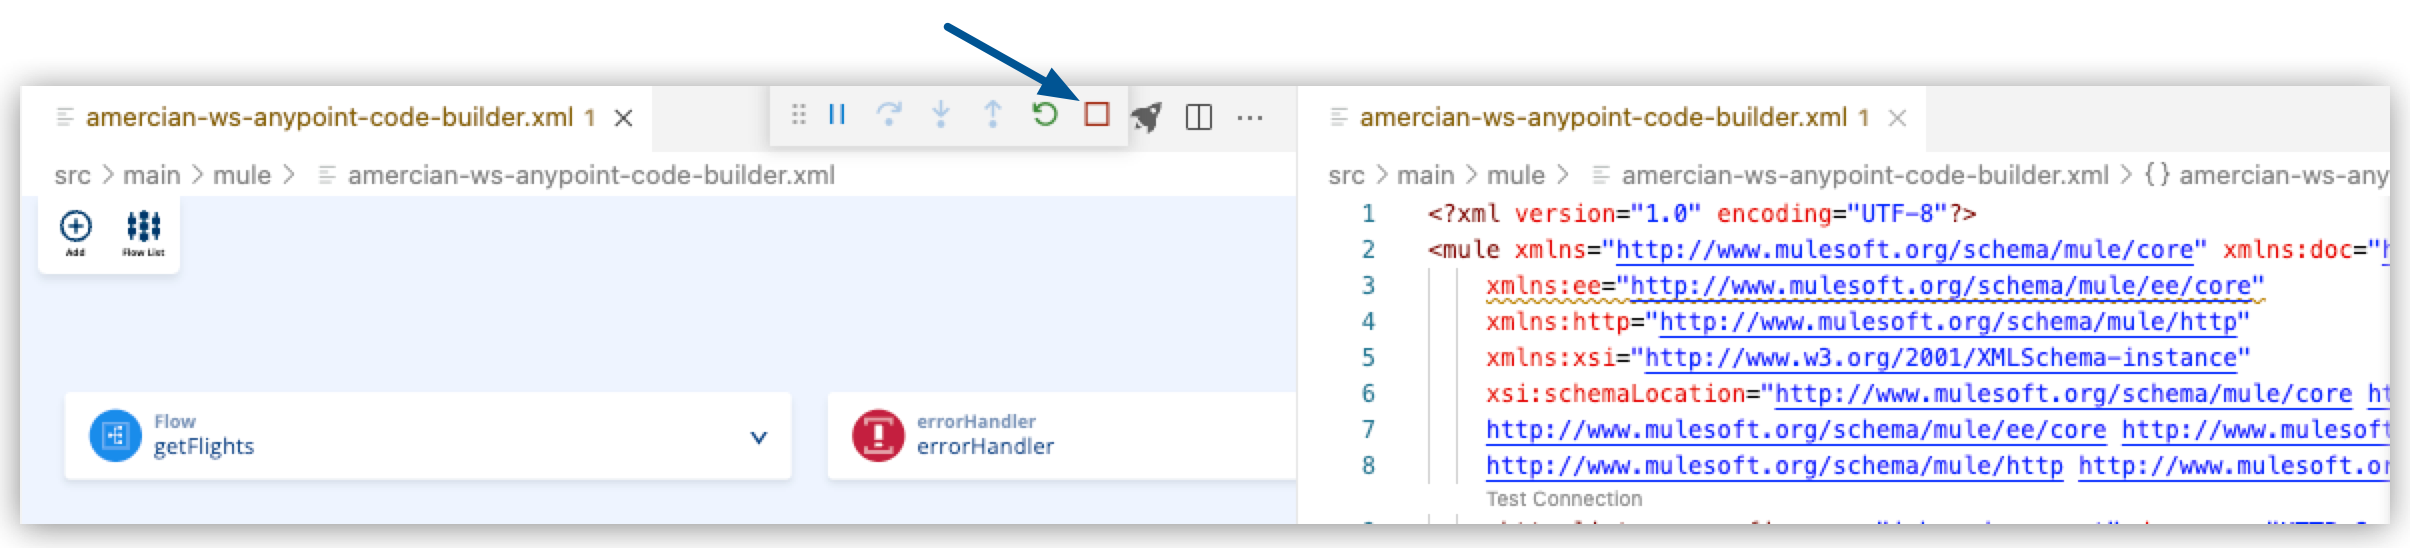
Stop Your Application
-
In Anypoint Code Builder, select the stop icon from the toolbar:
-
Proceed to Connecting to a Database from the App to import a connector from Exchange, and connect to an existing database that returns data about flights for the American Flights API.