
Step 3. Develop the API
Now that you’ve created an API spec, you’ll turn it into a working Mule application. Anypoint Code Builder includes an embedded Mule runtime for local testing. Later, you’ll deploy your application to CloudHub 2.0, where it runs on Mule runtime in the cloud.
Step 3.1: Create the Implementation Project
-
Open your API spec file in the editor, then click
 (Implement this local API) in the activity bar.
The icon and command are only available when your API spec file is open and active in the editor. Alternatively, open the Command Palette and select
MuleSoft: Implement this Local API.Show me how
-
Use the keyboard shortcuts:
-
Mac: Cmd+Shift+p
-
Windows: Ctrl+Shift+p
-
-
In the desktop IDE, select View > Command Palette.
Don’t select MuleSoft: Implement an API Specification. That command is for specs published to Anypoint Exchange, not local specs. -
-
At the prompt, click OK.

-
When prompted to save a
.code-workspacefile, navigate to your home directory and click Save.Don’t accept the default location. The default saves the
.code-workspacefile inside yourhello-world-apispec folder, which causes errors. You must save it one level up — in your home directory — so it sits alongside (not inside) your projects.For example, if you created your API spec in
~/hello-world-api/, navigate up to~(your home directory) and save the file there. Your folder structure should look like this:~/ (home directory) ├── hello-world-api/ <- your API spec project │ └── hello-world-api.yaml └── hello-world.code-workspace <- save the file HERE
-
When prompted, provide project configuration details:
-
Provide a name for your Mule project, for example,
hello-world-impl.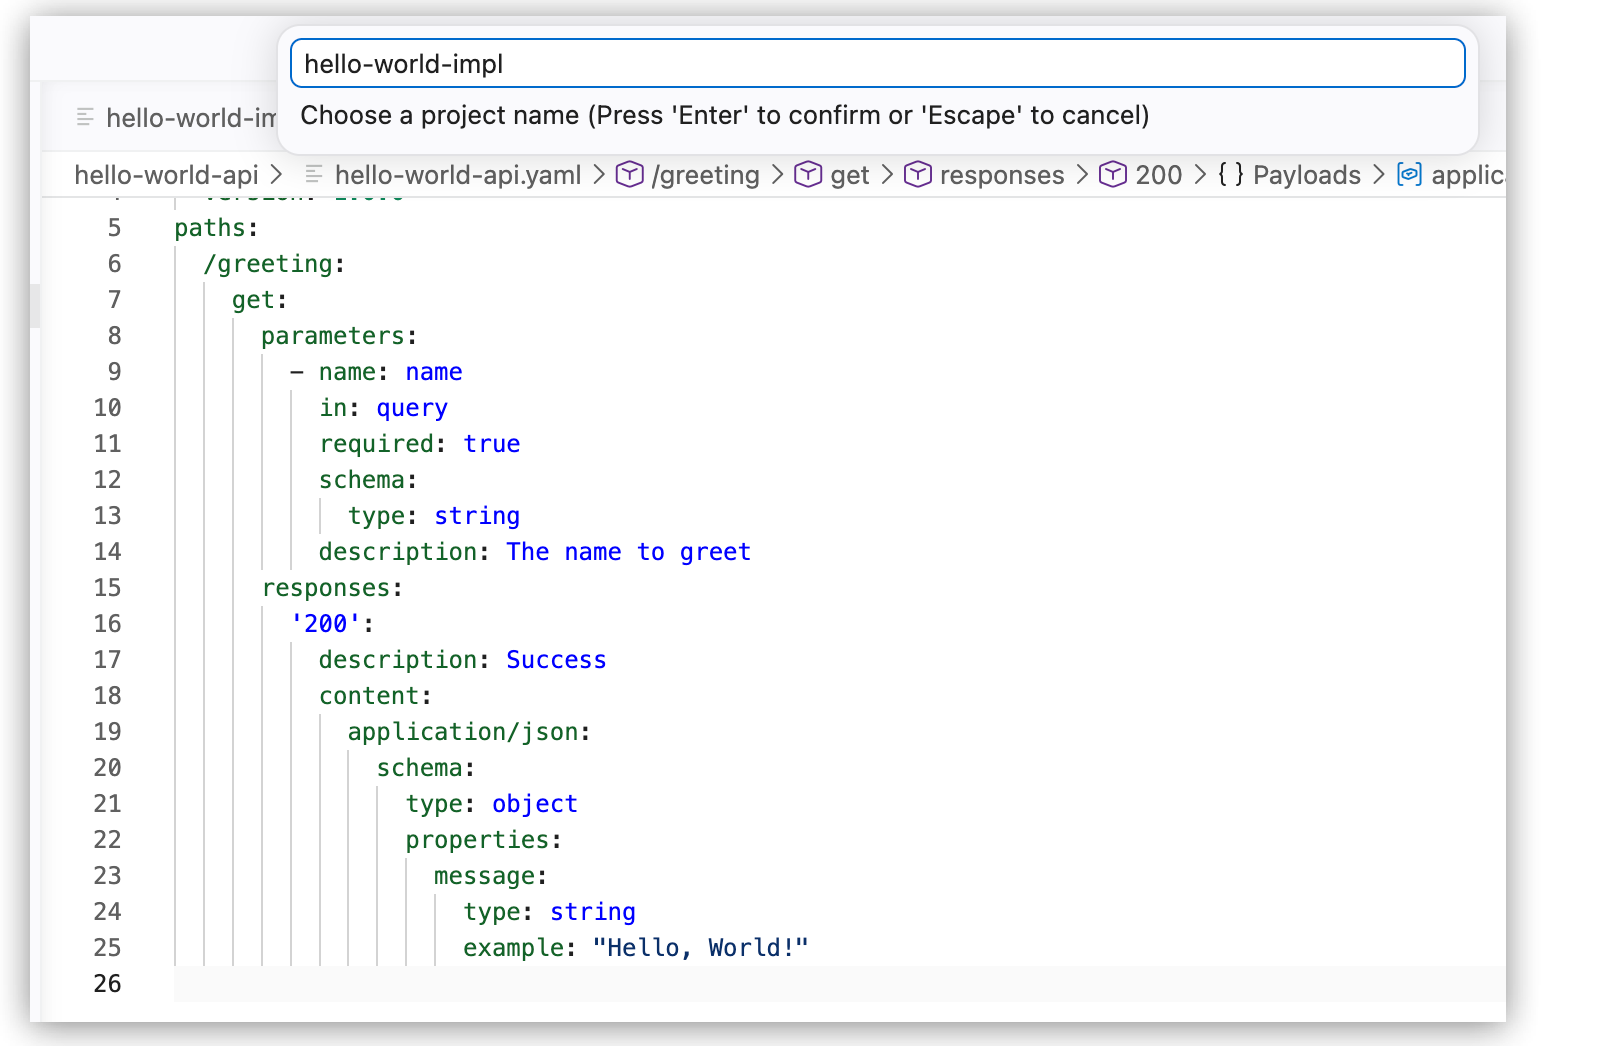
-
When prompted to select a target folder, navigate to your home directory (
~) and click Select target folder.This is where Anypoint Code Builder creates the
hello-world-implproject folder. Selecting your home directory places both projects side by side:~/ (home directory) ├── hello-world-api/ <- API spec project │ └── hello-world-api.yaml ├── hello-world-impl/ <- implementation project (created here) └── hello-world.code-workspace
-
Select a Mule runtime version for the project.
-
Select a Java version for the project.
Anypoint Code Builder scaffolds your local API spec into a new Mule project. Both the API spec and the implementation project open together in your IDE in a multi-root workspace.
-
-
Confirm the implementation file opened correctly:
-
In the Explorer view on the left, you’ll see two projects listed:
hello-world-apiandhello-world-impl. -
Expand
hello-world-impl > src > main > muleand openhello-world-api.xml.This is the Mule configuration XML, scaffolded from your API spec. It contains your flows, HTTP Listener, and APIkit Router. The canvas opens automatically.
-
Step 3.2: Understand the Scaffolded Structure
The canvas shows your scaffolded flows, including:
-
hello-world-api-main
HTTP Listener that receives requests on port 8081
-
get:\greeting:hello-world-api-config
Your GET endpoint implementation
-
Error handling flows
Click the Listener component, then select Edit Connection ( ) to review the connection configuration, including:
-
Path:
/api/*(receives all API requests) -
Host:
0.0.0.0(listens to all interfaces) -
Port:
8081(local development port)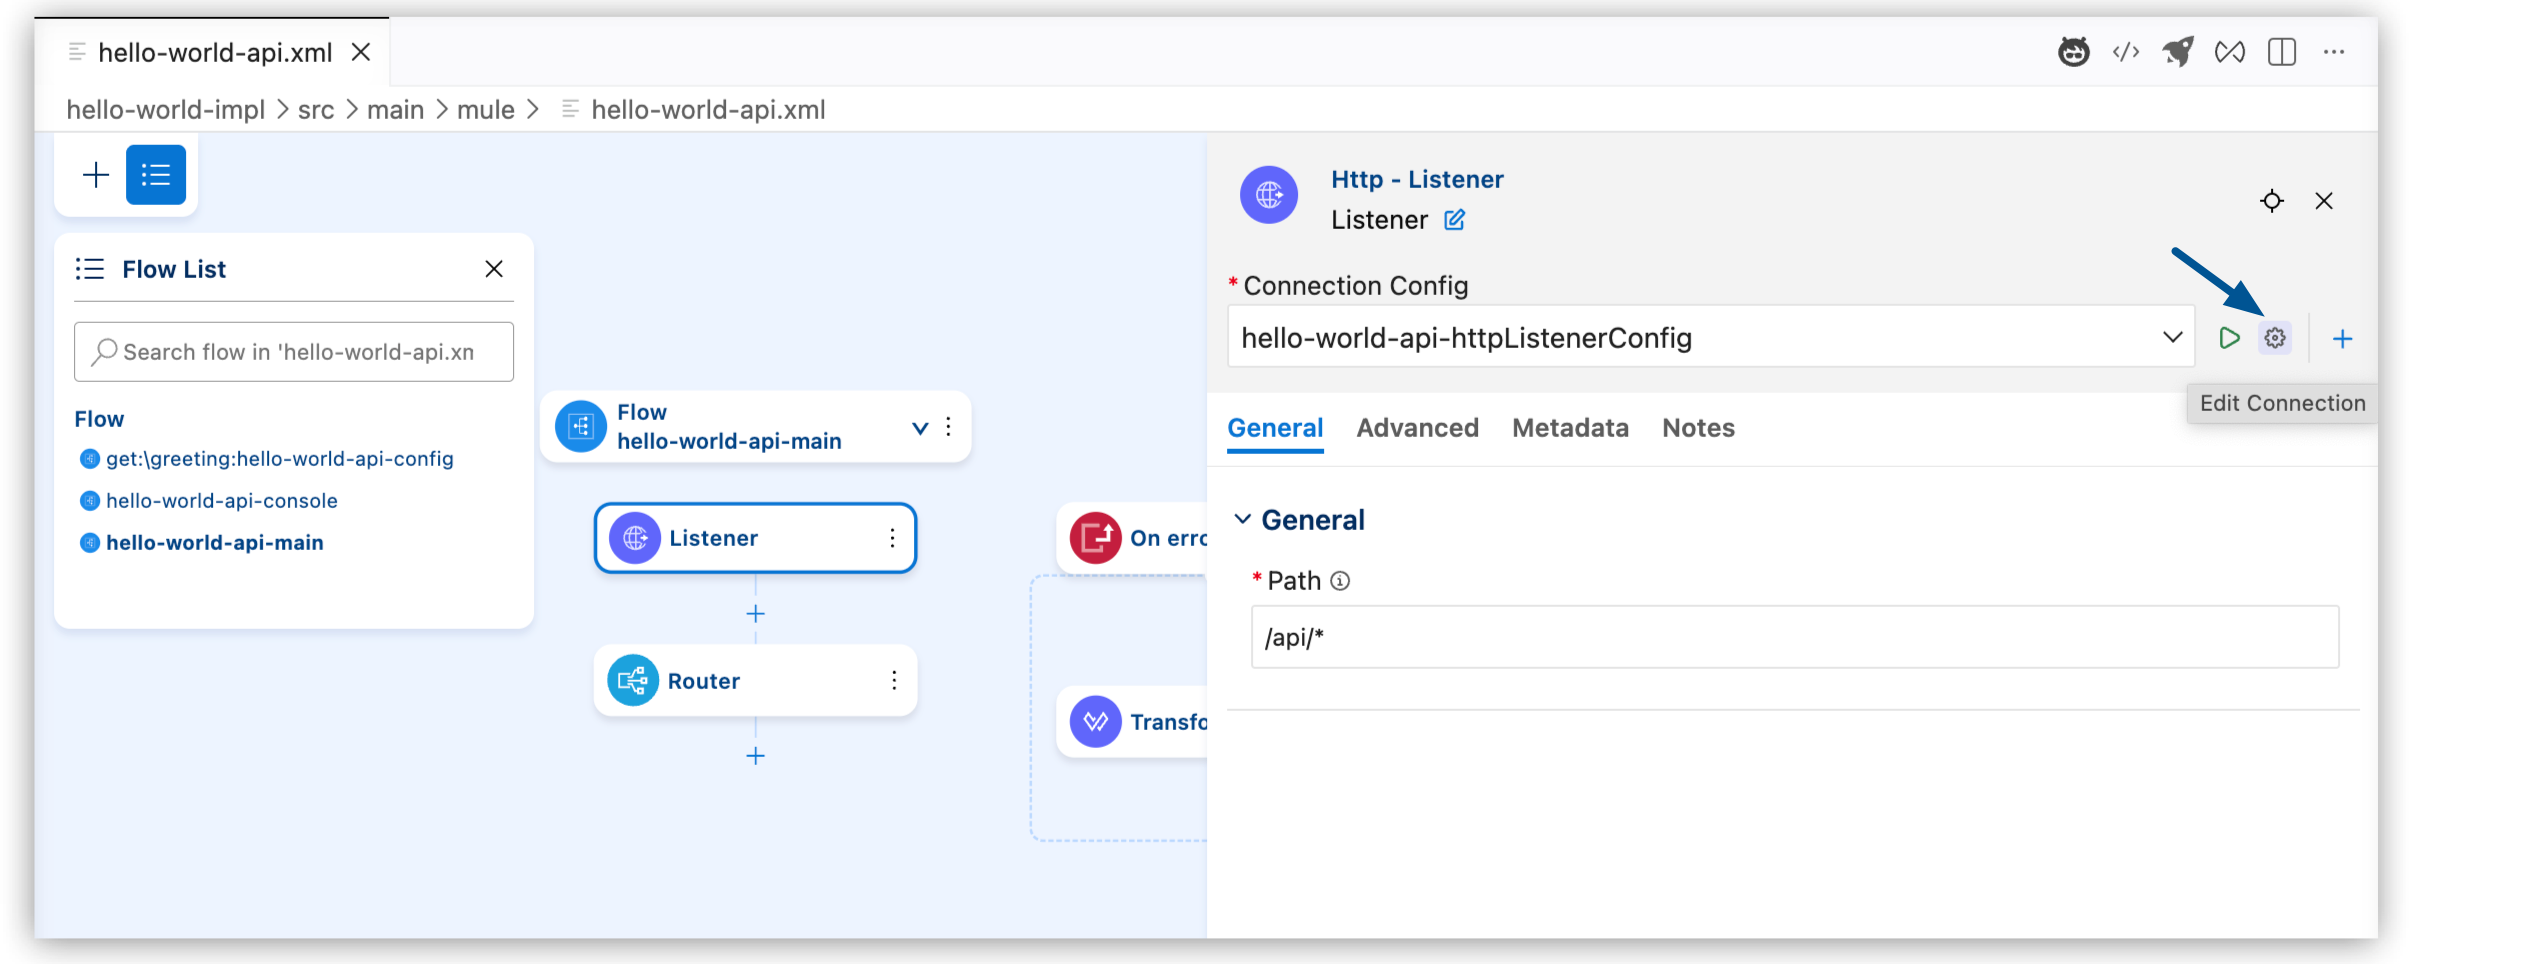
Step 3.3: Implement the Hello World Logic
Now add the logic to return your greeting.
-
Navigate to the get:\greeting:hello-world-api-config flow in the canvas.
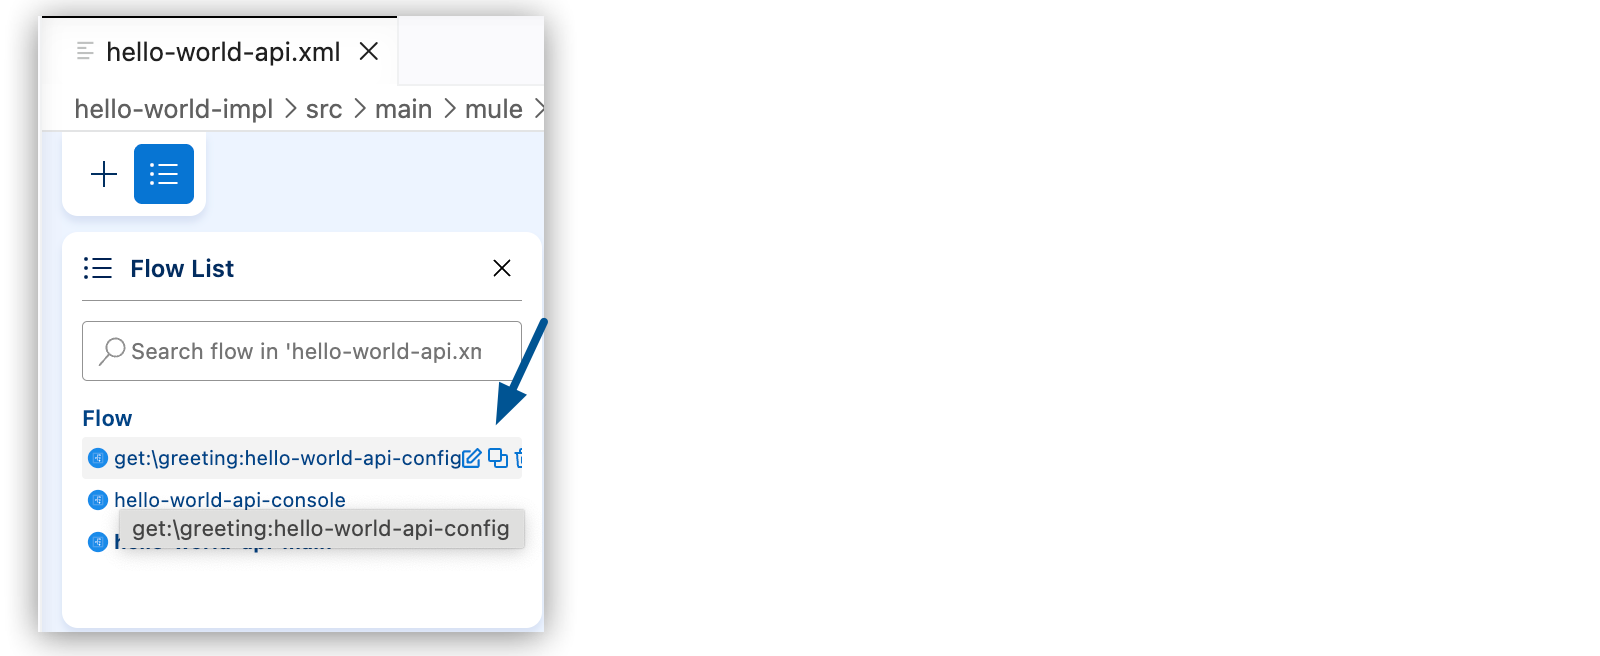
The flow contains a Logger component by default. You’ll add a Transform component after it to return your greeting.
-
Click
 (Add component) after the Logger component in the flow.
 -
In the Add Component panel, search for
Transformand select Transform from the results. -
Click the Transform component to open the DataWeave editor.
-
In the DataWeave editor that opens, replace the default script with:
%dw 2.0
output application/json
---
{
  message: "Hello, " ++ attributes.queryParams.name ++ "!"
}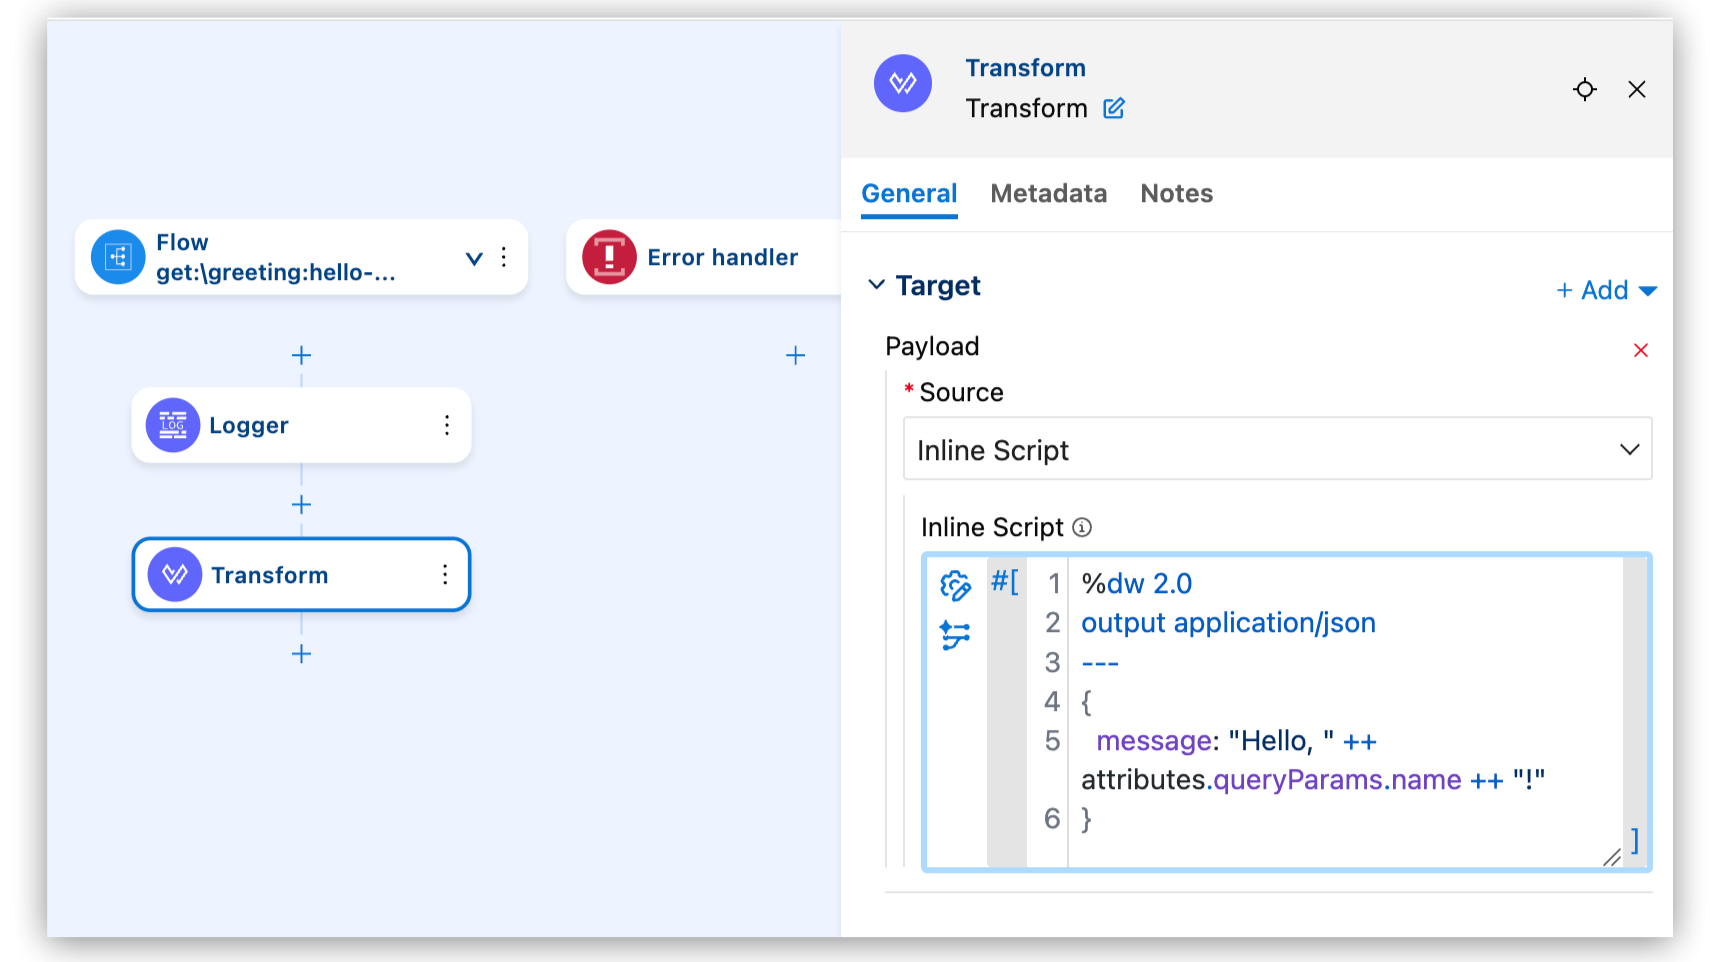
This DataWeave script reads the
namequery parameter and returns a personalized greeting. -
Save your changes (Cmd+S on Mac, Ctrl+S on Windows/Linux).
That’s it! Your API is implemented and ready to test.
What You Learned
You scaffolded a Mule project from your API spec using Anypoint Code Builder, which generated the HTTP Listener, APIkit Router, and flow structure automatically. You then implemented the greeting logic by adding a Transform component and writing a DataWeave script to read the name query parameter and return a JSON response.