
Step 4. Test the API
Test your API locally before deploying it to the cloud. You run the API in Anypoint Code Builder, send requests using Postman, add logging to track requests, and use the built-in debugger to inspect the Mule message at each step.
Step 4.1: Run and Test Your API
-
Open the Run and Debug panel.
Show me how
-
Click
 (Run and Debug) in the activity bar.
 -
Use the keyboard shortcuts:
-
Mac: Cmd+Shift+d
-
Windows: Ctrl+Shift+d
-
-
In the desktop IDE, select View > Run.
-
-
Run the Mule app.
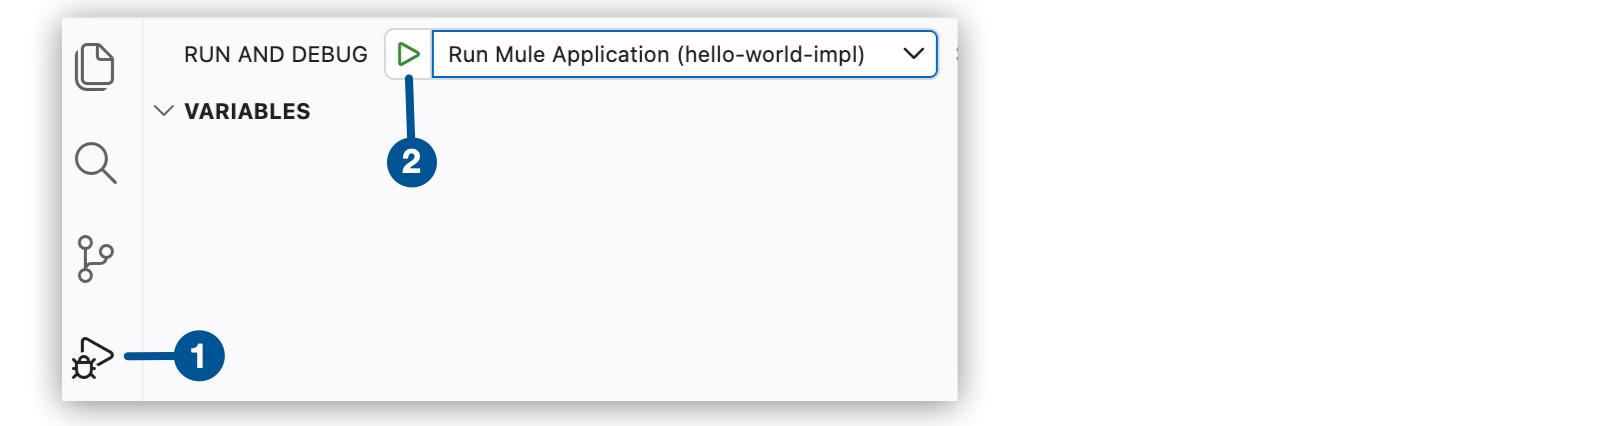
| 1 | Click to open the Run and Debug panel. |
| 2 | Click the button to run the Mule app. |
The Output panel shows startup progress. Wait for Application started successfully.
-
Open Postman and send a GET request:
http://localhost:8081/api/greeting?name=World -
Verify you receive:
{
  "message": "Hello, World!"
}
Your API works! Now let’s add logging and explore debugging.
-
Click
 (Stop) in the debug toolbar.
Step 4.2: Add Logging
Logging helps you see what’s happening inside your flows.
-
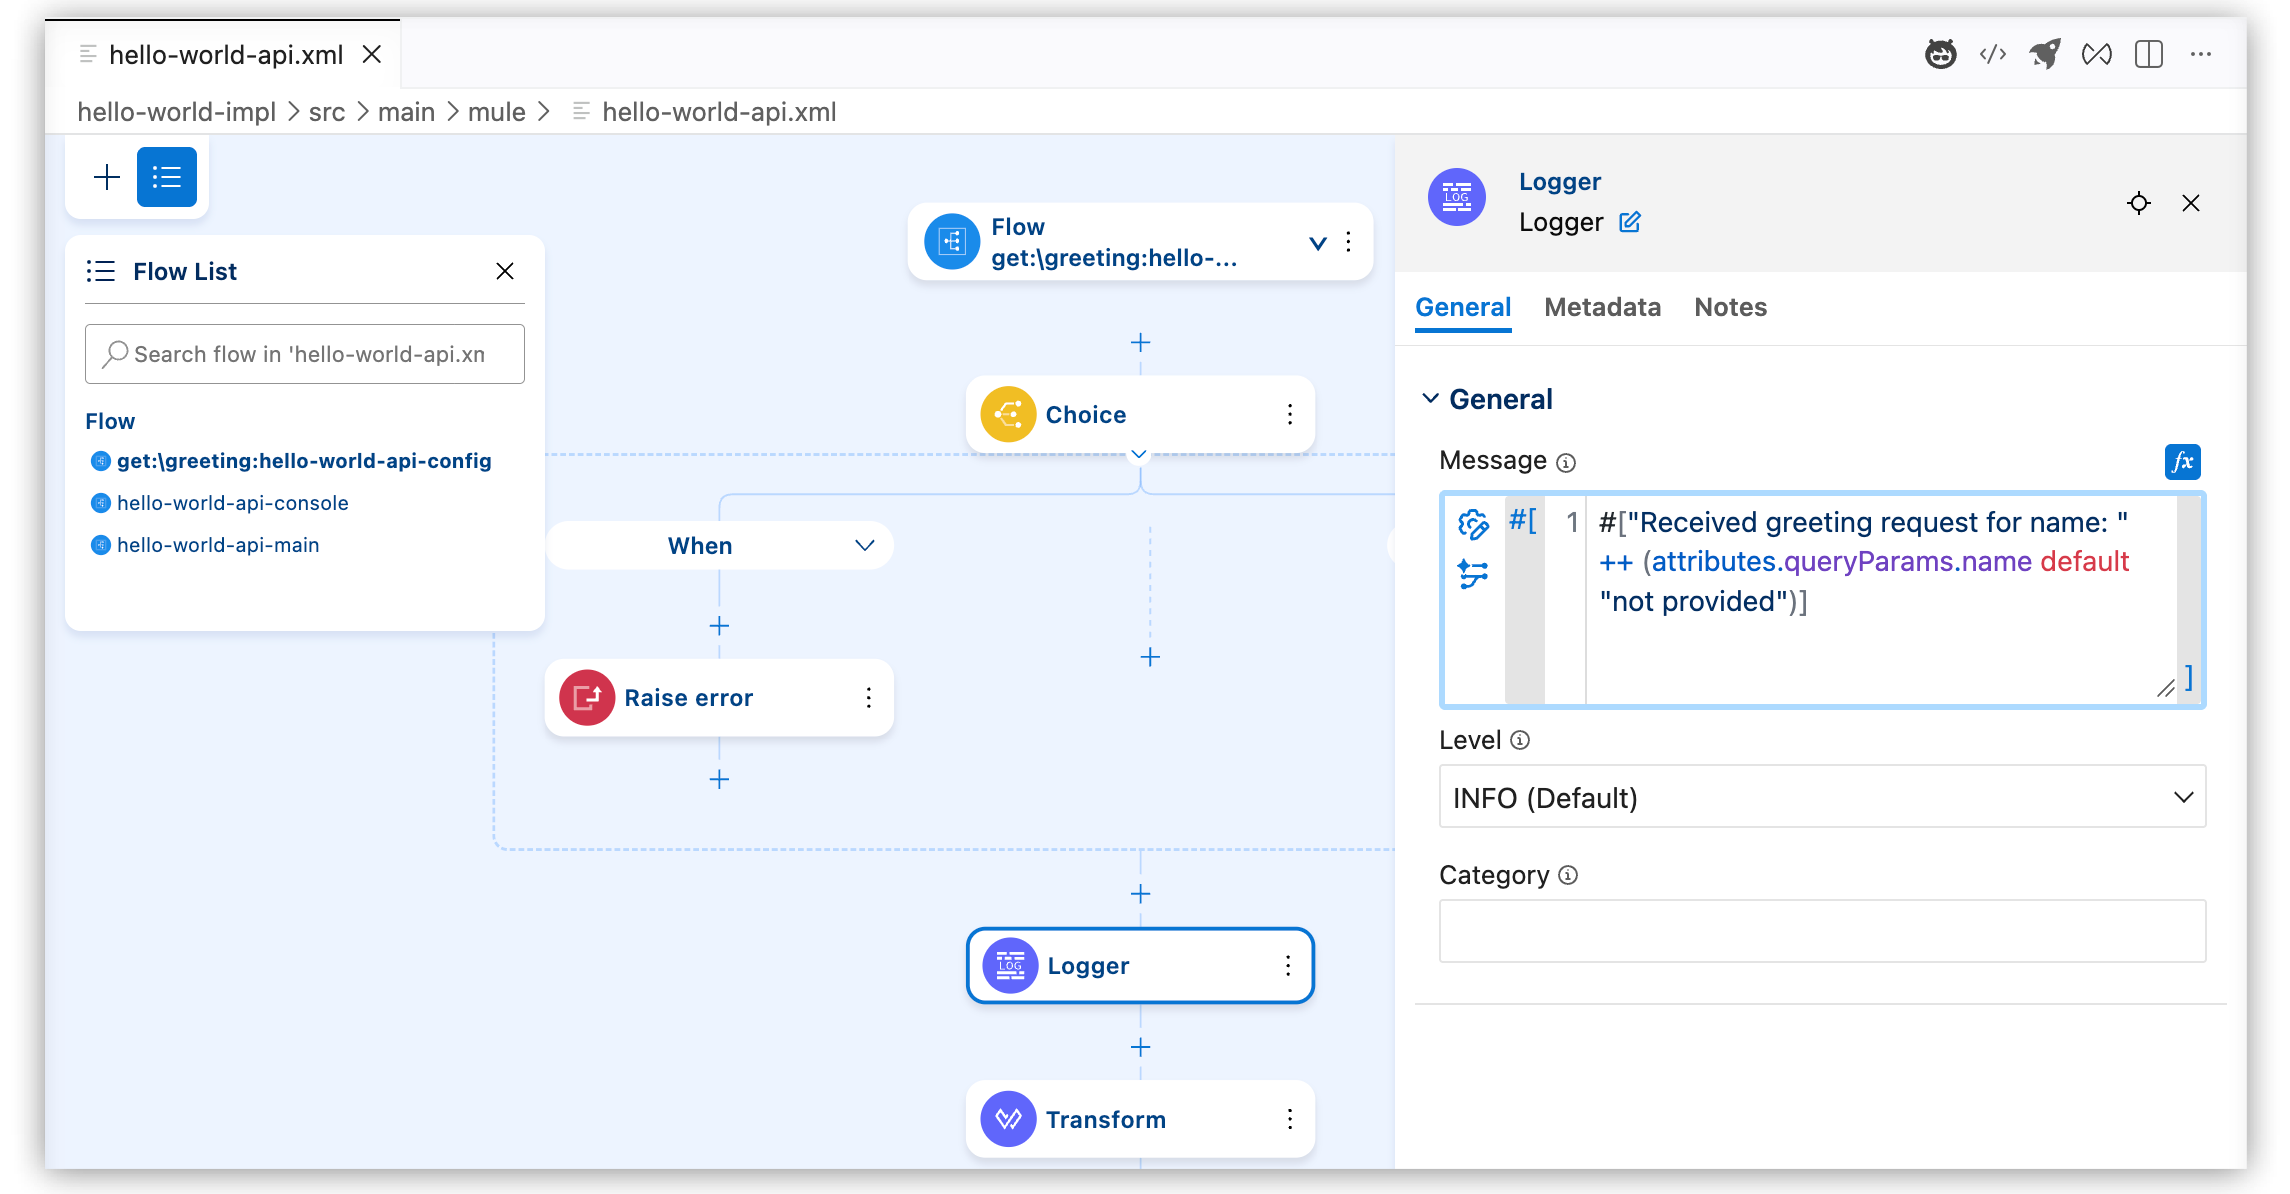
Click the Logger component and configure it:
-
Message: Click fx to switch to expression mode, then enter:
#["Received greeting request for name: " ++ (attributes.queryParams.name default "not provided")]This message logs the
namequery parameter value or "not provided" if it’s missing. -
Level: INFO
-
-
Save your changes.
Step 4.3: Test with Logging
-
Start your application by clicking
 (Run) in the debug toolbar.
 -
Open the Terminal panel to see your application logs:
-
Mac:
Cmd+\or select View > Terminal -
Windows:
Ctrl+\or select View > TerminalLogger output appears in the Terminal panel, not the Output panel. The Terminal shows the live Mule runtime log as requests are processed.
-
-
Send a request with Postman:
http://localhost:8081/api/greeting?name=World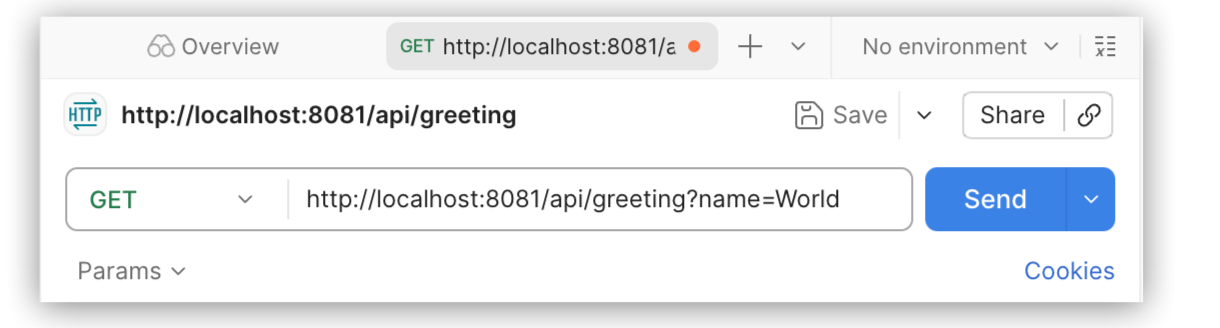
-
In the Terminal panel, you’ll see a log entry similar to:
INFO [hello-world-impl].get:\greeting Received greeting request for name: World -
Send a few more requests and watch the logs update.
-
Click
(Stop) when done.
Step 4.4: Understanding APIKit Validation
APIKit automatically validates incoming requests against your API specification. Since your API spec defines the name query parameter as required, APIKit:
-
Validates that the
nameparameter is present before routing to your implementation flow -
Returns a
400 Bad Requesterror automatically if the parameter is missing -
Ensures your flow only executes with valid requests that match the API contract
Try it:
-
Start the application.
-
In Postman, send a request without the name parameter:
http://localhost:8081/api/greeting -
Observe that APIKit returns an error response before your flow executes.
-
Check the Terminal — you won’t see your Logger message because APIKit blocked the invalid request.
This automatic validation is one of the key benefits of using APIKit — you don’t need to write manual validation code for contract requirements defined in your API specification.
Step 4.5: Use Breakpoints for Debugging
Breakpoints pause execution so you can inspect the Mule message at a specific point in your flow.
-
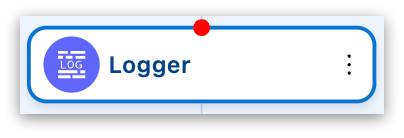
In the canvas, select the context menu for the Logger component, and then select Add Breakpoint.
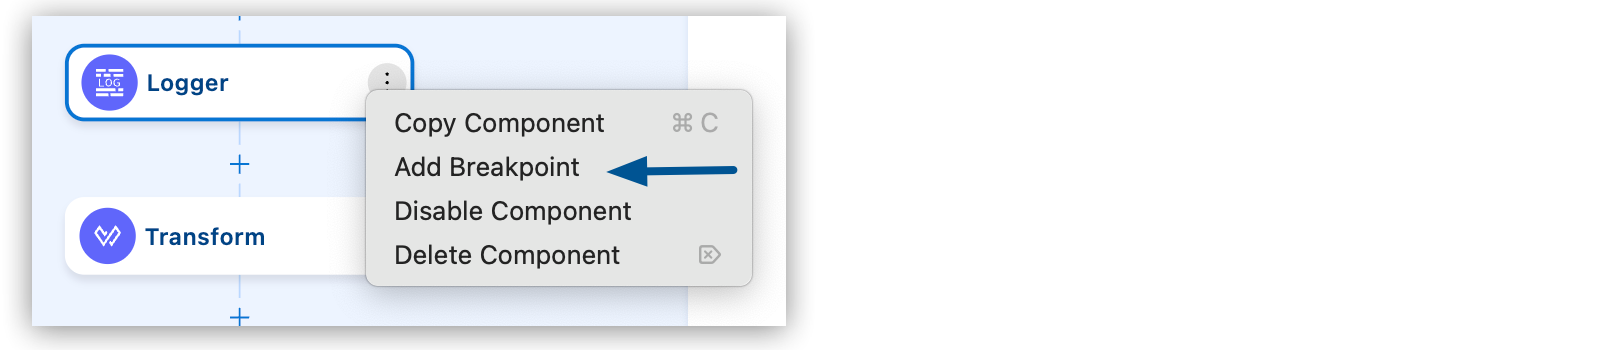
A red dot appears, which represents a breakpoint.
-
Click
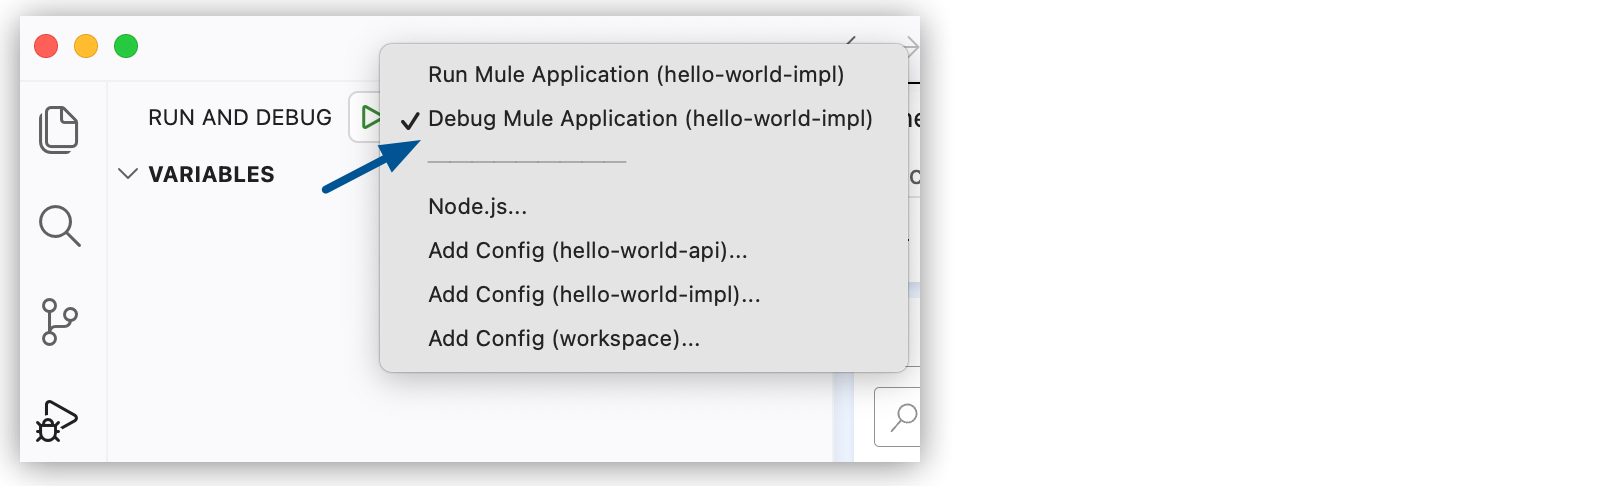
(Run and Debug) in the activity bar to open the Run and Debug panel. -
Select Debug Mule Application to start your application in debug mode.
-
Send a request from Postman:
http://localhost:8081/api/greeting?name=World -
Return to Anypoint Code Builder.
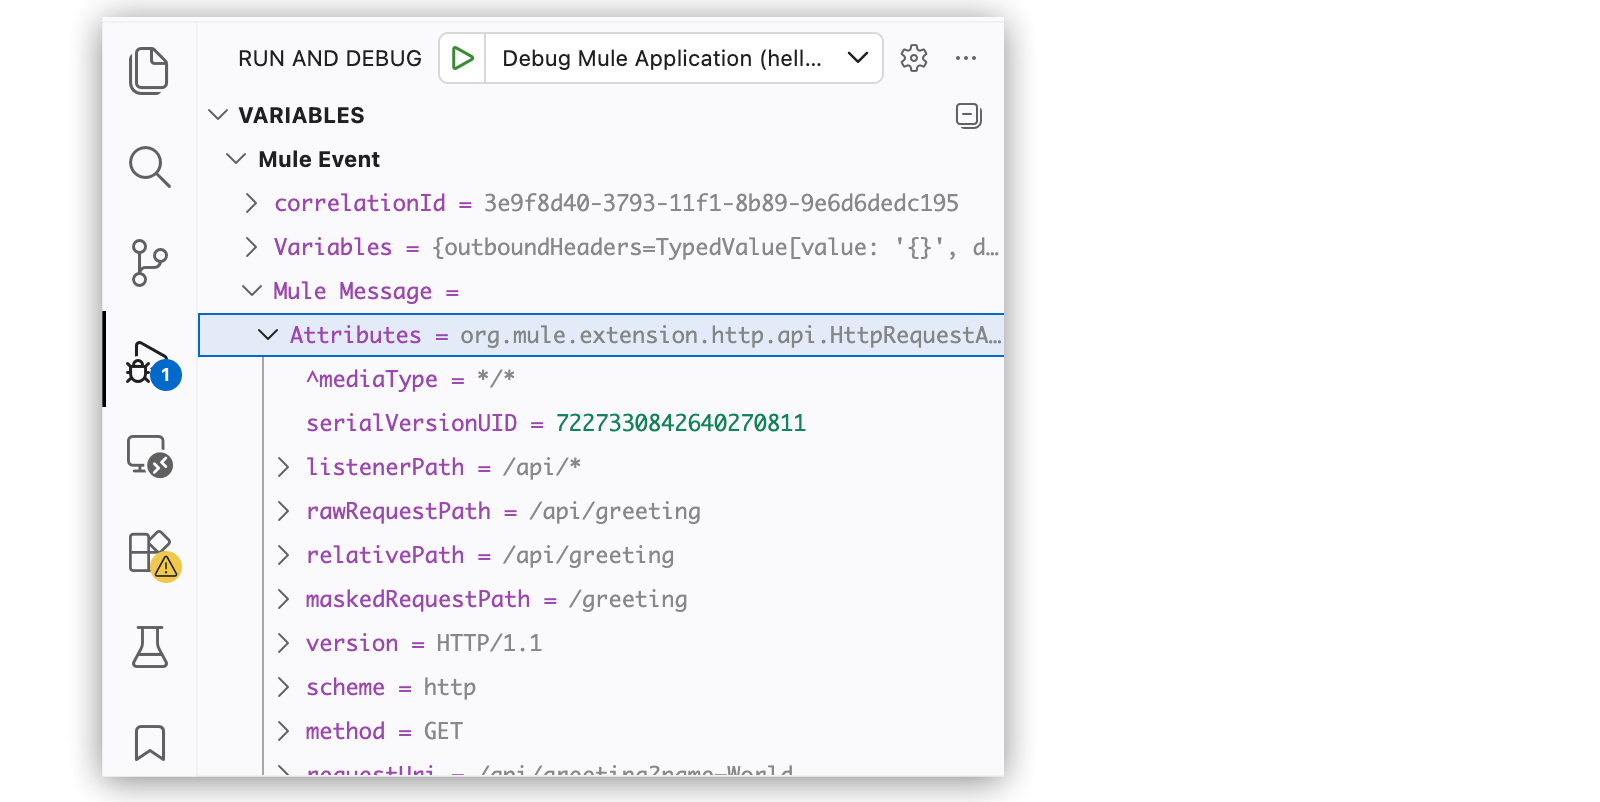
Execution pauses at the breakpoint. The debug toolbar appears at the top of the editor, and the Variables panel appears in the Run and Debug panel.
The Variables panel is in the Run and Debug sidebar, not at the bottom of the IDE. If you don’t see it, make sure the Run and Debug panel is open ( icon in the activity bar).
-
In the Variables panel, expand Mule Message to inspect:
-
payload: The current message content
-
attributes: HTTP request details, including headers, query parameters, and URI
-
vars: Any flow variables set during execution
-
-
Click Continue in the debug toolbar to resume execution and complete the request.
-
Click
(Stop) when done.
What You Learned
You ran the API locally and tested it with Postman, then configured a Logger to record each request. You learned how APIKit automatically validates requests against your API specification, and used Anypoint Code Builder’s debugger, including breakpoints and the Variables panel, to pause execution and inspect the Mule message at each step.