
Deploying Mule Apps to Hybrid Standalone Instances
Deploy your Mule applications to hybrid standalone instances for on-premises execution with centralized cloud-based management, enabling secure integration within your infrastructure while maintaining operational visibility and control.
Overview
Key deployment capabilities include:
-
Multi-target deployment: servers, server groups, and clusters
-
Application source flexibility: Anypoint Exchange, local files, and environment promotion
-
Configuration management: properties, logging, and monitoring settings
-
Real-time deployment tracking and status monitoring
-
Post-deployment management and update capabilities
Deployment Targets
Select deployment targets based on your application’s availability requirements, load distribution needs, and infrastructure architecture.
-
Servers
Deploy to specific server instances for development, testing, or applications requiring dedicated resources. -
Server Groups
Deploy to multiple servers simultaneously for load distribution and horizontal scaling. -
Clusters
Deploy to high-availability clusters for mission-critical applications requiring fault tolerance.
Deployment Methods
Choose from multiple deployment approaches based on your development workflow and integration requirements:
-
Runtime Manager Console
Web-based deployment through Anypoint Platform with visual deployment management -
Runtime Manager API
Programmatic deployment for CI/CD pipelines and automated workflows -
Maven Plugin
Integration with build processes for developer-centric deployment workflows
| When you use Runtime Manager to manage a server, you can’t use other deployment methods or tools to manage that server. This ensures consistent state management and prevents configuration conflicts. |
Before You Begin
Make sure your hybrid standalone environment meets the deployment requirements before initiating application deployment.
Review Requirements and Limitations to understand deployment and server scaling limits and plan your infrastructure within platform constraints.
Infrastructure Requirements
Complete this infrastructure setup:
-
Download, Install, Configure, and Upgrade On-Premises Mule Runtime Engine on target servers with appropriate Java version compatibility
-
Add servers to Runtime Manager for centralized management and deployment capabilities
-
Ensure servers have connectivity to Anypoint Platform for management communication
Environment Promotion Requirements
When promoting applications across environments (sandbox to production), verify these requirements:
-
Valid permissions on both source and target environments for deployment operations
-
Identical or compatible Mule runtime versions across environments to prevent deployment failures
-
Matching deployment target types (server, server group, cluster) between source and destination
-
All servers in clusters must use the same Java version that matches application requirements
| You can verify Java version compatibility by checking server details in Runtime Manager > Servers before deployment. |
Application Compatibility
Verify your application meets these deployment criteria:
-
Application built for target Mule runtime version
-
All dependencies available in target environment
-
Configuration properties aligned with target environment requirements
-
Resource requirements compatible with target server capacity
Deploy Applications Through Runtime Manager
Deploy Mule applications to your hybrid standalone infrastructure using Runtime Manager’s web console for comprehensive deployment management and monitoring.
Access the Deployment Interface
-
Sign in to Anypoint Platform.
-
Navigate to Runtime Manager.
-
In the Applications page, click Deploy application.
Configure Application Identity
-
Application Name
Provide a unique application name that identifies your deployment across environments:
-
3-42 alphanumeric characters (a-z, A-Z, 0-9) and dashes (-) only
-
Must be unique within the target environment (Runtime Manager validates automatically)
-
Application names can’t be changed after deployment
Choose meaningful application names that reflect functionality or environment for easier identification in operational dashboards. For example, customer-api-prod or inventory-sync-dev.
|
-
Deployment Target Selection
Select your deployment target based on application requirements:
-
Target must be in Running status to accept deployments
-
Available options depend on your configured infrastructure (servers, server groups, clusters)
-
Target selection determines available Mule runtime version for deployment
Application Source Configuration
Choose your application source based on development workflow and artifact management practices:
-
Exchange Integration
Deploy applications directly from Anypoint Exchange for centralized artifact management:
-
Click Choose file > Import file from Exchange.
-
Select Application as the asset type.
-
Search for your application by name.
-
Select the target application and choose the desired version.
-
Click Select.
Benefits: Version control, dependency management, organizational sharing
-
Local File Upload
Deploy applications from local development builds:
-
Click Choose file > Upload file.
-
Browse and select your application JAR file.
-
Click Open to upload.
Best for: Development testing, custom builds, hotfixes
-
Environment Promotion
Promote applications from non-production environments to maintain consistency:
-
Click Get from sandbox (available when non-production environments exist).
-
Select the source environment (for example, Sandbox, QA).
-
Search and select the application to promote.
-
Click Apply.
| Only applications deployed to hybrid standalone infrastructure can be promoted to other hybrid deployments. CloudHub applications require separate CloudHub-to-CloudHub promotion. |
Deployment Configuration
Configure application settings through specialized configuration tabs before initiating deployment:
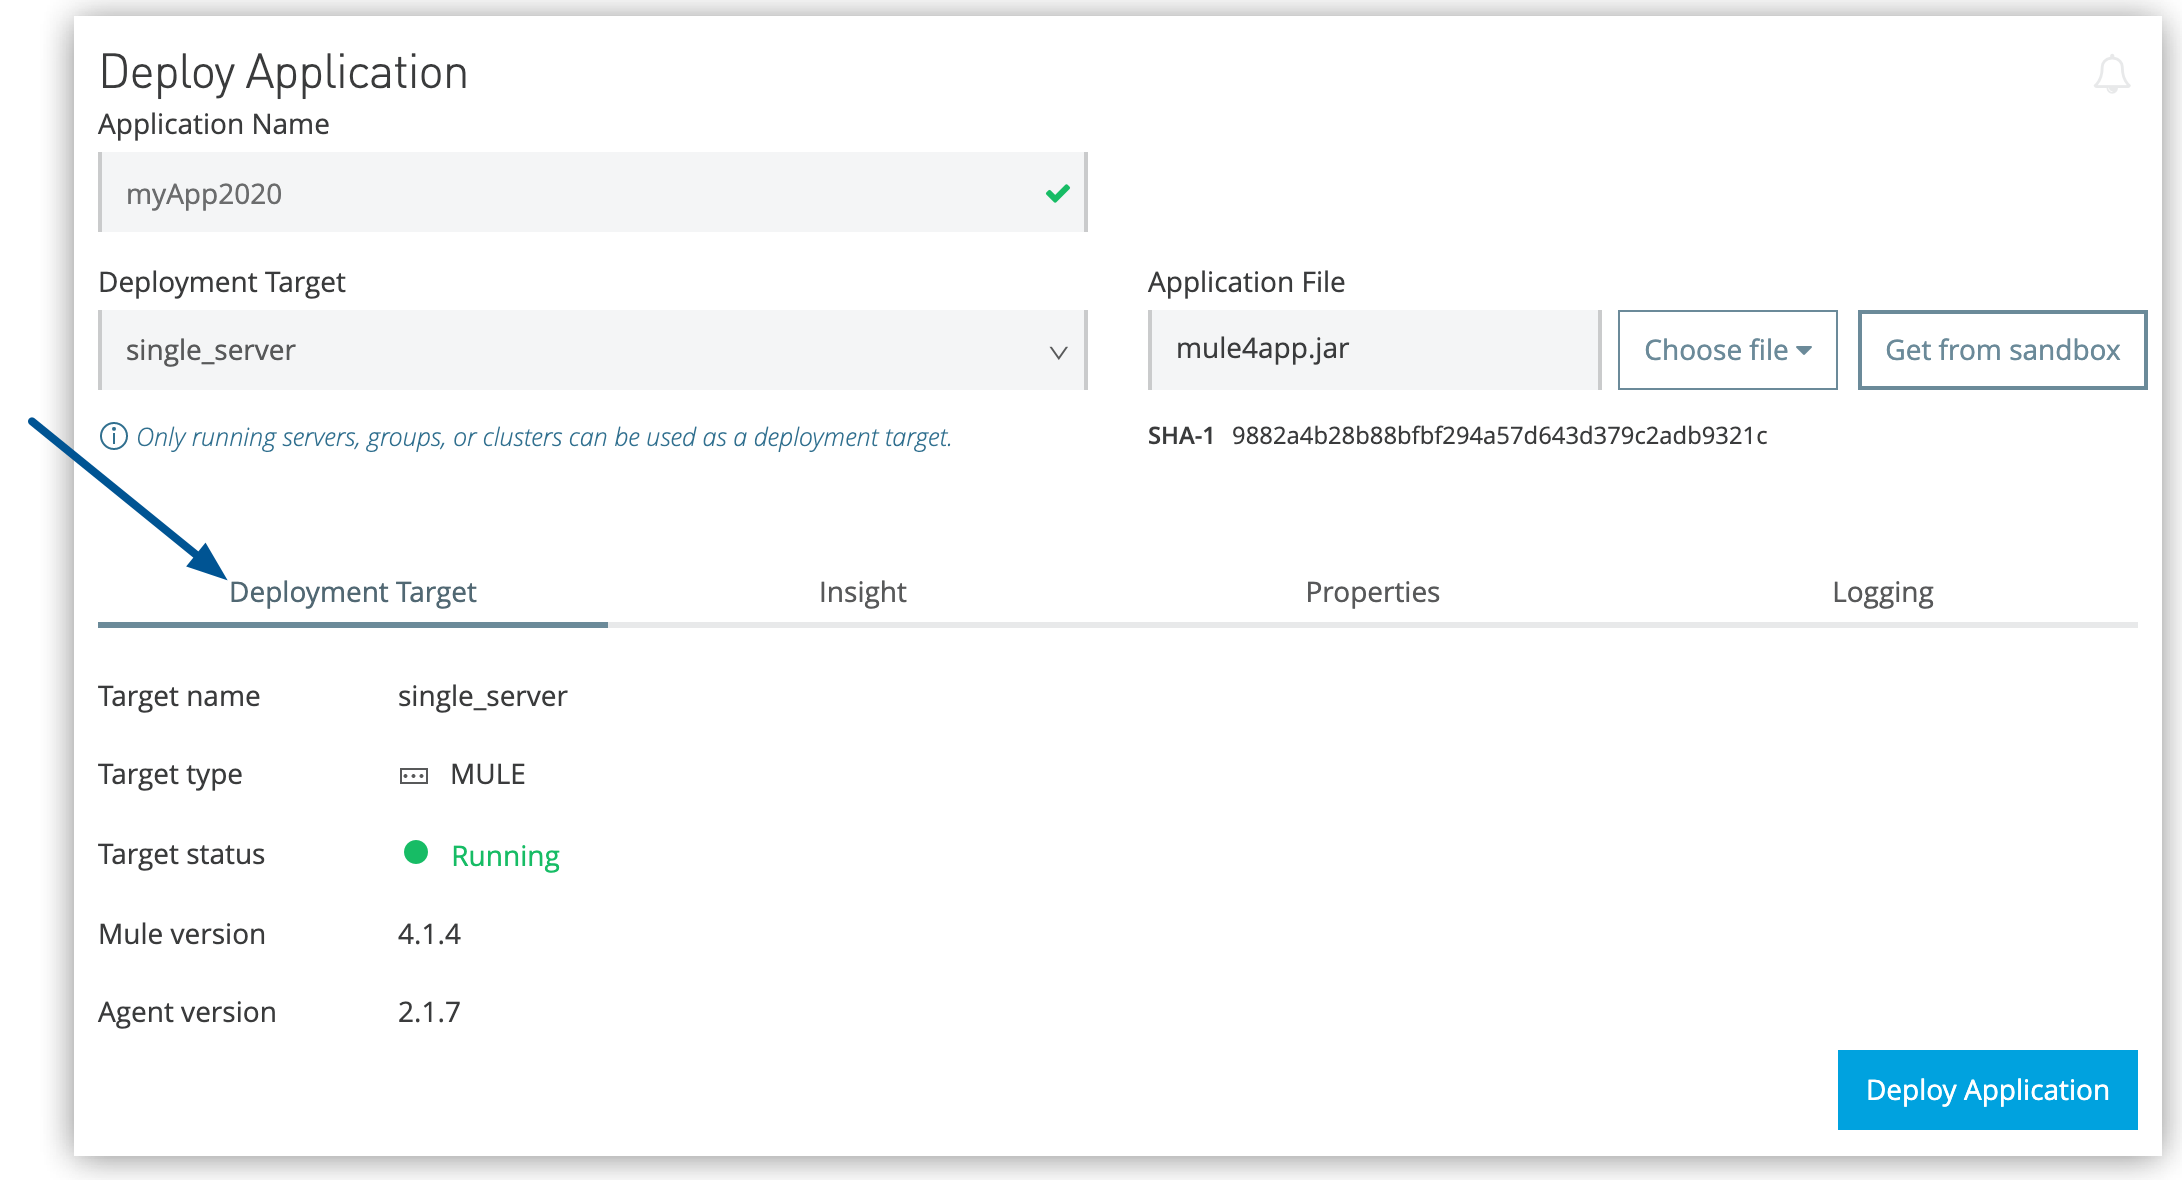
Deployment Target
Verify runtime compatibility between your application and target infrastructure:
-
Target selection automatically determines available Mule version
-
Ensure this matches your application’s development runtime version
-
Incompatible versions cause deployment failures
Insights
Configure application analytics and monitoring metadata:
-
Enable tracking for business transaction monitoring
-
Configure application-specific monitoring points
-
Enable detailed transaction flow analysis
Properties
Define runtime properties that control application behavior:
-
Configure environment-specific settings (endpoints, credentials, timeouts)
-
Promoted applications retain original properties (editable before deployment)
-
Use secure property management for sensitive configuration data
Property Management Resources:
Logging
Set application-specific logging levels for operational visibility:
-
TRACE,DEBUG,INFO,WARN,ERROR,FATAL -
Logging configuration overrides application defaults
-
Modify
log4j2.xmlfor advanced logging scenarios
For details, refer to:
Execute Deployment
-
Click Deploy Application to initiate the deployment process.
-
Monitor deployment status in the Applications dashboard.
-
Verify successful deployment through application status indicators.
The new application appears in the deployed applications list with a status indicator showing deployment progress and final state.
Update Deployed Applications
Perform application updates through Runtime Manager to deploy new versions or apply configuration changes with minimal service disruption.
Application Version Updates
Update application artifacts while preserving existing configuration:
-
Navigate to Applications page and select your deployed application.
-
Click Choose File.
-
Select new application version through the same source options:
-
Exchange version update
-
Local file upload
-
Environment promotion
-
-
Review configuration changes if needed.
-
Click Deploy Application.
Configuration Updates
Modify application properties and settings without changing the application artifact:
-
Select the deployed application from the Applications list.
-
Access configuration tabs (Properties, Logging, Insight).
-
Make necessary configuration changes.
-
Apply changes to trigger configuration reload.
Troubleshoot Deployment Errors
Use these steps to troubleshoot deployment errors:
-
Review status indicator and error messages in the Applications dashboard.
-
Access detailed error information through the application’s log view.
-
Confirm all deployment prerequisites are met (runtime version, connectivity, permissions).
-
Validate application properties and external system connectivity.
-
Correct identified issues and redeploy the application.