Managing Schedulers
Manage Scheduler components within your deployed Mule applications through Runtime Manager’s centralized controls to dynamically adjust scheduled jobs, automated processes, and time-based integrations without requiring application redeployment.
Overview
Runtime Manager provides comprehensive scheduler management capabilities for applications deployed to hybrid standalone instances, enabling you to:
-
Control scheduler lifecycle operations (enable, disable, run immediately)
-
Modify scheduling frequencies and execution patterns in real-time
-
Configure timezone settings for cron-based schedulers
-
Monitor scheduler execution status and performance
-
Manage multiple schedulers across application flows simultaneously
Scheduler Management Scope
Scheduler management is available for applications deployed to hybrid standalone instances (individual servers, server groups, and clusters). This feature provides runtime control over Scheduler components defined in your Mule application flows.
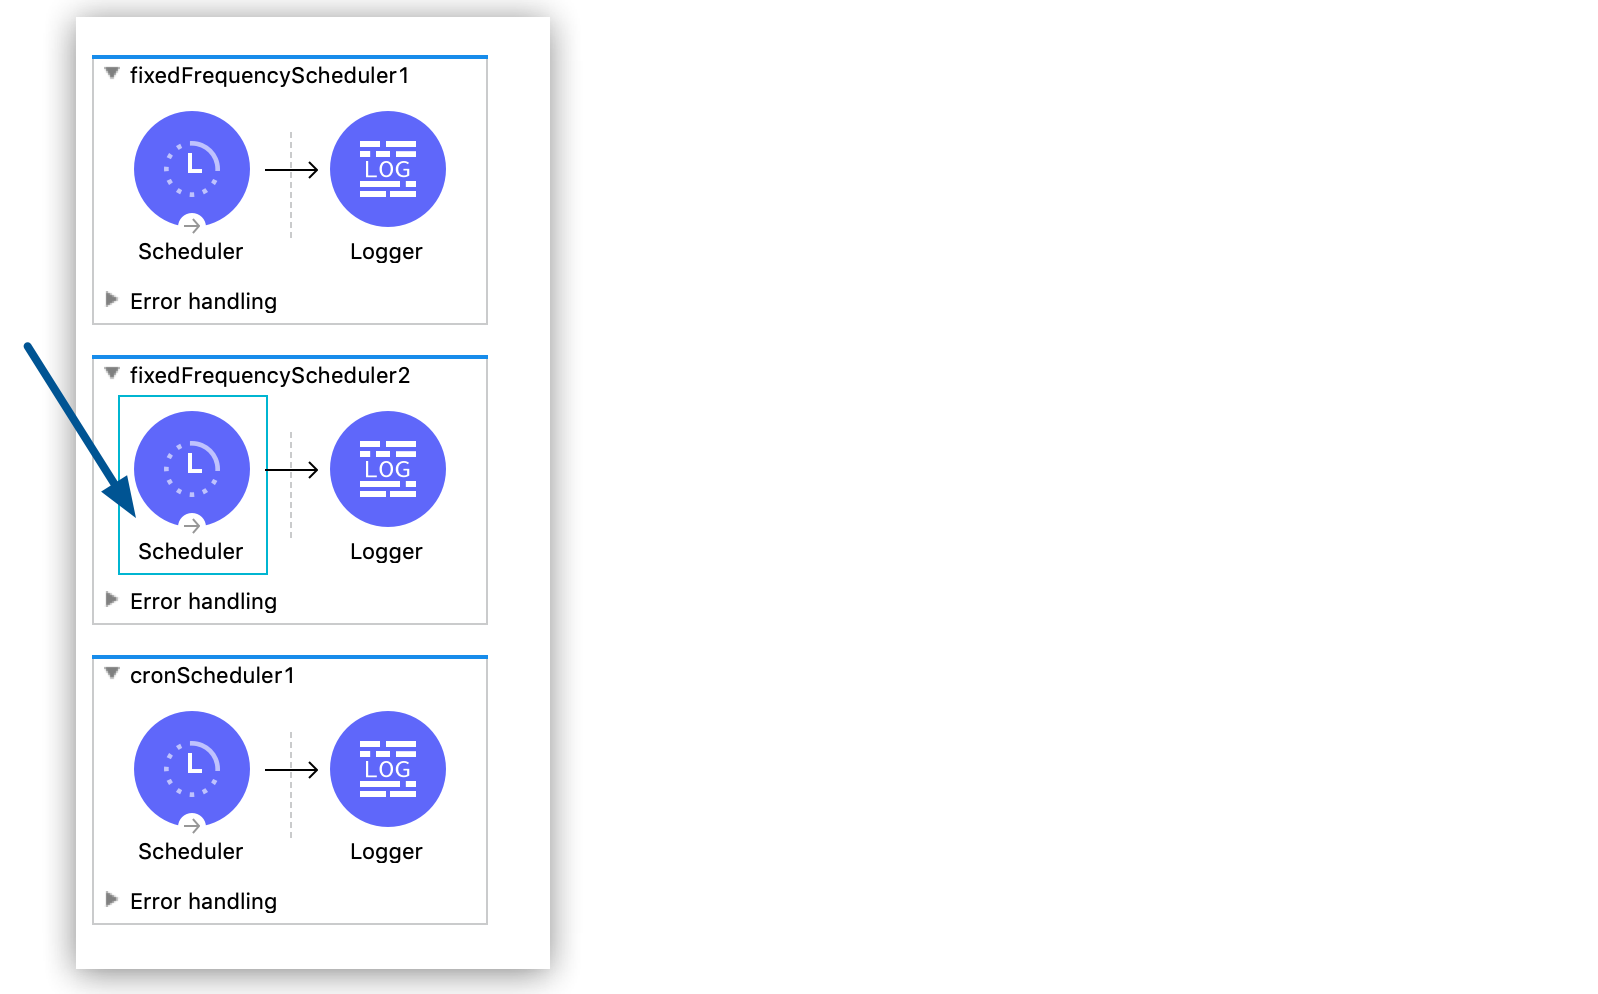
Scheduler Identification
Runtime Manager identifies each Scheduler component using the naming convention polling://{flow_name}, where {flow_name} represents the name of the flow containing the Scheduler element.
|
Timezone configuration for cron schedulers is available only for hybrid standalone deployments. CloudHub and Government Cloud deployments don’t support custom timezone settings. |
Use Cases
Schedule management is useful in these contexts:
-
You want to change the schedulers in your application at runtime without redeploying.
-
You want to disable a scheduled job while one of the applications you’re connecting to is undergoing maintenance.
-
You want runtime visibility into the schedulers in your application.
Considerations and Limitations
When using the Schedulers tab, consider this:
-
If a scheduled job isn’t triggered because the application isn’t running, Runtime Manager triggers the job as soon as the application restarts.
-
The scheduler reads the job configuration every time it runs.
To apply your changes immediately, run your jobs manually after updating the schedule.
Scheduler Management Operations
Manage scheduler configurations and runtime behavior through Runtime Manager’s Schedulers interface for applications deployed to hybrid standalone instances.
Prerequisites
Before managing schedulers, make sure that your application deployment meets these requirements:
-
Your application contains one or more Scheduler components defined in Mule flows
-
Your application is successfully deployed to hybrid standalone instances (servers, server groups, or clusters)
-
Your user account has appropriate application management permissions in Runtime Manager
Access Scheduler Management
Go to the scheduler management interface for your deployed application:
-
In Runtime Manager, click Applications in the navigation pane.
-
Select your deployed application from the applications list.
-
Click the Schedulers tab to access scheduler management controls.
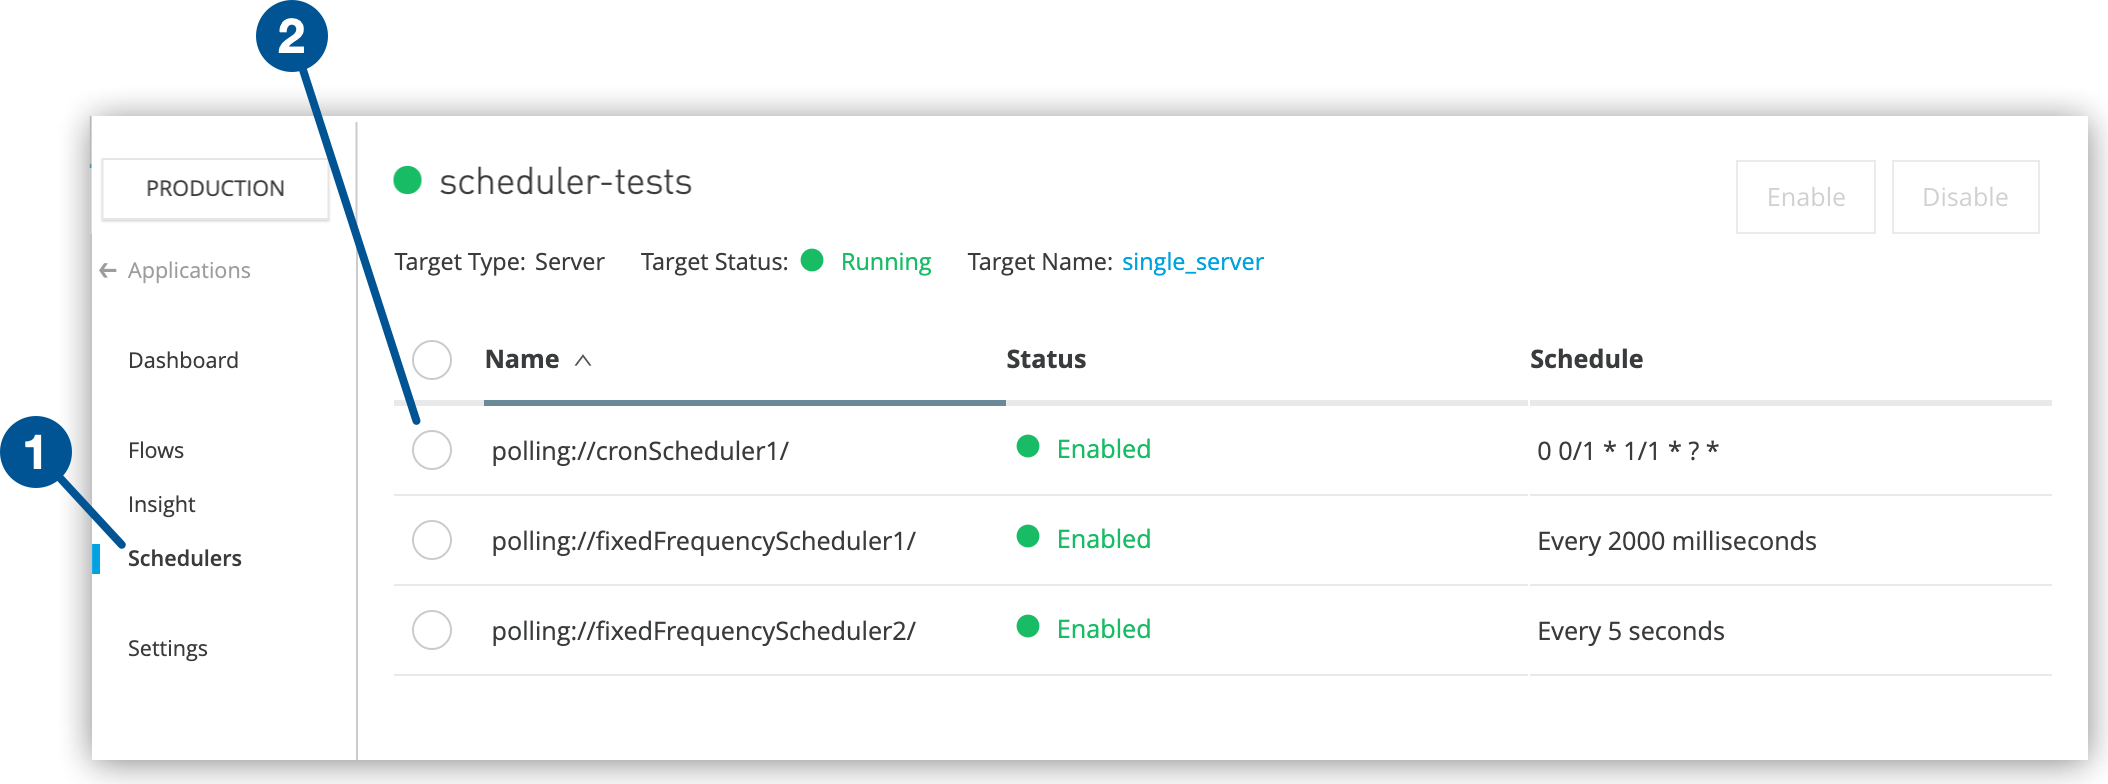
Scheduler Display Information
-
Name: Shows the flow name containing each Scheduler element
-
Status: Displays current state (enabled/disabled) for each scheduler
-
Schedule: Lists schedulers in the order they appear in your application

Scheduler Configuration Operations
Enable/Disable Schedulers
Control scheduler execution state through bulk or individual operations:
-
Bulk Operations: Select multiple scheduler checkboxes and click Enable or Disable
-
Individual Control: Select a single scheduler checkbox to modify its state
-
Status Verification: Confirm scheduler state changes in the status indicators
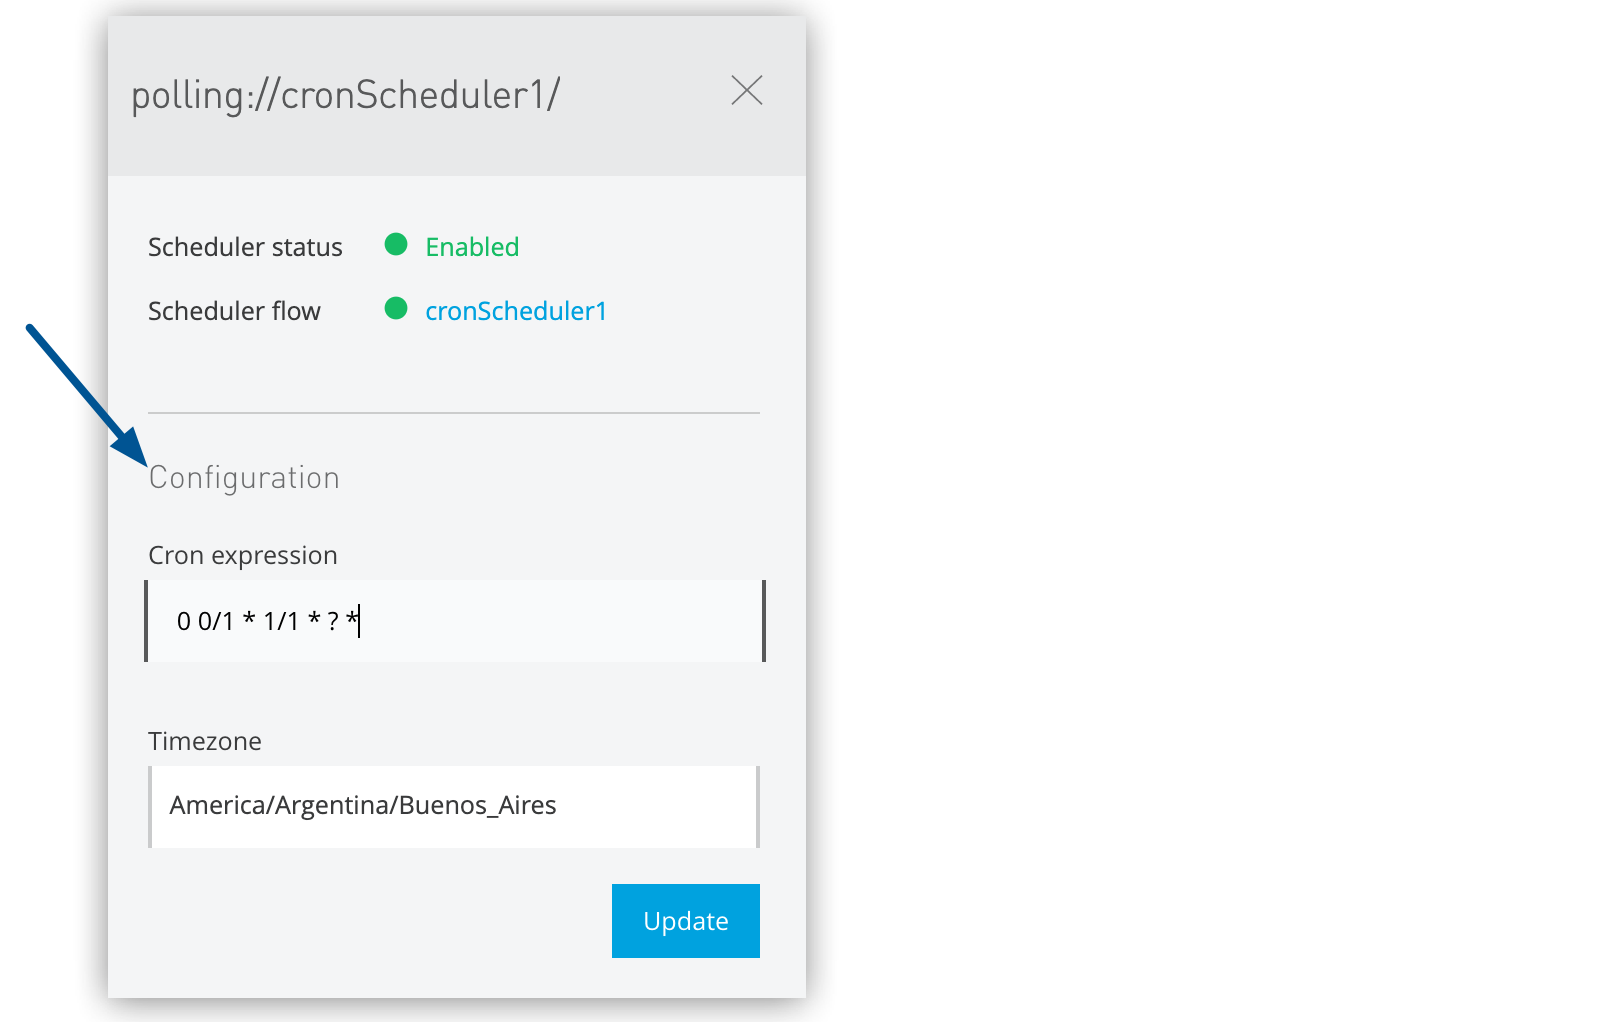
Cron Scheduler Configuration
Modify cron-based scheduler settings for complex scheduling patterns:
-
Select a single cron scheduler checkbox
-
Update schedule configuration in the details pane:
-
Cron Expression: Define minute, hour, day, month, and day-of-week patterns
-
Timezone: Configure timezone for execution (hybrid standalone only)
-
Start Time: Set the execution start time.
-
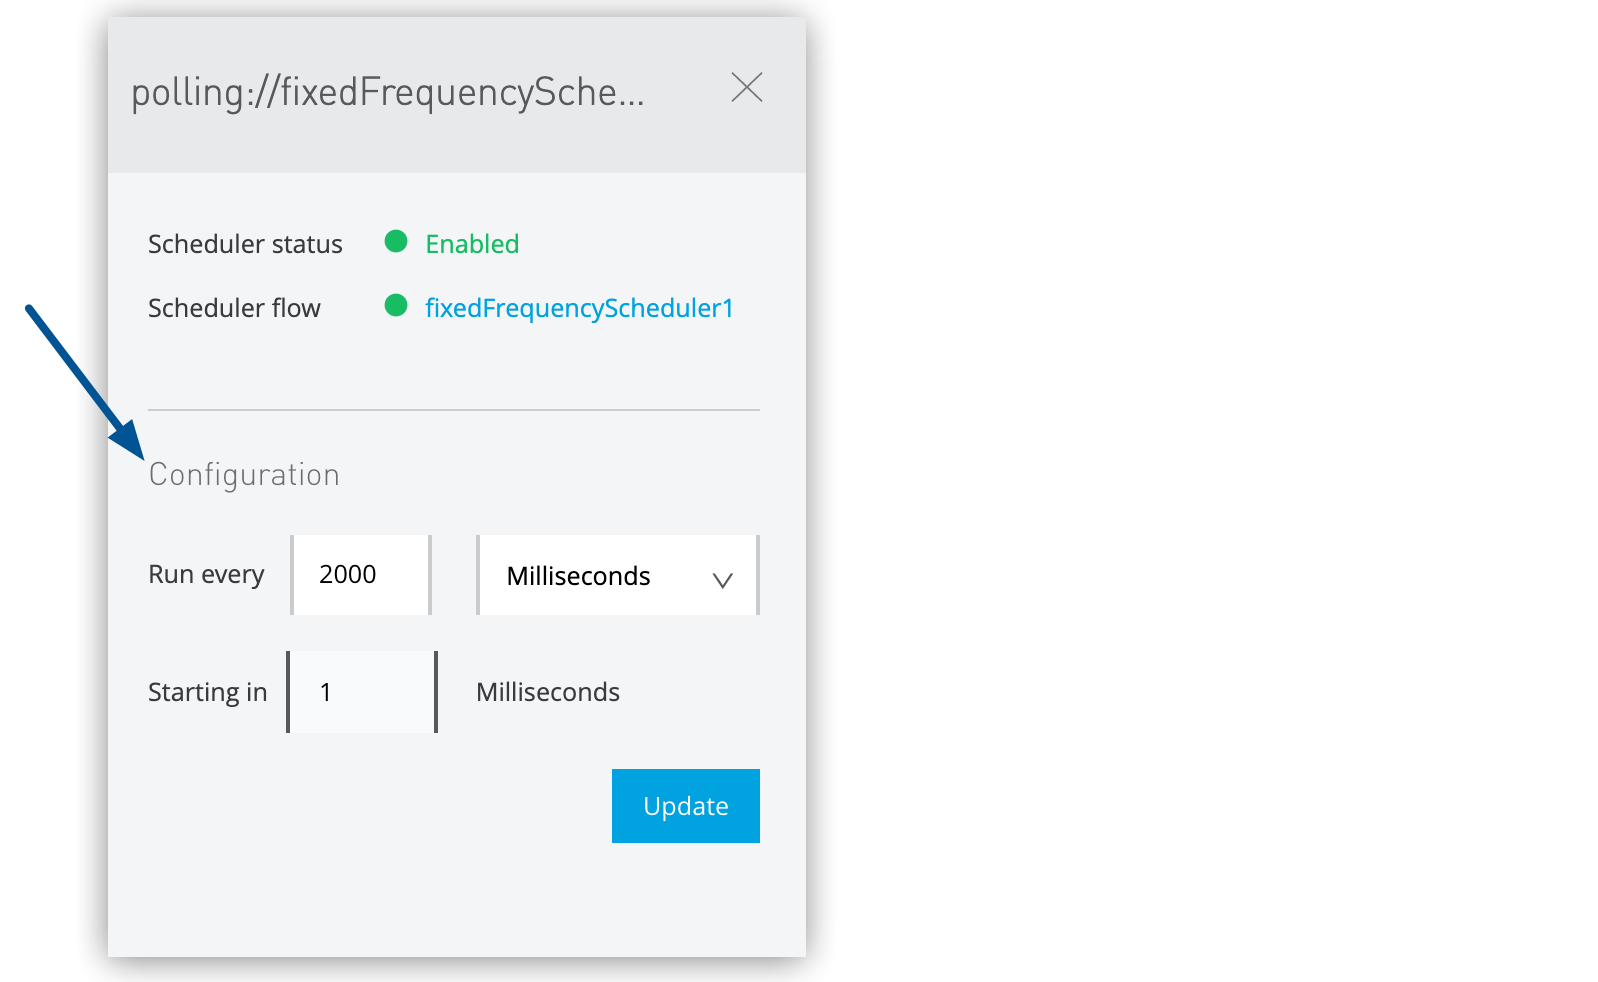
Fixed-Frequency Scheduler Configuration
Adjust fixed-frequency scheduler settings for regular interval execution:
-
Select a single fixed-frequency scheduler checkbox
-
Update schedule configuration in the details pane:
-
Frequency: Set the execution interval (seconds, minutes, hours)
-
Frequency Units: Select the time unit for the frequency value.
-
Start Delay: Configure initial delay before first execution
-
Apply Configuration Changes
Finalize scheduler configuration modifications:
-
Review all configuration changes in the details pane.
-
Click Update to save all modified settings.
-
Verify changes take effect on the next scheduler execution cycle.
| Configuration changes apply immediately for management operations (enable/disable) but take effect on the next execution cycle for scheduling modifications (frequency, cron patterns). |
| By default, schedules run at the frequency defined in the application. When you change the frequency of a schedule from Runtime Manager, the schedule runs at the frequency configured in Runtime Manager even if you update and redeploy the same schedule in the application JAR file. |